
This post may contain affiliate links. If you use these links to buy something I may earn a small commission at no cost to you. Thanks.
…
Whether you’re new to amigurumi or an old pro, you may have wondered why some designers design their patterns with joined seams versus continuous rounds. I can’t speak for all the wonderful designers out there but I thought I’d give you some insight into why I choose that technique for a lot of my projects and some tips on how to make your joins less noticeable!
First, a little clarification to make sure you are familiar with some of the terms that I’ll be using throughout this tutorial. As with a lot of crafts, there are multiple names for the same things and none of them are wrong but these are the terms I will use to talk about these techniques.
JOIN TECHNIQUES
Joined Round- This is where each round of your project will start with a chain and end with a slip stitch to the first stitch of the round. For most amigurumi that will be a Ch 1 to start and a sl st to the first SC.
Continuous Round- This is where each round of your project is continued from the last. For this, you will need to mark the beginning of each round with a stitch marker (I generally use a scrap piece of yarn) so that you don’t lose your place and the counts add up.

CROCHET TERMINOLOGY (US)
Ch- Chain
SC- Single Crochet
Sl st- Slip Stitch
Magic Ring- Starting technique where you will create loops to crochet onto and then pull tight, leaving no hole. I have a tutorial for the Magic Ring as well.
WHY I USE JOINED ROUNDS
To start, I want to say that each join technique has its place and usefulness and every designer and crocheter probably has their own opinions about which is easier/better/more useful. So as a disclaimer, this is my personal preference and my personal reasoning behind it.
For a lot of my amigurumi designs I use a joined round technique. This is especially useful and important for the designs where you crochet pieces together as you go (as opposed to sewing them together after). When you use the continuous round you will inherently end up with slightly uneven sides- so the right side of Round 6, for example, will be slightly higher than the left side. This is fine for a lot of projects but when I want to attach arms I want them to be level rather than lopsided. When you use the joined rounds, each round will end evenly and each side will be level for attaching appendages. The joined rounds are also an advantage for your color changes, there will be less of a jog in color if the change happens at the join.
JOINED ROUND TUTORIALS
This post will first give you a written description of how I do my joined rounds, followed by a photo tutorial, and then a video tutorial. I hope that one of those help you master this technique!
JOINED ROUNDS-WRITTEN TUTORIAL
(The stitch counts in this section are just an example for the tutorial. You will follow your pattern as written, using the same technique to join.)
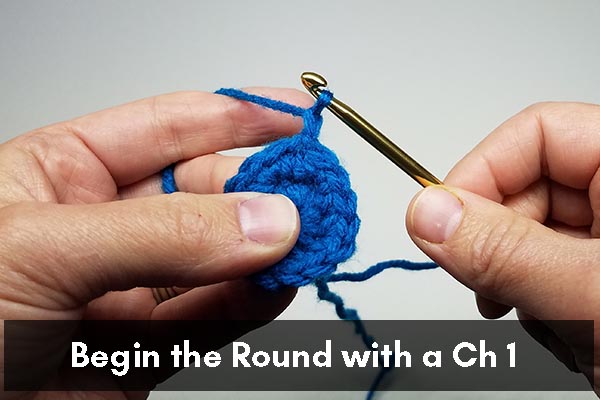
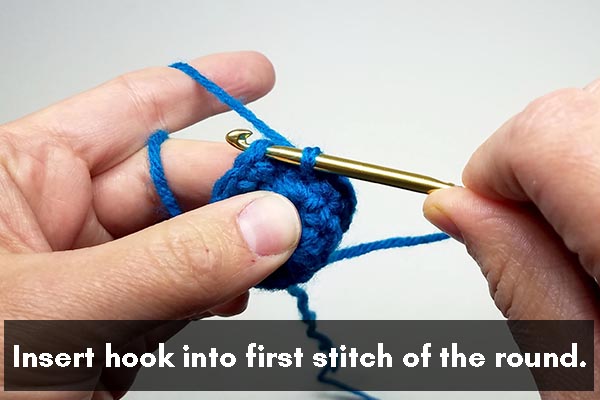
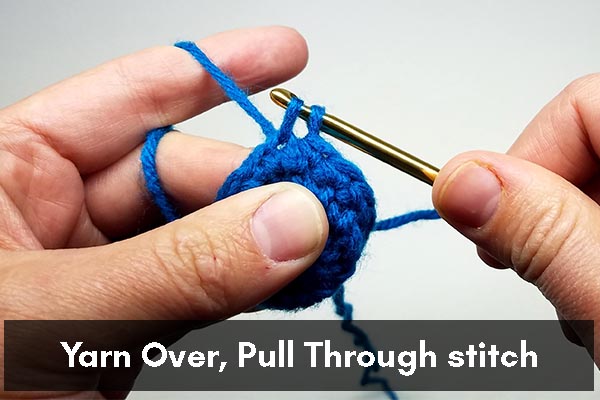
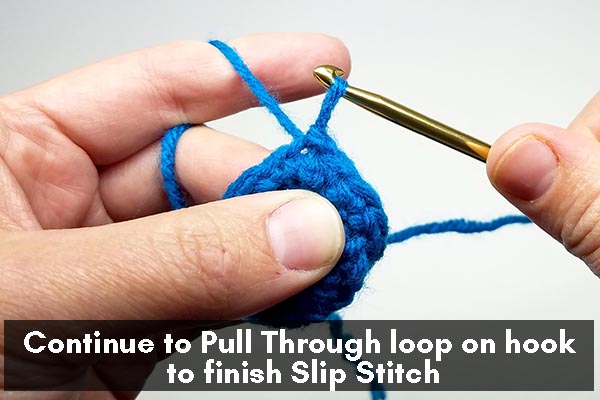
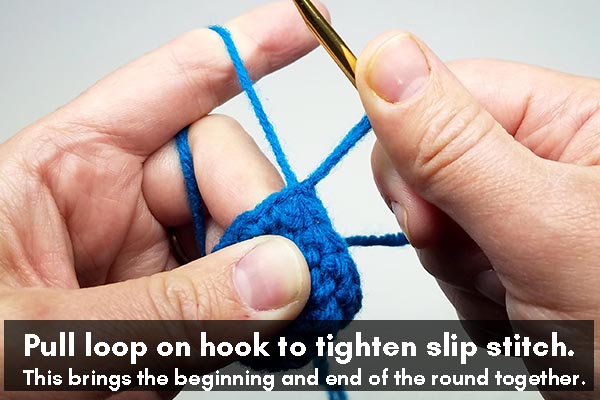
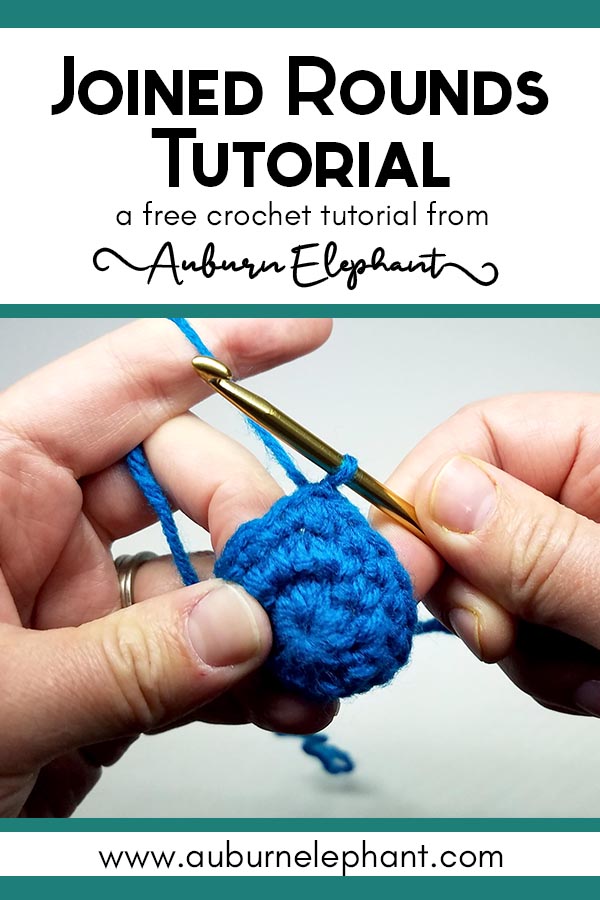
1) Starting with the Magic Ring (OR Ch 3 and join with a sl st to first ch to form a ring) SC 10 into the ring, pull tail to close Magic Ring. Join with a sl st to first SC of the round. Be sure that you go into the first SC and not the side or the second SC. So, insert your hook into the top of the first SC, Yarn over, pull through all loops. Join made. Now, pull that loop tight enough that the beginning and end of the round come close together.
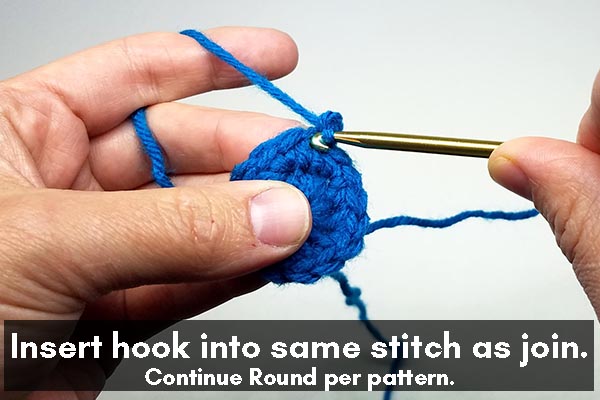
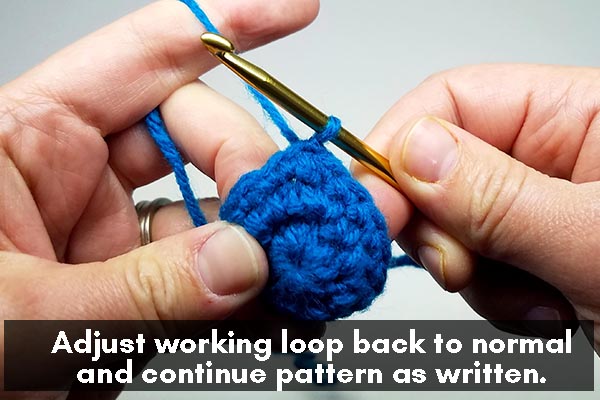
2) Ch 1, don’t make this starting chain too tight or too loose. Too tight will make the first SC harder to find and too loose will make the join more noticeable. Starting in the same stitch as you joined to, *SC, 2SC in next;* Repeat from * to * around. Join with a sl st to the first SC of the round. (15)
Continue using the joining steps above for a few more rounds to get the hang of it.
3-6) SC in each around. (15)
If you are keeping your tension even and pulling the joining sl st tight enough, your join seam should be more or less straight. If it is really off then there could be several things going on that you can watch out for.
- Your beginning chains could be too loose or too tight.
- Your joining slip stitch could be too loose or too tight.
- You may not be joining to the first stitch of the round. Be sure that your stitch count is accurate.
- You may not be putting your first SC of the round into the same stitch as joining.
- Your tension may be off. Whether you tend to crochet tightly or loosely, it needs to stay consistent throughout. Changes in tension will give you inconsistent results.
Check these things and if you are still having some issues I would recommend continuing on with the Rounds listed above until you feel like you get the hang of it. Sometimes practice is really the key.
JOINED ROUND- PHOTO TUTORIAL

JOINED ROUNDS- VIDEO TUTORIAL
So there you have it. Hopefully, through one of the methods you were able to learn how to execute a joined round and will be able to utilize it in the future.
Again, this is the way that I do my joins. There are other methods out there and other tutorials. I found this tutorial from hookabee which is similar to mine. And this tutorial from PlanetJune that uses a different technique altogether. If you need some more more inspiration or want to use a different approach check out their sites!
Thanks for checking out this tutorial. Please let me know if you have any questions!
Here are some patterns you can practice your joined rounds with:

12 thoughts on “Joined Rounds Tutorial”
Comments are closed.