
This post may contain affiliate links. If you use these links to buy something I may earn a small commission at no cost to you. Thanks.
…
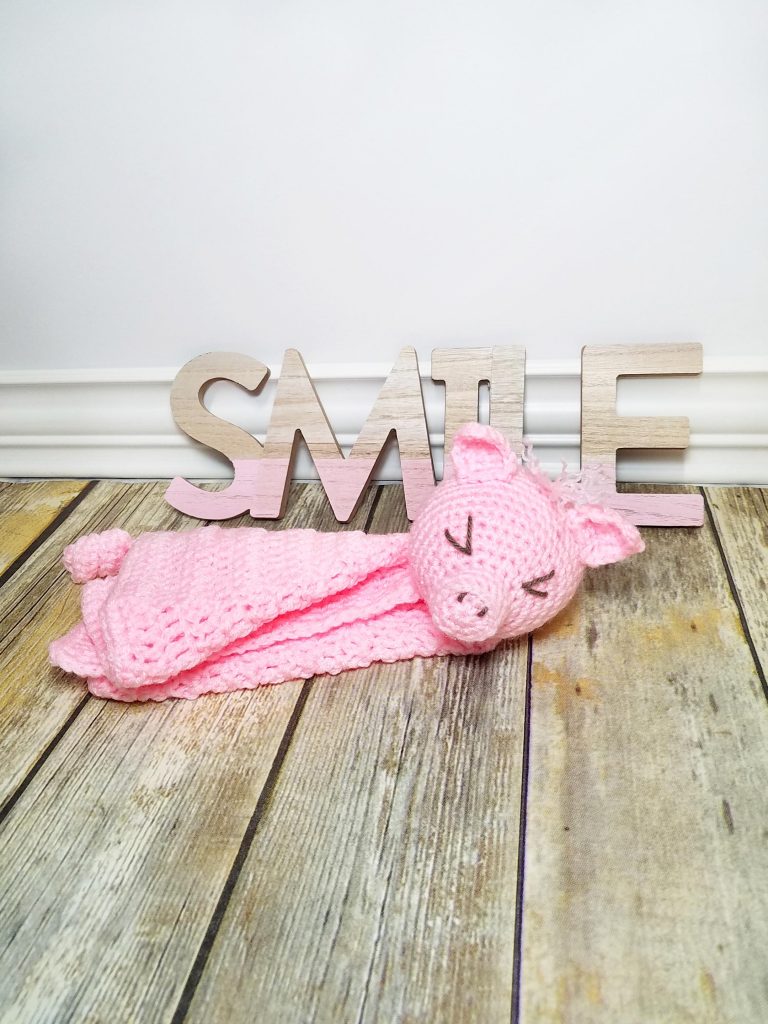
Spike the Pig might have a tough-sounding name but he’s really the biggest softie. He is the best snuggler and always knows how to make a bad day better. He’s a bit sneaky when it comes to food, he is a pig afterall, so don’t leave your snacks unattended!
—–
I am loving this whole On the Farm set! They have been super fun to design. I don’t know what it is about Spike though I think he might be my favorite! From his cute little piggy ears to the curly piggy tail, he just screams hug me! Overall, I think it’s a perfect blend of amigurumi and snuggle blanket.
I chose to not use safety eyes on these loveys for a couple of reasons. For speed and cost, thinking about these as being gifts or sellable products, I wanted them to be quick and profitable. For safety, safety eyes aren’t exactly as safe as their name implies, especially for really little ones. But as with ALL things that you hand over to a baby, they should always be supervised while playing and the items should be inspected thoroughly before and after each use. Even with the best intentions and diligence, babies inevitably find the one weak point. This doesn’t mean they can’t enjoy great handmade gifts, just that caution is always warranted!

I hope that you also love this lovey and that he brings some joy and snuggles to someone in your life!
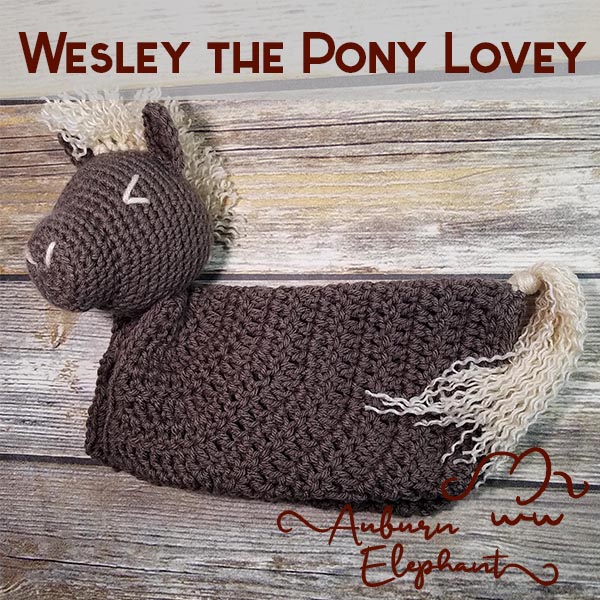
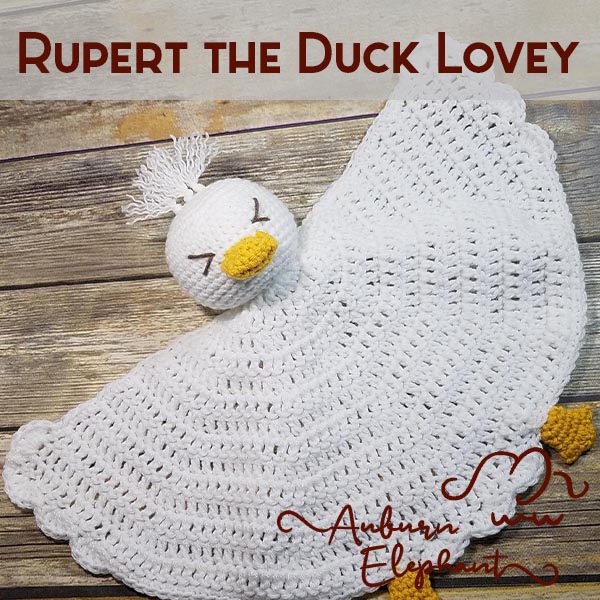
The FREE written pattern is available below. You can also find the FREE patterns for Spike’s friends, Rupert the Duck and Wesley the Pony, on the site as well.
If you’re more of a PDF person, you can purchase the Premium Patterns individually from Etsy or Ravelry.
There’s also an On the Farm Lovey Bundle PDF that will give you all 3 Premium Lovey Patterns for the price of 2! Those are also available on Etsy or Ravelry.

A couple of disclaimers: This pattern is intended for personal use only. You are welcome to use the pattern to make and sell products, to keep for yourself, or to give away as gifts. I would appreciate receiving credit and a link back to the site, however. Please do not republish or distribute the pattern in any way, or use my photos in your listings.
I hope you enjoy this crochet pattern. If you have any questions or comments you can leave them below OR email me at auburnelephant@gmail.com OR through the contact page on this site. I’d also love to see your finished creations! 🙂
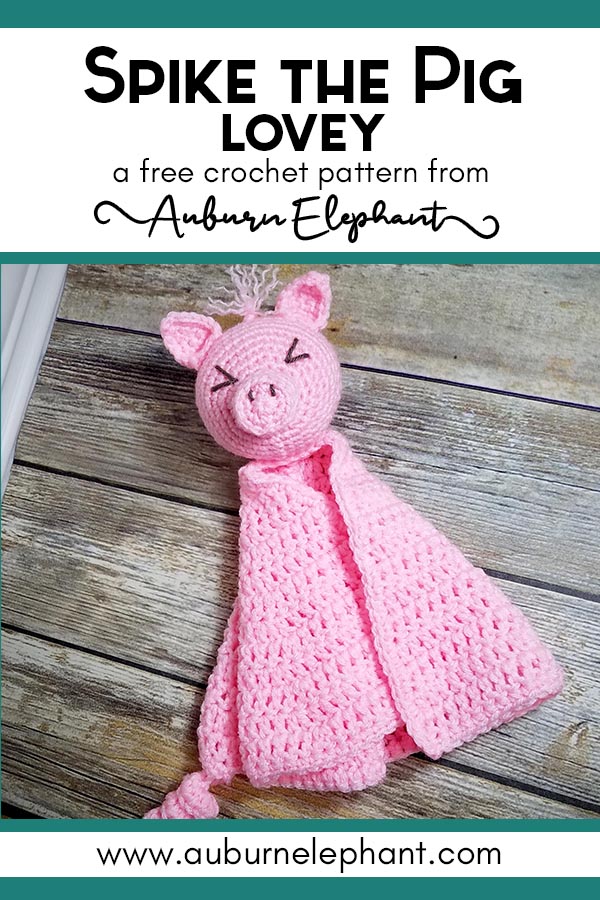
Spike the Pig Lovey
Supplies Needed:
- Big Twist Value Yarn, Medium Worsted Weight 4 (100% Acrylic, 371 yds, 6 oz) Medium Rose, 1 skein- approx. 220 yds, Small amount of Taupe for eyes and nostrils
- G/6 4.25mm hook
- J/10 6.0mm hook
- Polyfil Stuffing
- Needle, for weaving ends
Stitches/Terminology Used (US):
- Ch- Chain
- St(s)-Stitch(es)
- Sl st- Slip Stitch
- SC- Single Crochet
- DEC- Single Crochet Decrease, Using the Invisible Decrease method, insert hook up through front loops of next 2 stitches, yarn over, pull through front loops, yarn over, pull through to finish decrease
- 2SC- Single Crochet Increase- 2 SC in same stitch to increase
- BPSC- Back Post Single Crochet
- FPSC-Front Post Single Crochet
- DC- Double Crochet
- 2DC- Double Crochet Increase- 2 DC in same stitch to increase
- HDC- Half Double Crochet
- SC3TOG- SC decrease over 3 stitches
Notes:
- Head pattern is worked in joined rounds. Each round will begin with a Ch 1 and end with a sl st to the first SC of the round. If you need help with this technique, you can find my tutorial HERE.
- Lovey pattern is a half circle worked in rows. Each row will begin with a Ch 2 and turn.
- Throughout the pattern, Chains do NOT count as stitches.
- I chose to embroider eyes onto this Lovey. If you would prefer to use safety eyes, you absolutely could. You will just need to remember to place them before you finish off the head.
- Gauge for the head isn’t terribly important but you do want to make sure that your stitches are tight enough that the stuffing won’t show. You can go down a hook size if needed. Changing the hook size will change the finished size some as well. As written, the finished head will have a circumference of about 11” and the lovey will be about 19” across and 9” tall (not counting the tail). You can check the gauge on the lovey after Row 4, it should be about 4.5” in diameter. Although, if you need to go up or down a hook size for the lovey, you may want to go up or down a size for the head as well to keep them proportionate.
Head
Using G Hook
1) Using the Magic Ring technique (OR Ch 3 and join with a sl st to first ch to form a ring), SC 8 into ring. (8)
2) 2SC in each st around. (16)
3) BPSC in each st around. (16)
4-5) SC in each st around. (16)
6) FPSC in each st around. (16)
7) *SC in next, 2SC;* Repeat from * to * around. (24)
8) *SC in next 2, 2SC;* Repeat from * to * around. (32)
9) SC in each st around. (32)
10) *SC in next 3, 2SC;* Repeat from * to * around. (40)
11-20) SC in each st around. (40)
21) *SC in next 3, DEC;* Repeat from * to * around. (32)
22) SC in each st around. (32)
23) *SC in next 2, DEC;* Repeat from * to * around. (24)
24) *SC in next, DEC;* Repeat from * to * around. (16)
Stuff.
25) DEC around. (8)
Finish off. Leave long tail to close opening as well as to attach Head to Lovey Blanket.
Lovey
Using J Hook
1) Using the Magic Ring technique (OR Ch 3 and join with a sl st to first ch to form a ring), DC 6 into ring. DO NOT JOIN. (6) (Leave the starting tail to help attach the head to the lovey.)
2) 2DC in each st across. (12)
3) *DC in next, 2DC;* Repeat from * to * across. (18)
4) *DC in next 2, 2DC;* Repeat from * to * across. (24)
5) *DC in next 3, 2DC;* Repeat from * to * across. (30)
6) *DC in next 4, 2DC;* Repeat from * to * across. (36)
7) *DC in next 5, 2DC;* Repeat from * to * across. (42)
8) *DC in next 6, 2DC;* Repeat from * to * across. (48)
9) *DC in next 7, 2DC;* Repeat from * to * across. (54)
10) *DC in next 8, 2DC;* Repeat from * to * across. (60)
11) *DC in next 9, 2DC;* Repeat from * to * across. (66)
12) *DC in next 10, 2DC;* Repeat from * to * across. (72)
13) *DC in next 11, 2DC;* Repeat from * to * across. (78)
14) *DC in next 12, 2DC;* Repeat from * to * across. (84)
15) *DC in next 13, 2DC;* Repeat from * to * across. (90)
After Row 15, you’ll continue around for the border. Ch 1, turn. SC in next 45. Ch 12, starting in 3rd chain from hook- 3HDC in each, sl st into the same st as last SC, SC in next 44, 2SC in corner space. SC evenly along the top edge. (Don’t crochet over the starting tail, leave it to help attach the head to the lovey.) Place last SC into the same as the first of the border. Join with a sl st.
Finish off, weave in end.


Ears
Make 2
Using G Hook
Leave a long starting tail to sew onto head.
Ch 5,
1) Starting in 2nd chain from hook, SC 4. Ch 1, turn. (4)
2) SC in each across. Ch 1, turn. (4)
3) SC in next 2, DEC. Ch 1, turn. (3)
4) SC in each across. Ch 1, turn. (3)
5) SC3TOG. (1)
Ch 1, continue to SC around ear, place 2SC in each bottom corner. End with 2SC in same stitch as starting.
Finish off, weave in end.
Assembly/Details
Start with sewing your piggy ears on. I use T-pins to place the ears and make sure that they are even. Aim for sewing the ears down on Round 15 about 5 stitches apart.
You can also take a 18-24” length of yarn folded in half and tie on in between the ears. Then trim and fray the ends for a little tuft of piggy hair.
The eyes are up to you. I chose to embroider eyes on in a closed look. You can embroider full eyes if you’re good at that. You can do closed, open, sleepy, whatever you think fits best. You can also use safety eyes if you would like, but you will need to place those before you finish off the head.
Attaching the head to the lovey securely is very important. I use the starting tail from the Blanket part and the ending tail from the head to attach. Place the blanket on the underside of the head and sew down in a half circle at the start of Row 2 of the Lovey. Go around and through the center as many times as your yarn will allow. Use both tails for this. (The ending tail from the head will be higher than where the blanket meets, just thread it through the head until it reaches.)
And there you go! A sweet little Pig Lovey to snuggle! 🙂

4 thoughts on “Spike the Pig Lovey”
Comments are closed.