
This post may contain affiliate links. If you use these links to buy something I may earn a small commission at no cost to you. Thanks.
…
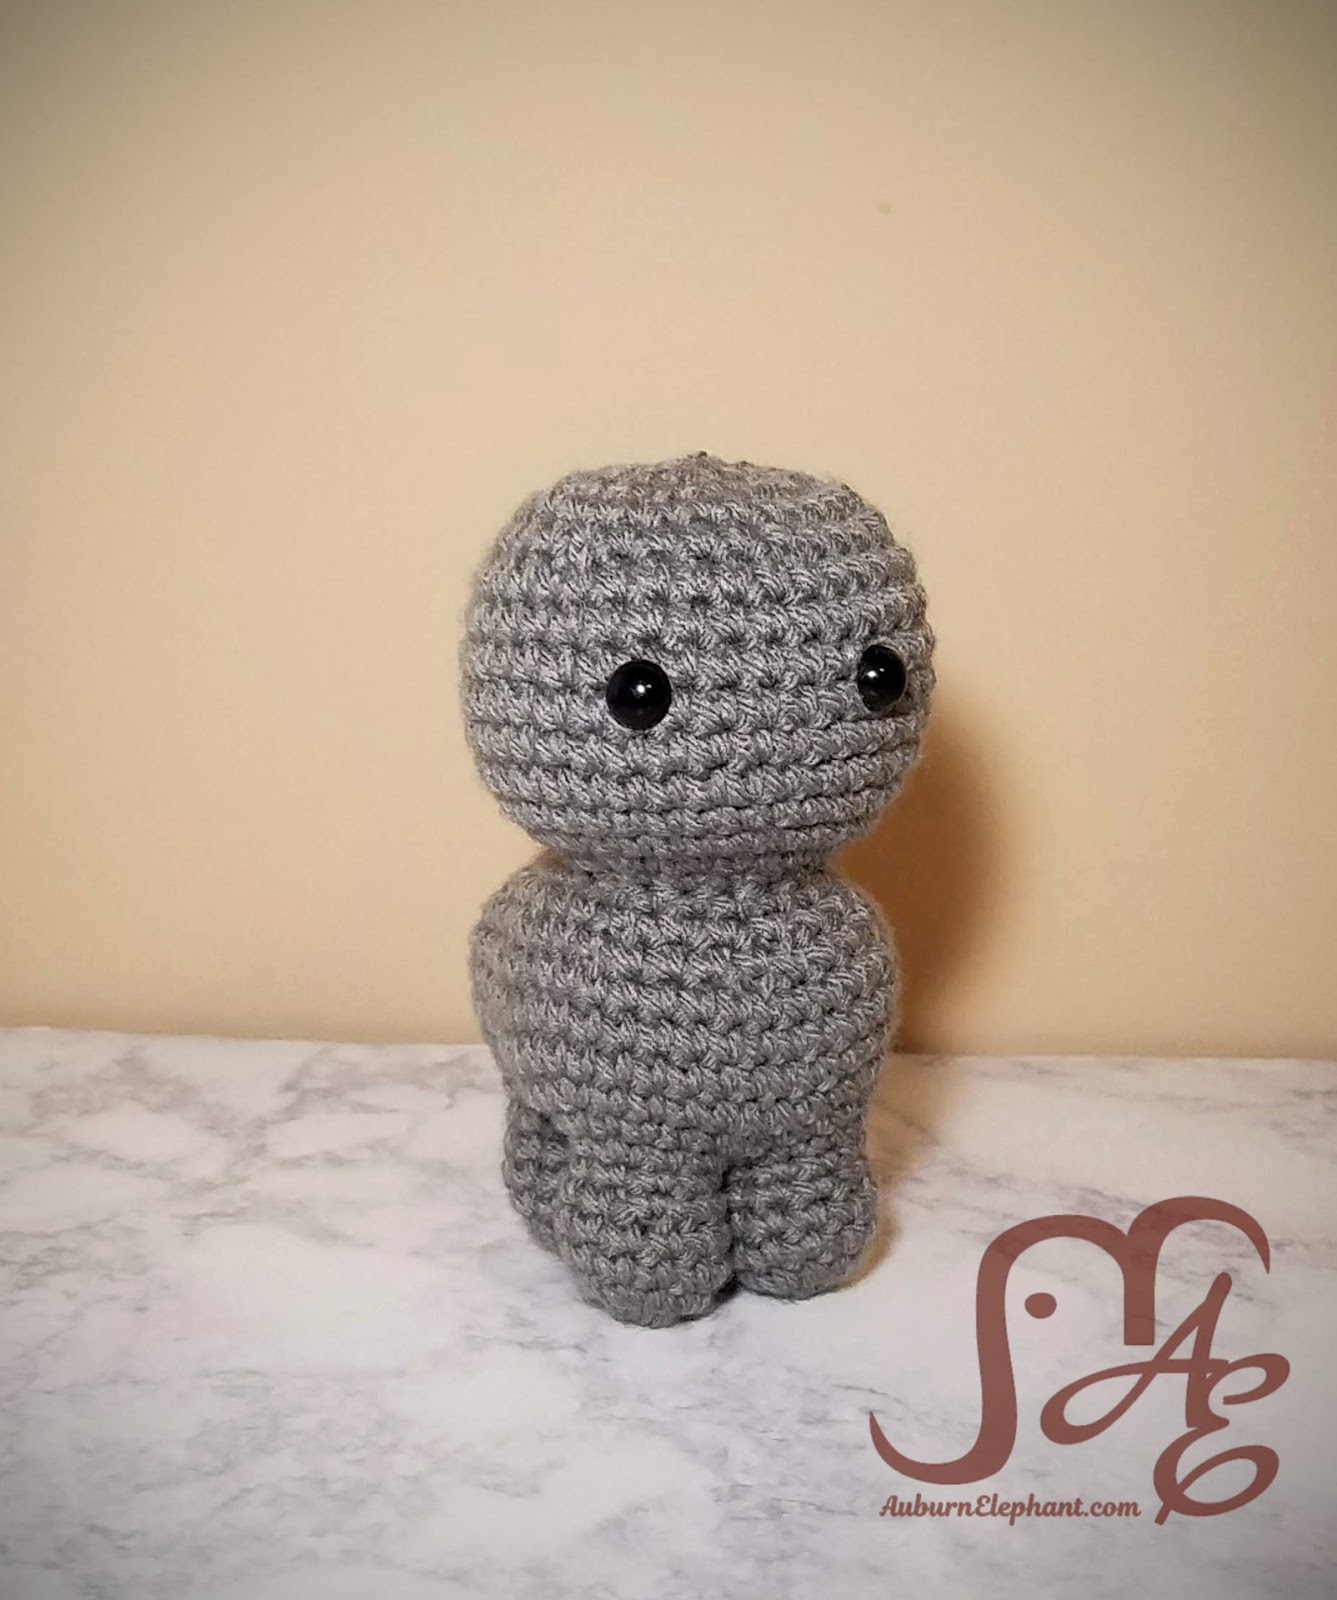
For my little one’s 5th birthday party the only thing he said he wanted was to have a “Kitty Party”! So, of course, I obliged and had to come up with a little toy that we could give out as party favors. (Okay, I guess I didn’t have to but I definitely wanted to! lol) He was so excited about this Kitty Plush! I sort of love them too! Each color turned out so cute and there were so many other choices that I had a hard time picking which to use!
You can now purchase a PDF version of this pattern from my ETSY page! Direct link at the bottom of the post. 🙂
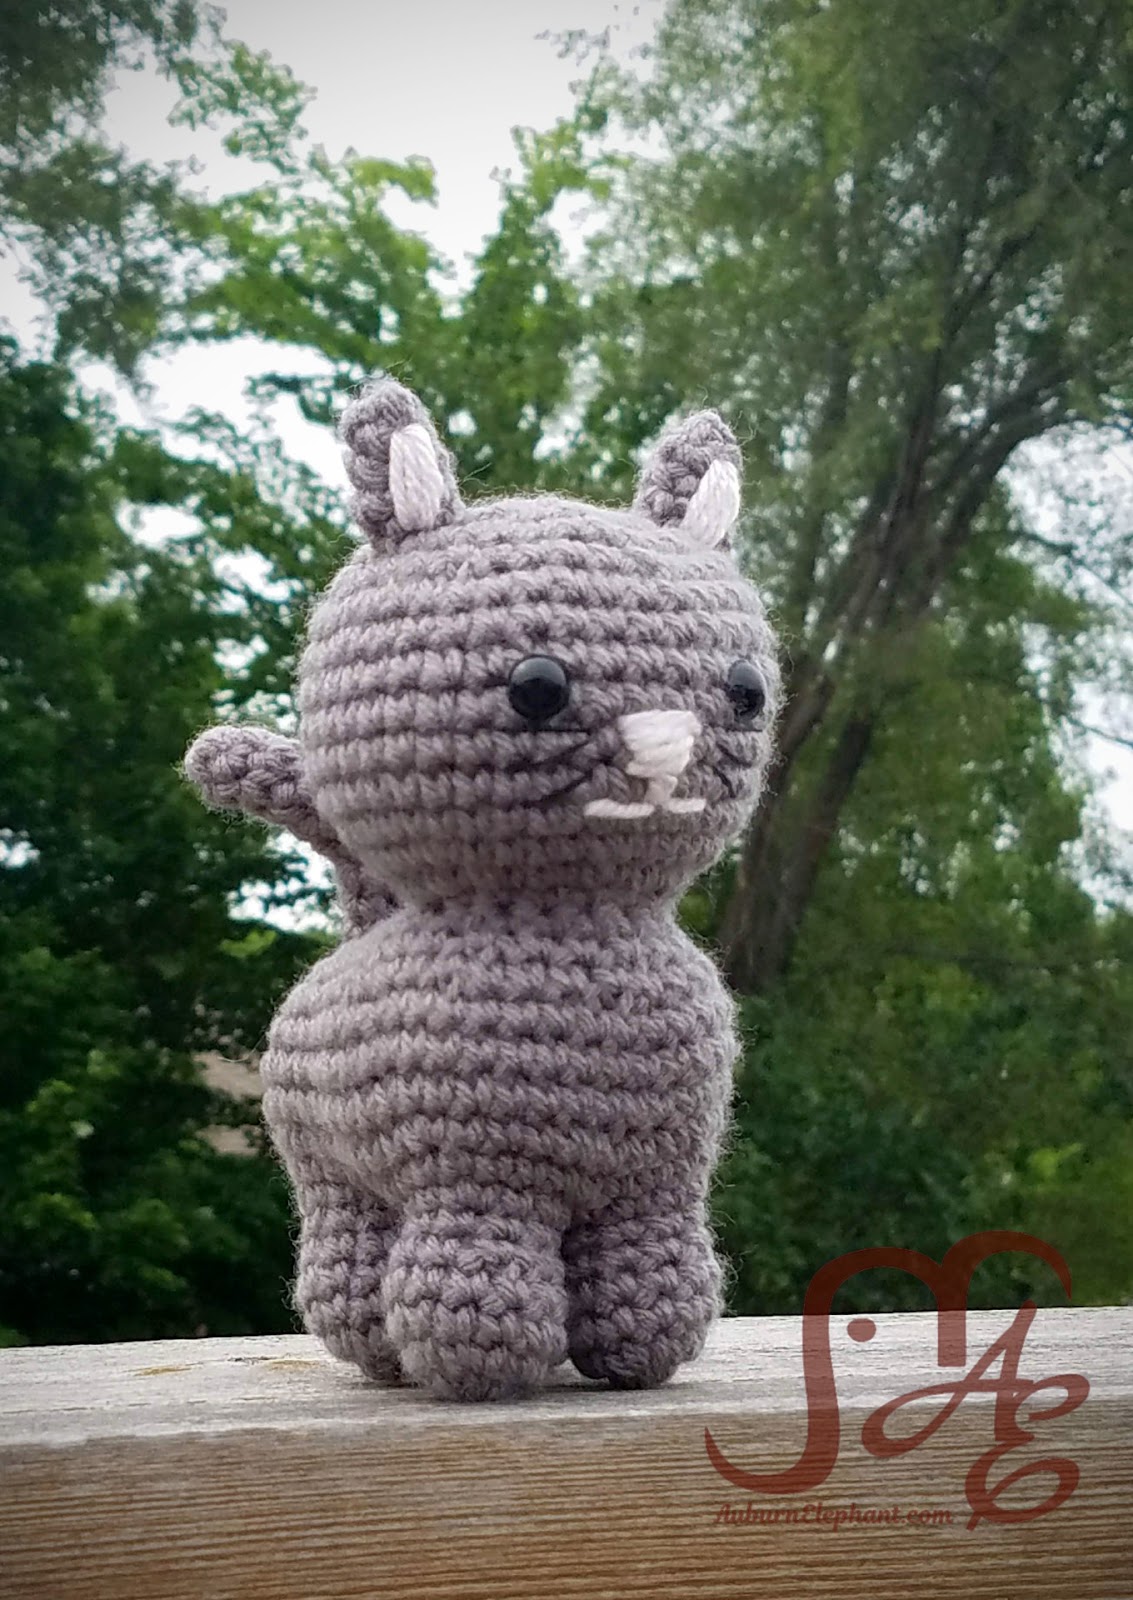
Kitty Plush
Supplies Needed:

Big Twist Value Yarn, Medium Worsted Weight 4 (100% Acrylic, 371 yds, 6 oz) any color, 1 skein
G/6 4.25mm Hook
Tapestry Needle
Polyfil
10mm safety eyes (2)
Stitches Used:
In US Terminology
Ch- Chain
Sl st- Slip Stitch
SC- Single Crochet
2SC- Single Crochet Increase, do 2 SC in same stitch to increase
DEC- SC Decrease, using the Invisible Decrease method, insert hook up through front loops of next 2 stiches, yarn over, pull through front loops, yarn over, pull through to finish decrease
Notes:
Unless otherwise noted, each section is worked in joined rounds. Each round will begin with a Ch 1 and end with a sl st to the first stitch of the round. Beginning chains do not count as stitches.
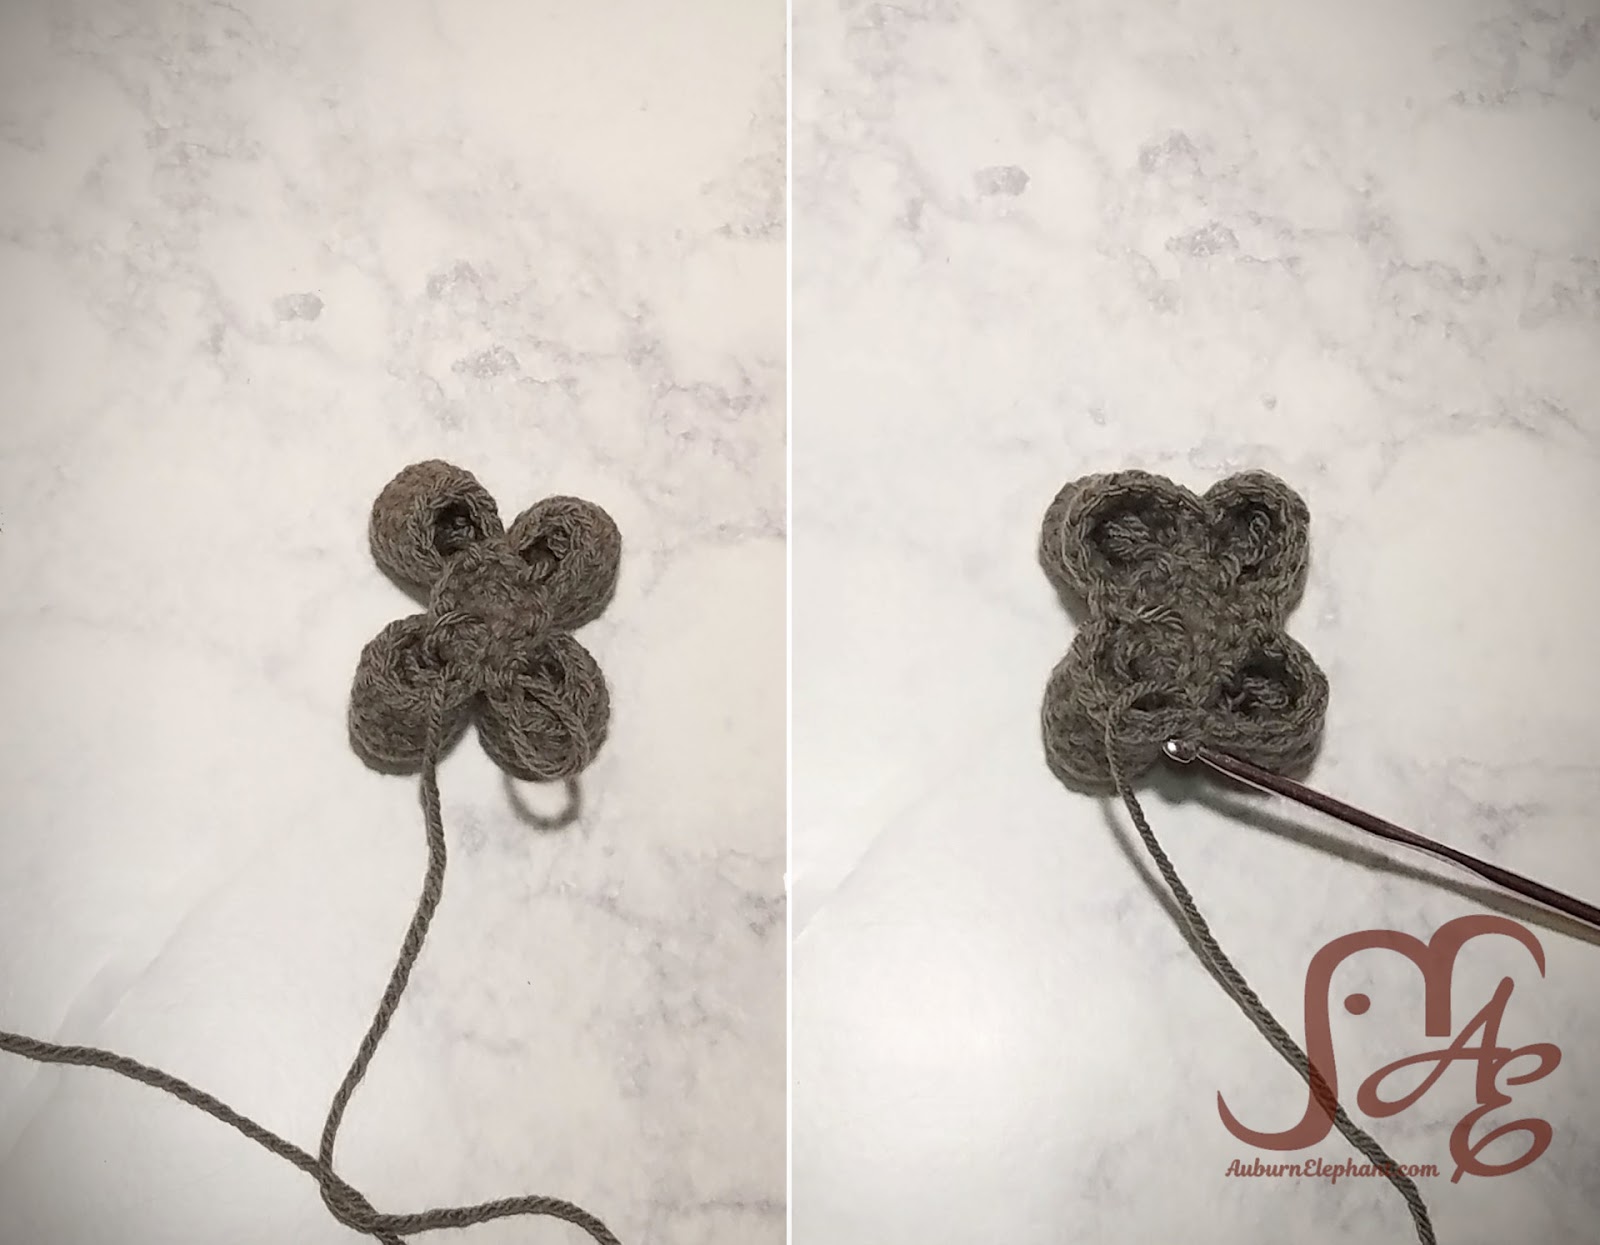
Legs
Make 4
1) Using the Magic Ring technique (OR Ch 3 and join with a sl st to first ch to form a loop) SC 6. (6)
2) 2SC in each around. (12)
3-4) SC in each around. (12)
5) *SC in next 4, DEC* Repeat from * to * around. (10)
6) SC in each around. (10)
You can finish each leg off or leave the tail and go over it on the body section. Leaving it means less weaving in to start with but also can be in the way. You can also tuck it down into the leg to keep it out of the way.
Body
1) Using the Magic Ring technique (OR Ch 3 and join with a sl st to first ch to form a loop) SC 10. (10)
The next round will attach the legs.
2) Sl st 2 from inside to outside of Leg 1 onto the starting circle, 2SC into the next on the starting circle, sl st 2 through Leg 2 onto the starting circle, sl st the next on Leg 2 to Leg 3, sl st 2 through Leg 3 onto the starting circle, 2SC into the next on the starting circle, sl st 2 through Leg 4, sl st 1 through Leg 4 onto Leg 1.
(So, there were 10 SC from Round 1. Each Leg used 2 SC from Round 1 and 2 SC were used as increases on each side= 10 SC. Leg 2 and Leg 3 were connected with 1 sl st. Leg 4 and Leg 1 were connected with 1 sl st. At the end of this Round, there should be 7 unworked stitches on each leg, plus 2 SC on each side. For a total of 32 stitches to be worked in the next round.)

3) For this round, you’ll be going around the outside of the leg. Be sure to only use the unworked stitches and not the joined ones. SC in next 3, 2SC, SC in next 8, 2SC, SC in next 6, 2SC, SC in next 8, 2SC, SC in remaining 3. (Should be doing one increase at the middle of each leg= 36)
4) SC in each around. (36)
5) *SC in next 3, 2SC* Repeat from * to * around. (45)
6-8) SC in each around. (45)
9) *SC in next 3, DEC* Repeat from * to * around. (36)
10) *SC in next 2, DEC* Repeat from * to * around. (27)
11) SC in next 4, DEC, SC in next 5, Ch 4, Skip 8, SC in next 5, DEC, SC in last. (17 SC, 4 Ch, 8 Skipped stitches)
12) *SC in next, DEC* Repeat from * to * around. (14) (You will be working into the chains so that you can use the other side for working on the neck/head.)
13) DEC around. (7)
Finish off, weave in ends.
Stuff legs and body.
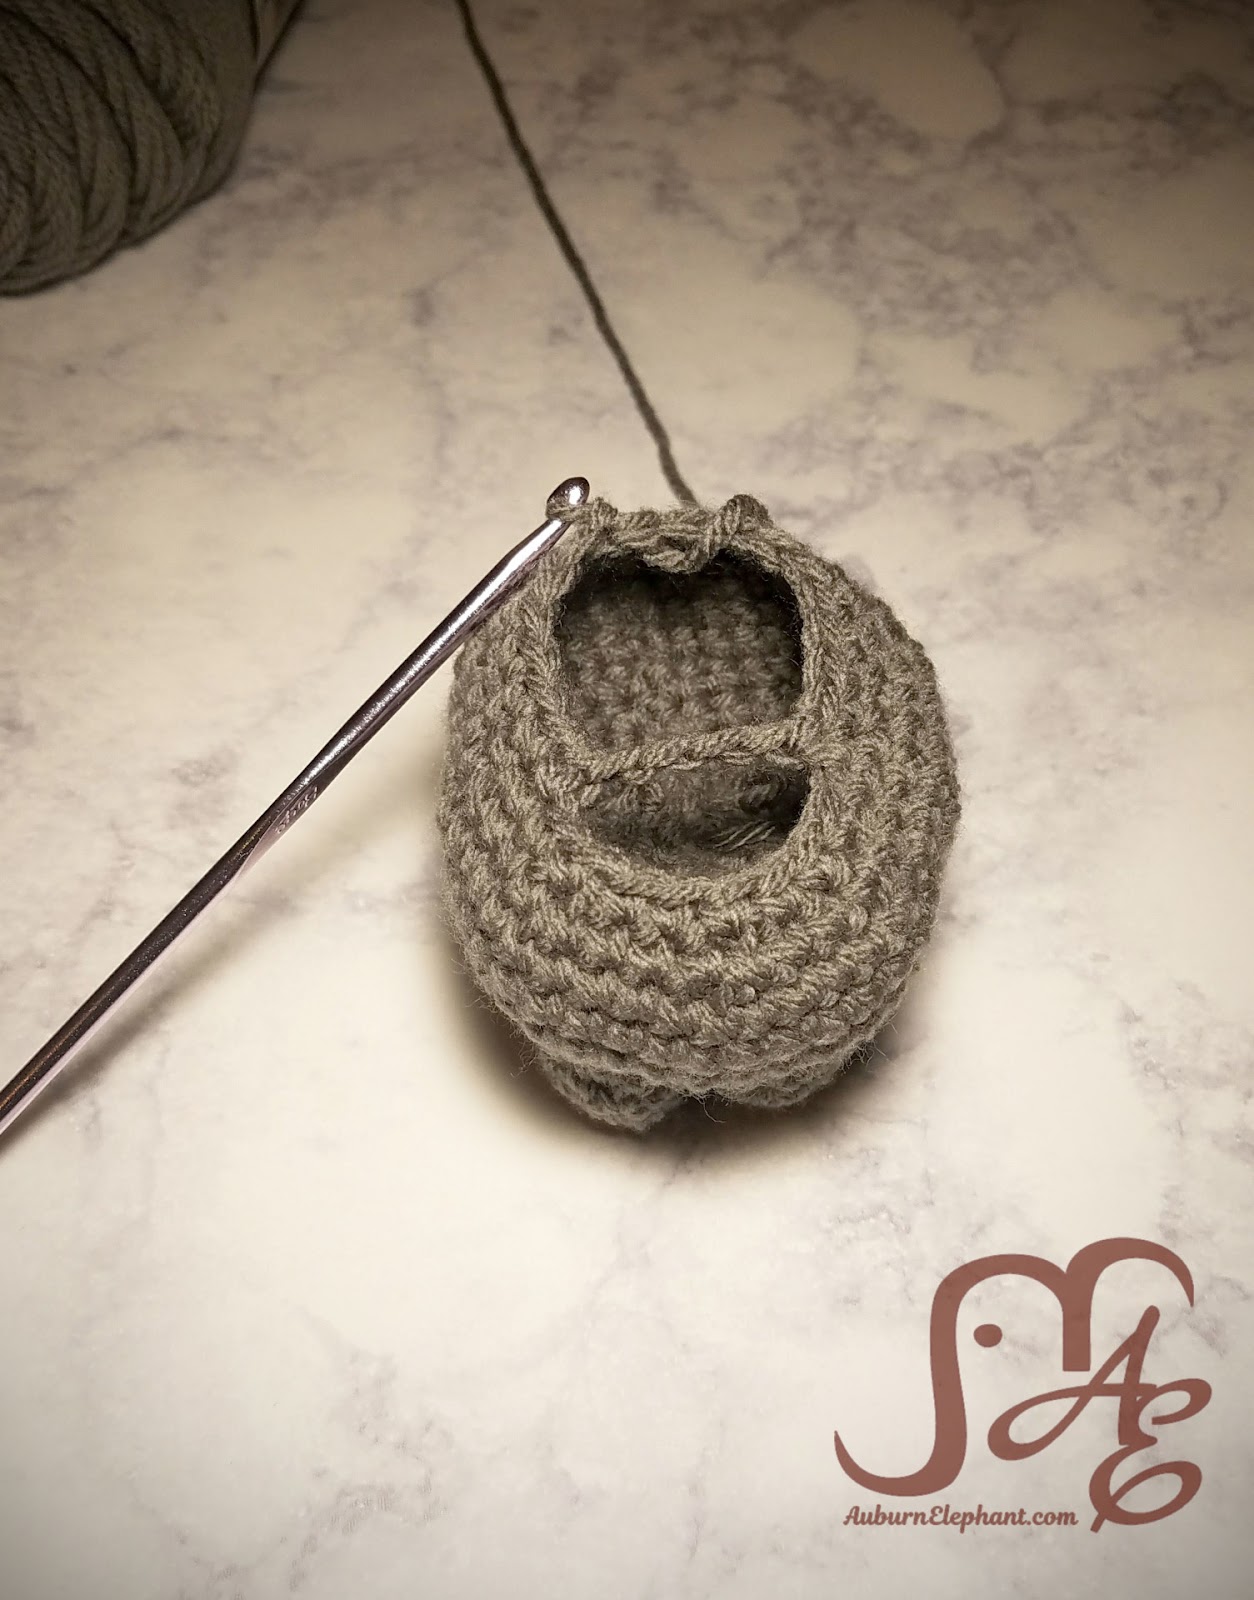
Neck/Head
Join yarn in last skipped stitch (so the right corner of the opening if your cat was facing away from you) SC 8, Sl st to next space, Ch 1 and turn. From here this is also worked in joined rounds like the other sections so far.
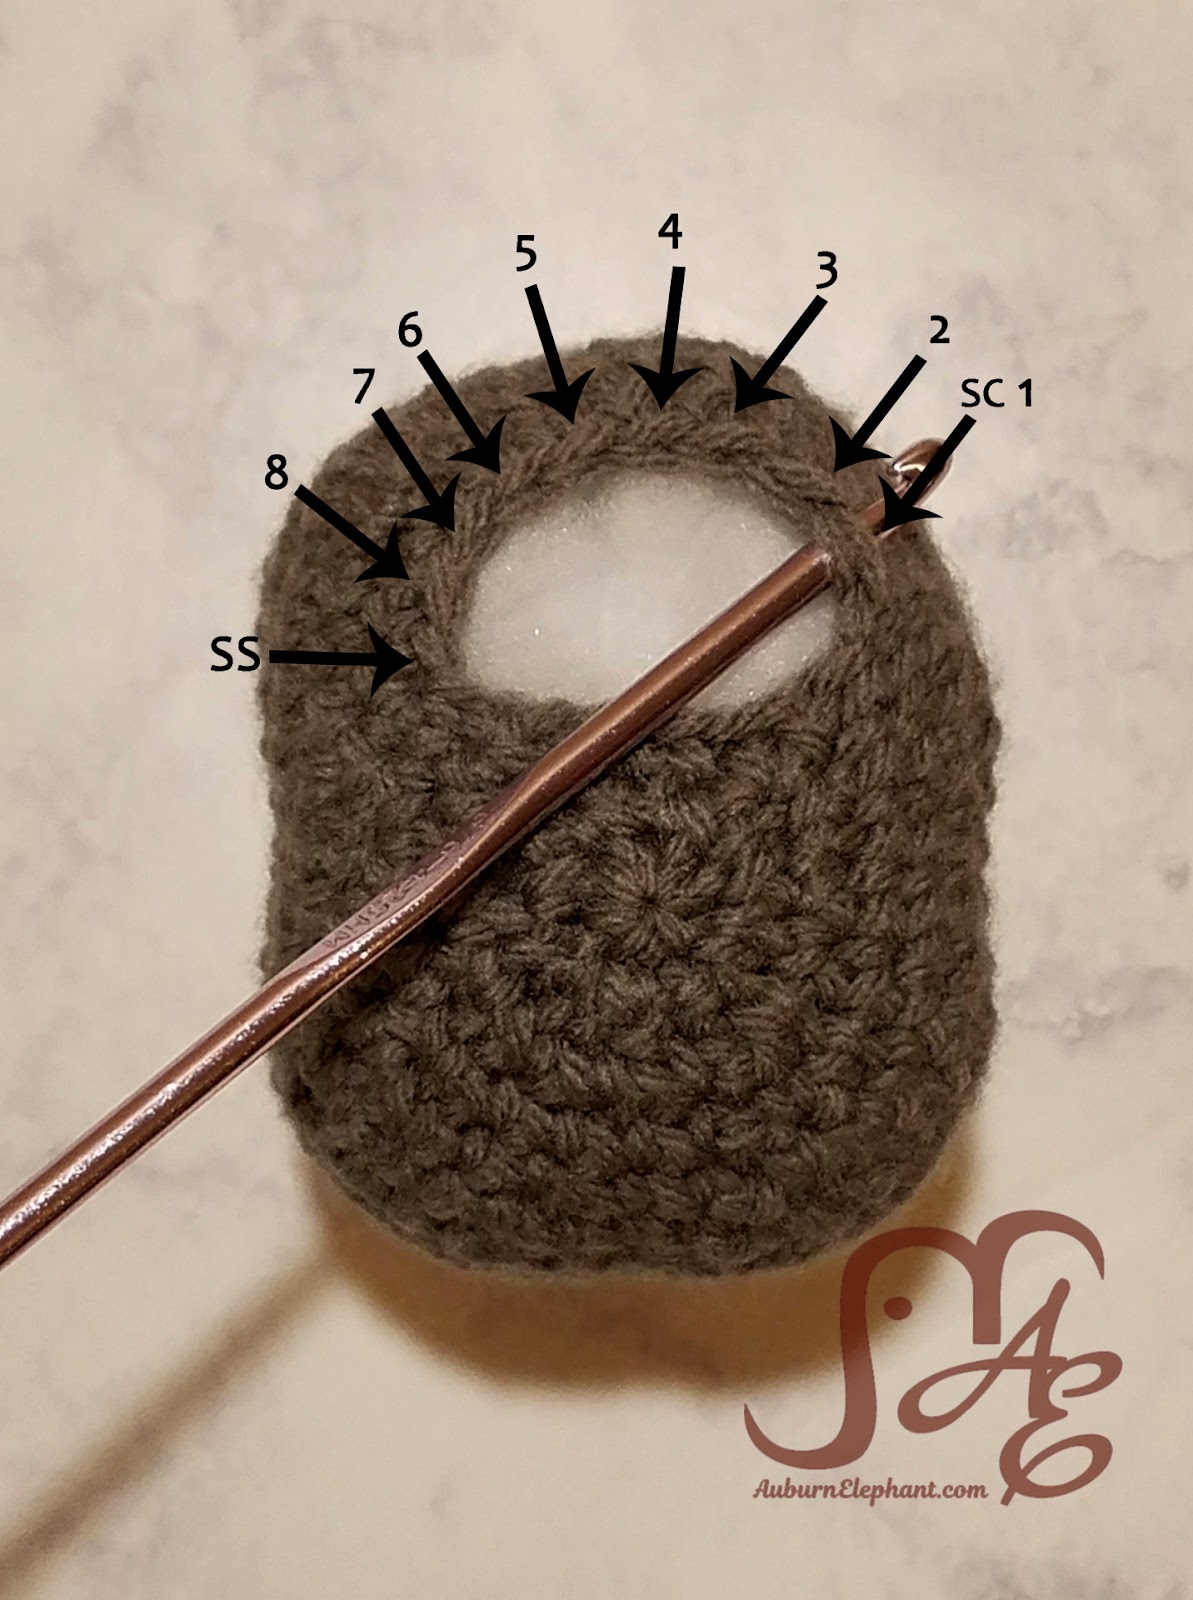
1) SC in each around and in corners. (15)
2) 2SC in each around. (30)
3) *SC in next 4, 2SC* Repeat from * to * around. (36)
4-10) SC in each around. (36)
11) *SC in next 4, DEC* Repeat from * to * around. (30)
12) SC in each around. (30)
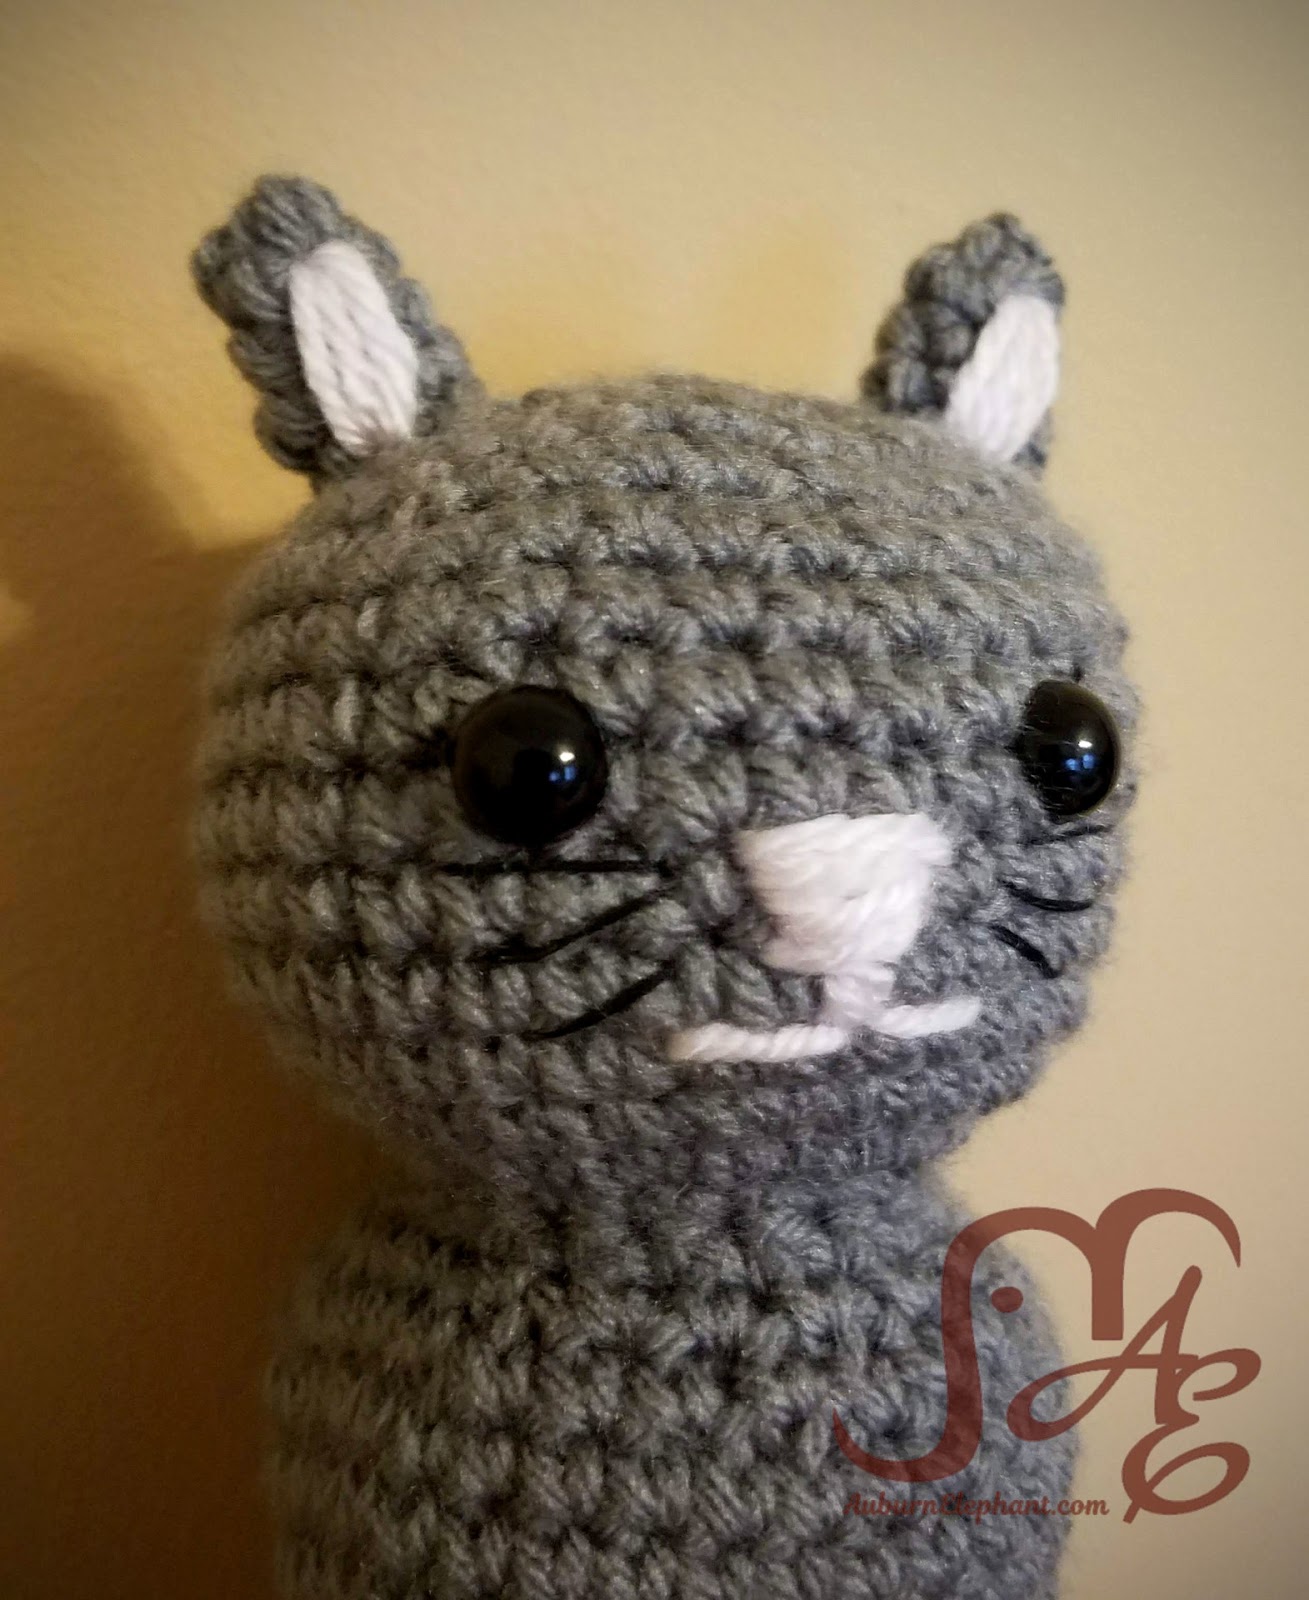
Place your safety eyes. I tried the eyes in a few places, I liked them best between rounds 7 and 8 and about 5 stitches apart.
13) *SC in next, DEC* Repeat from * to * around. (20)
Stuff head and neck. Make sure that the body is still stuffed the way that you want it.
13) DEC around. (10)
Finish off, weave in ends.
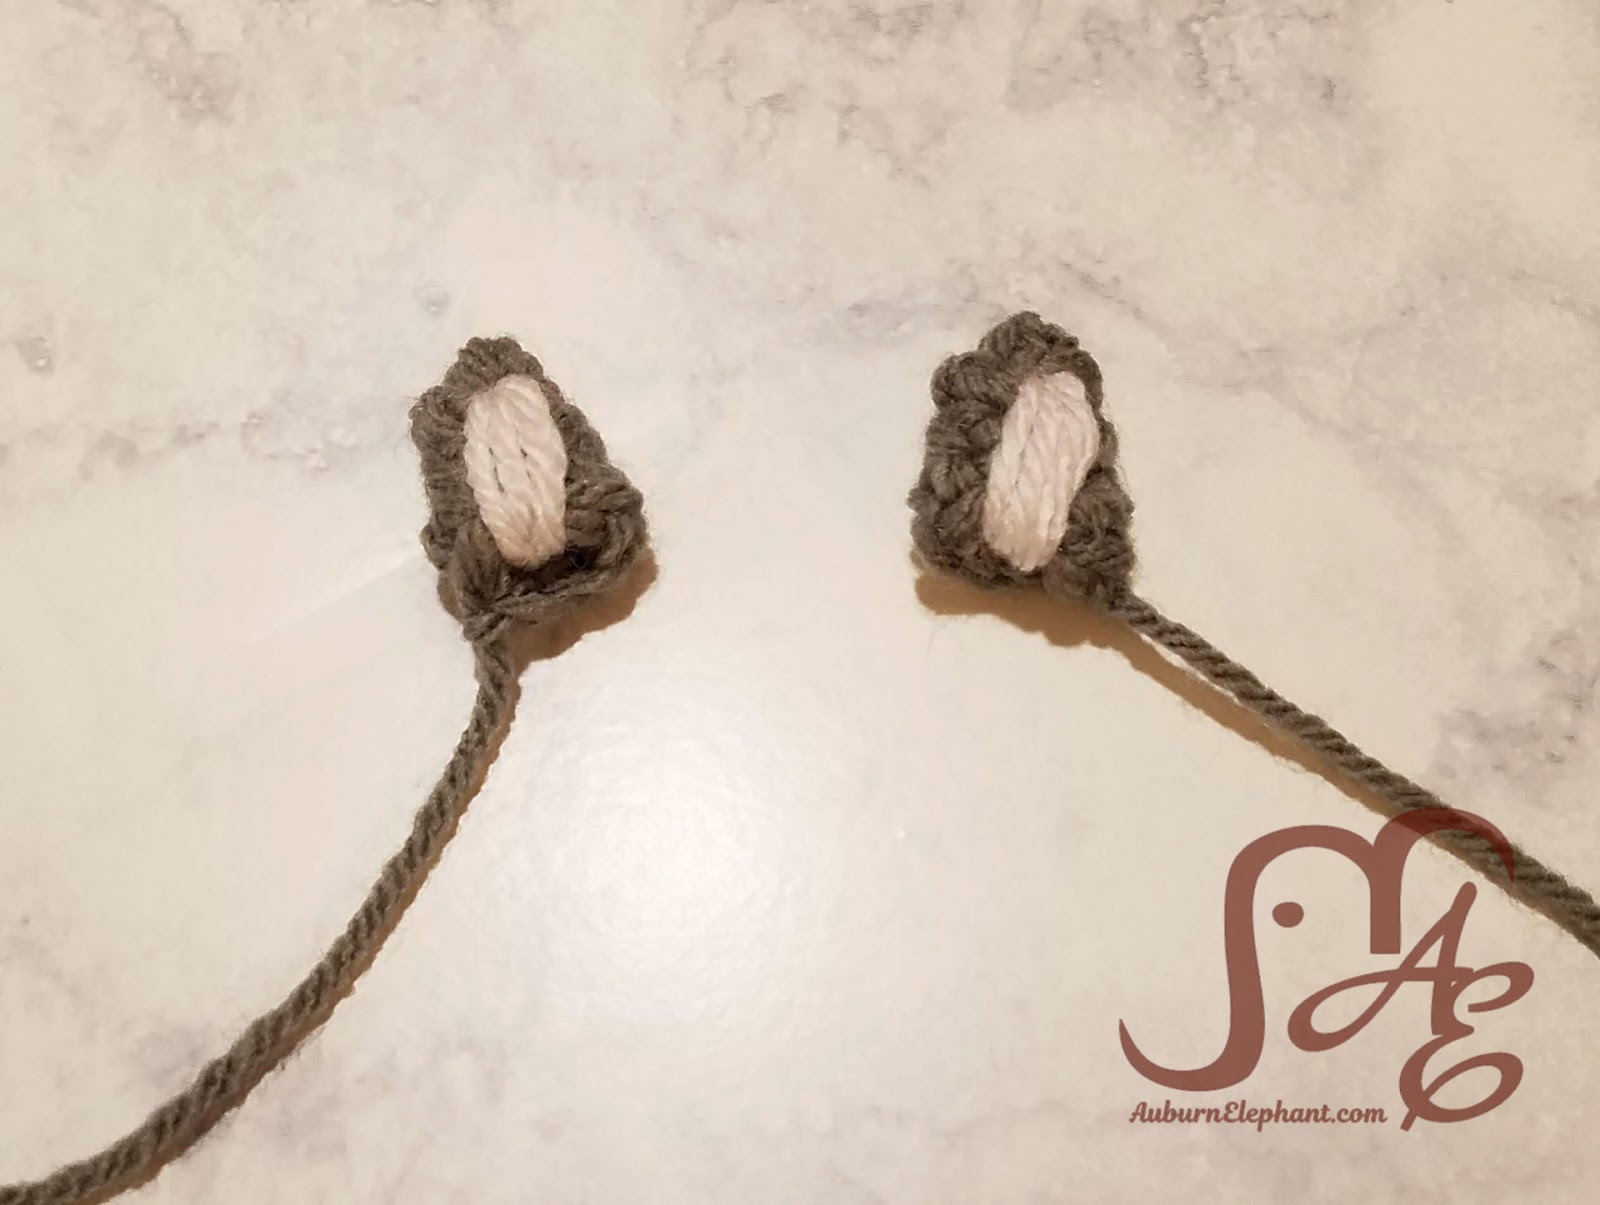
Ears
Make 2
In Joined Rounds
1) Using the Magic Ring technique (OR Ch 3 and join with a sl st to first ch to form a loop) SC 3. (3)
2) SC in next 2, 2SC in last. (4)
3) SC in next 3, 2SC in last. (5)
4) SC in next 4, 2SC in last. (6)
Finish Off. I take a length of light pink and stitch from the inside toward the top and around a few times to create the “inside” of the ear. After you go around a few times, tie the beginning and end together and stuff it up inside the ear.
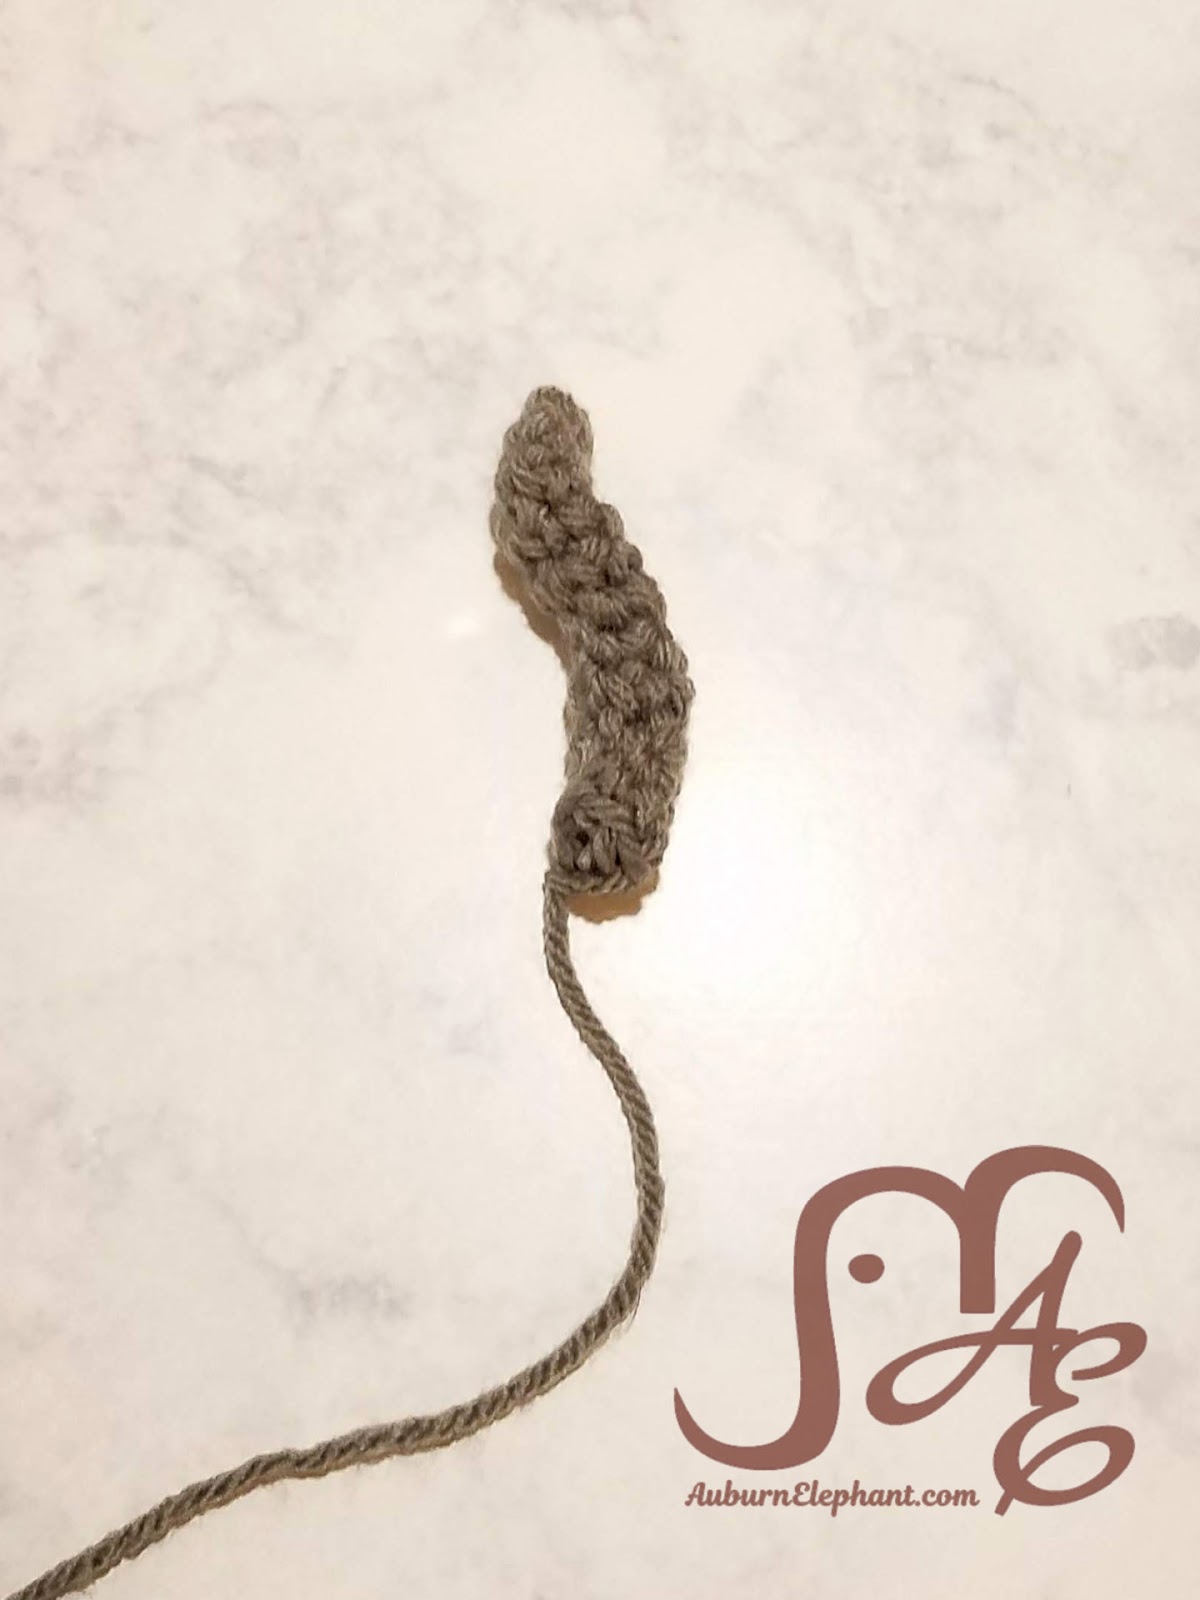
Tail
I found this part easiest worked in continuous rounds but you could do them joined as well.
1) Using the Magic Ring technique (OR Ch 3 and join with a sl st to first ch to form a loop) SC 4. (4)
2) SC in next 3, 2SC in last. (5)
3-4) Sl st in next 2, SC in remaining 3. (5)
5) SC in each around. (5)
6-7) SC in next 3, sl st 2. (5)
8-9) SC in each around. (5)
10-12) Sl st in next 2, SC in remaining 3. (5)
Finish Off, leave tail for sewing on to body. You should end up with a slanted base, place it so that the tail points up.
Assembly
I use some T-pins or bobby pins to place the ears and tails onto the kitty so that I can get the look right before I attach them.
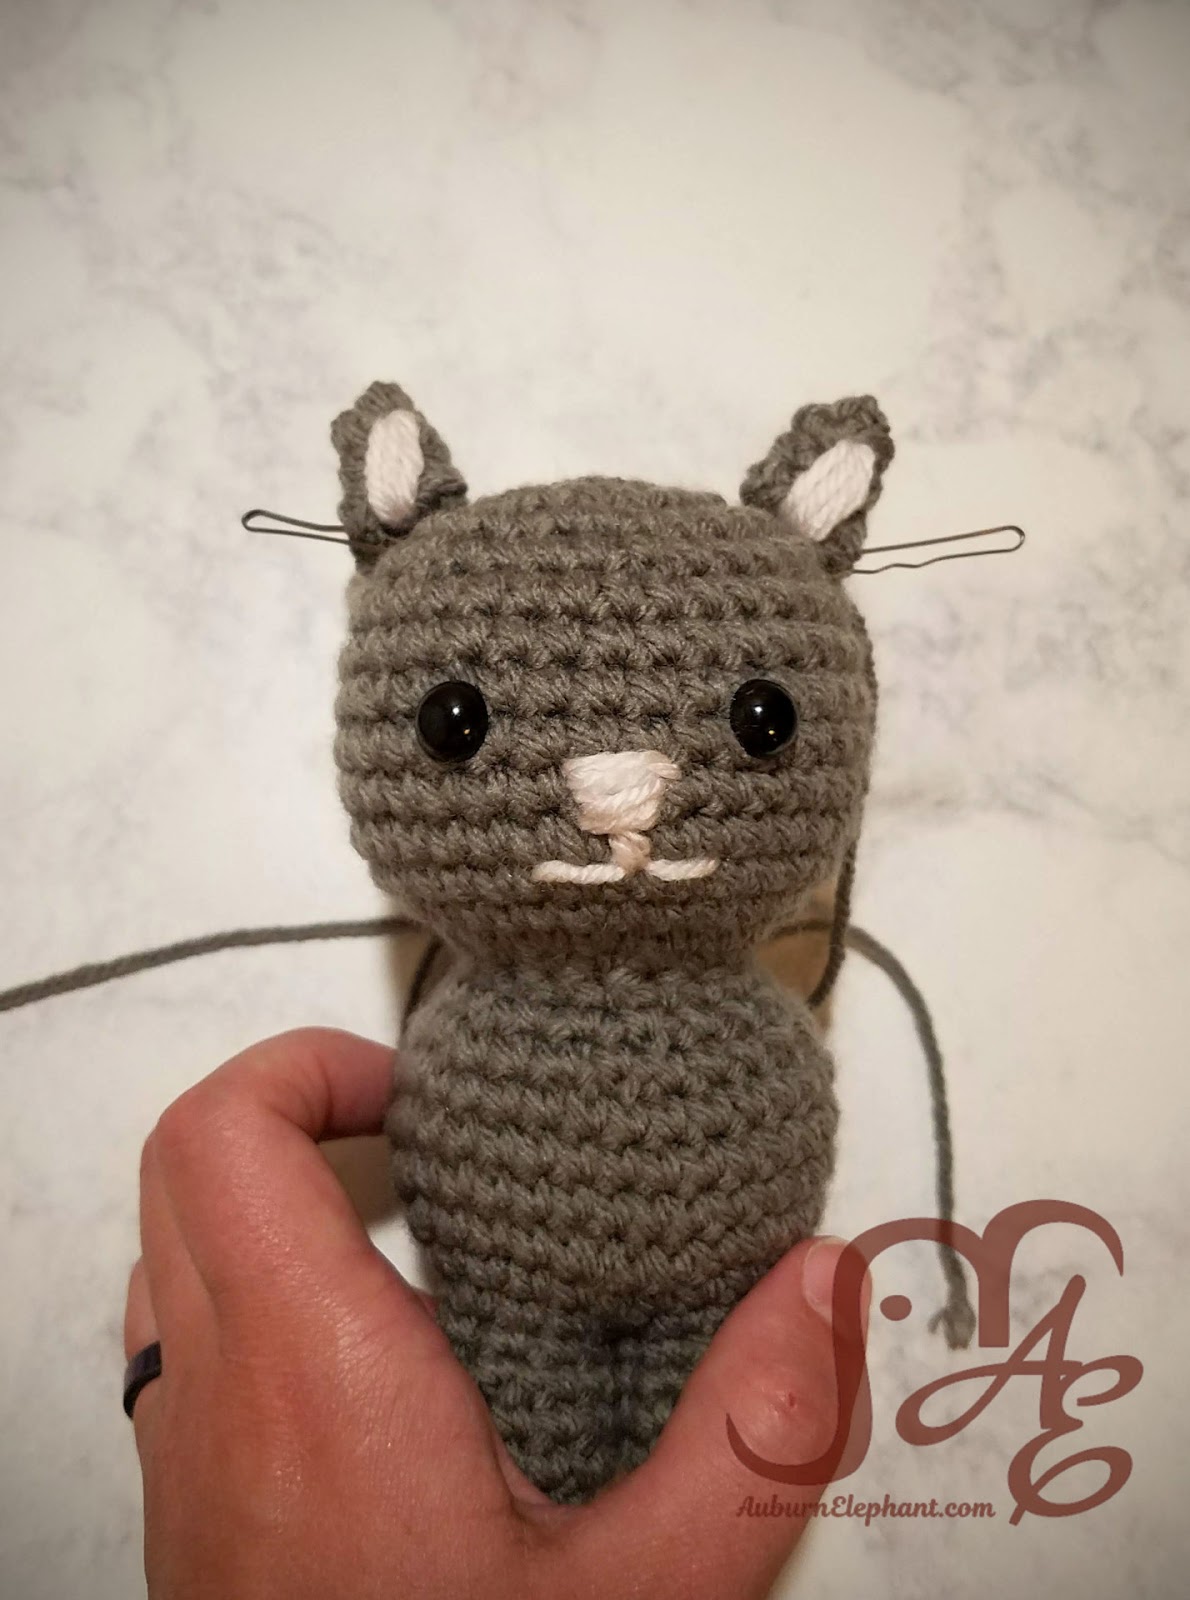
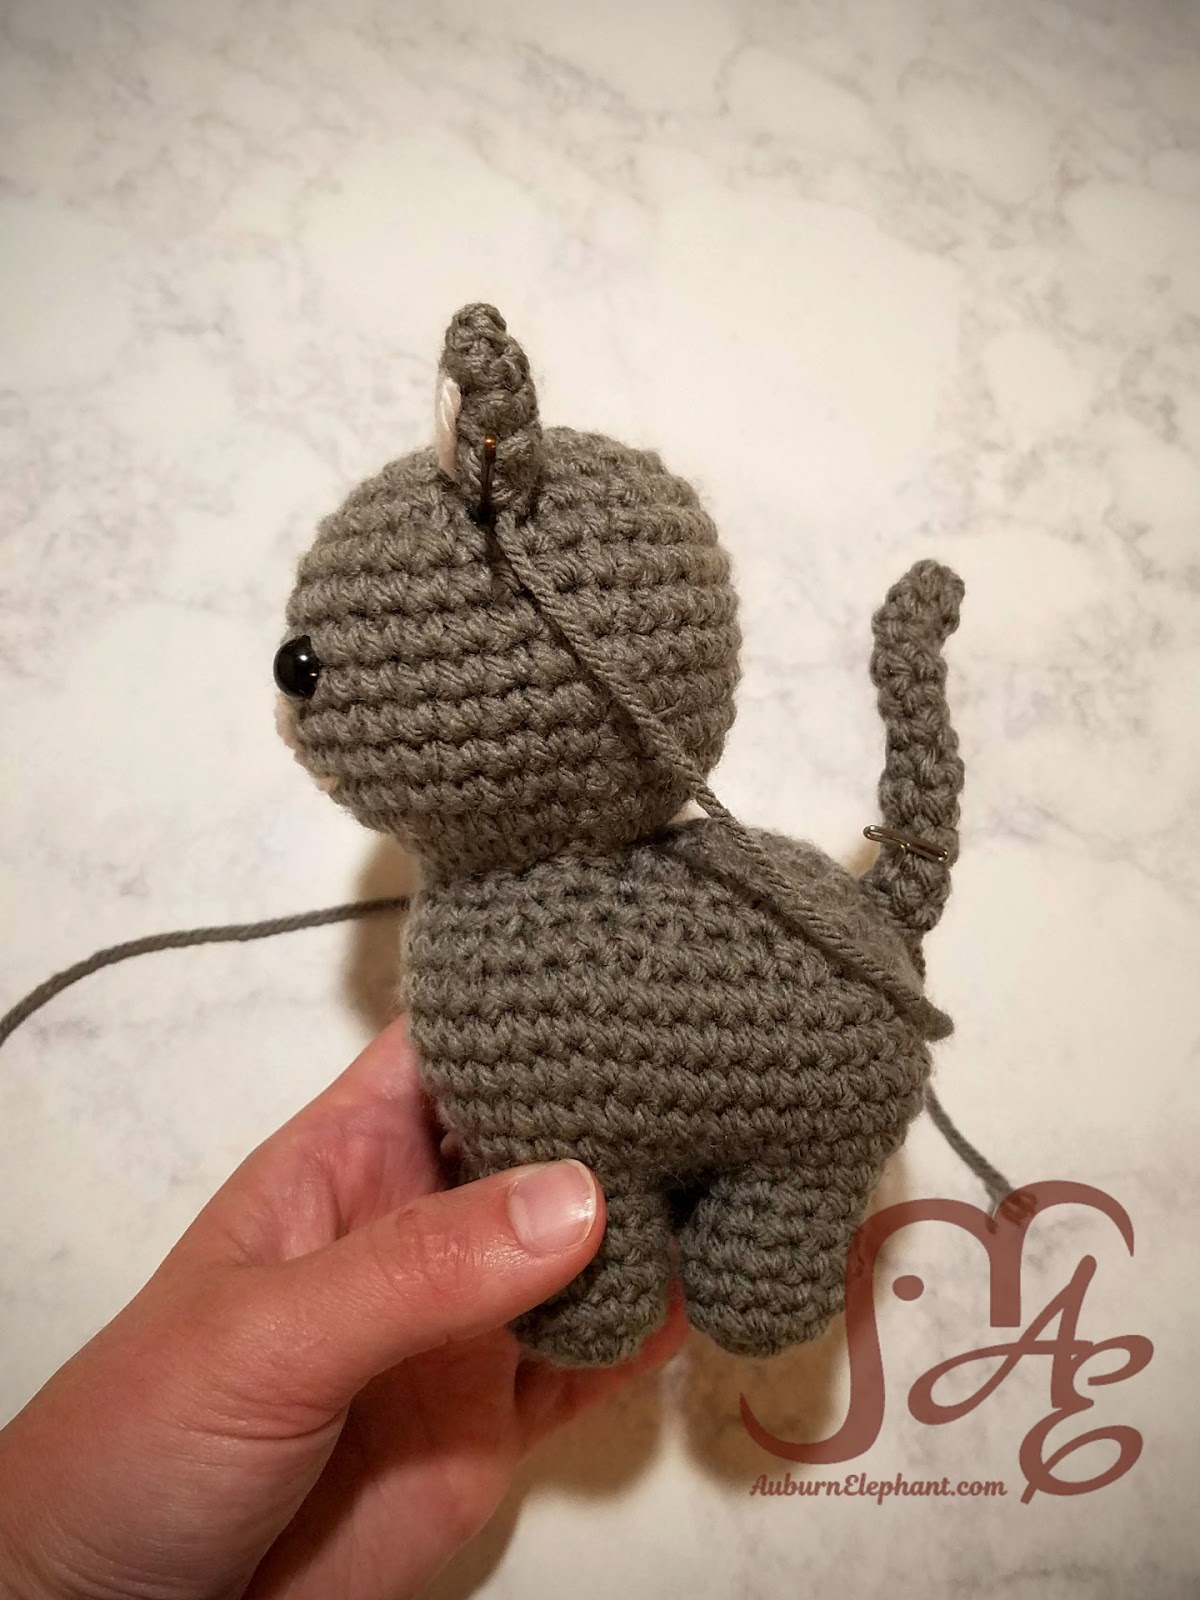
Stitch each of those pieces on and then using a light pink (or black or white) yarn, embroider a nose and mouth. You can also use a length of black to add whiskers and eyelashes if you choose. For those details I prefer to use a black crochet thread rather than yarn because the yarn is really too much on such a small little face.
Add any other details that you would like! Make this kitty your own. 🙂 There are lots of different color options you can use. Try a variegated yarn for a fun calico kitty!
For the Ad-Free, printable PDF-version of the pattern, click HERE! Or add to your Ravelry queue, HERE!

(This photo looks like the album cover for a Kitty band! lol!)


2 thoughts on “Kitty Plush”
Comments are closed.