
This post may contain affiliate links. If you use these links to buy something I may earn a small commission at no cost to you. Thanks.
…
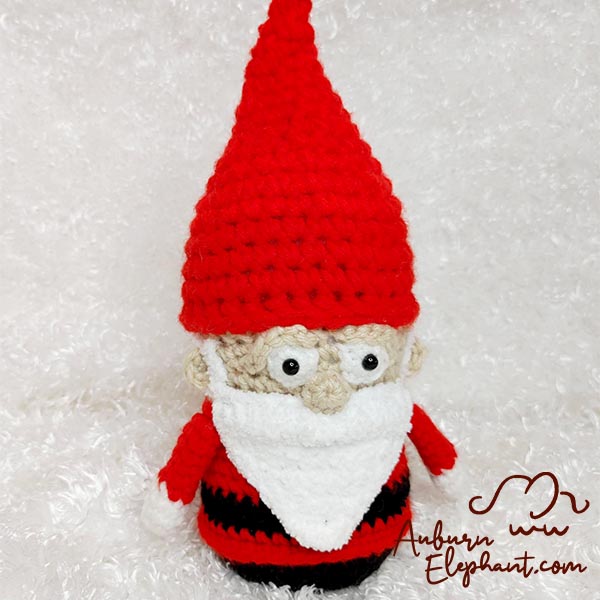
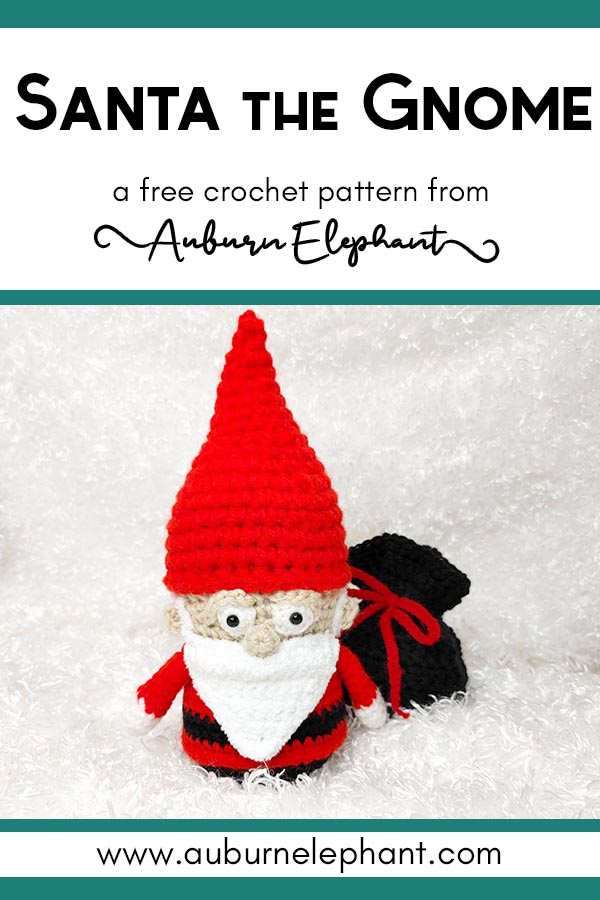
This poor little Gnome has sat around for over a year just waiting to be finalized and shared! Story of my life!
He’s adorable and pretty quick to make. I have been seeing lots of similar gnomes this year too. One of my favorite things about crochet (and handmade gifts in general) is how the “same” pattern can be made sooo many different ways.
This little gnome does make a good Santa. But change up the colors and he’d be a great garden protector as well!
I hope you enjoy this crochet pattern and that I’ve made it easy enough to follow. If you have any questions you can contact me at auburnelephant@gmail.com OR through the site’s contact page. I’d also love to see your finished creations! Connect with me on Facebook or Instagram!

A couple of disclaimers: This pattern is intended for personal use only. You are welcome to use the pattern to make and sell products, to keep for yourself, or to give away as gifts. I would appreciate receiving credit and a link back to the site. Please do not republish or distribute the pattern in any way, or use my photos in your listings.
Santa the Gnome
Supplies Needed:
- Big Twist Value Yarn
, Worsted Weight 4 (100% Acrylic, 380 yds, 6 oz) in:
- Varsity Red, approx 80 yds
- Cream, approx 20 yds
- Black, approx 20 yds
- White, approx 10 yds
- Bernat Blanket Tiny, Worsted Weight 4 (100% Polyester, 316 yds, 3.5 oz) in Snow Cap, approx 20 yds (Can substitute with Big Twist Value in White or Bernat Pipsqueak)
- J/10 6.0 mm hook
- G/6 4.25 mm
- H/8 5.0 mm
- Safety Eyes 6mm (Optional)
- Needle for weaving ends
- T-Pins for piece placement
Stitches/Terminology Used (US):
- Ch- Chain
- Sl st- Slip Stitch
- St(s)- Stitch(es)
- SC- Single Crochet
- 2SC- Single Crochet Increase, 2 SC stitches in the same stitch
- FLO- Front Loop Only
- DEC- Single Crochet Decrease, Using the Invisible Decrease method, insert hook up through front loops of next 2 stitches, yarn over, pull through front loops, yarn over, pull through to finish decrease
- BPSC- Back Post Single Crochet
- FPSC- Front Post Single Crochet
- 2FPSC- Front Post Single Crochet Increase, 2 FPSC around the same post
- SC3TOG- SC Decrease over 3 stitches
Notes:
- Gauge for this project is not very important. You want to make sure that your stitches are tight enough so that your stuffing doesn’t show through and that your pieces hold their shape. If you need to go down a hook size to maintain tight stitches that is fine. As I made it the finished gnome size is approximately 10” tall.
- Pattern is worked in joined rounds, unless noted. Each round will begin with a Ch 1 and end with a sl st to the first stitch of the round. The first stitch of a round will be worked in the same as joining. Chains do NOT count as stitches. If you need help with this technique, you can find my tutorial at auburnelephant.com/home/joined-rounds.
- Be sure to read through the sections and make sure you are using the correct yarn and hook size as they vary throughout.
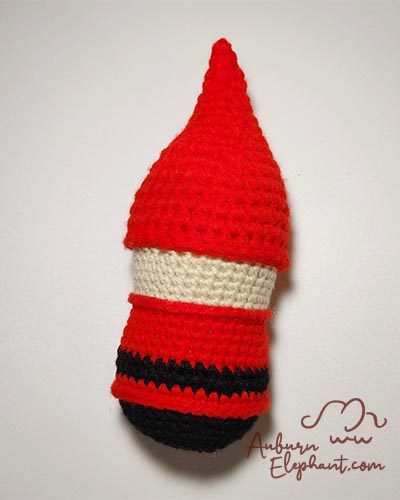
- The hat is worked from the brim up and then the rest of the body is worked down from the brim. The hat is also worked using 2 strands of worsted yarn. You can substitute with a bulky (5) yarn if you’d prefer. To get the 2 strands, you can either start with 2 skeins of Varsity Red and pull from both OR you can ball some from your 1 skein and pull from those.
Hat
Using 2 Strands of Varsity Red
J/10 6.0 mm hook
Ch 30, join with a sl st to form a loop. Be careful not to twist the chain.
1) SC in each ch around. (30)
Your circle should have about a 10” circumference.
2) BPSC around each SC. (30)
This creates a sort of flat “brim” under the edge of the hat. You’ll reattach to that “brim” later to do the head and body.
3-4) SC in each st around. (30)
5) *SC in next 13, DEC;* Repeat from * to * around. (28)
6) SC in next 6, DEC, SC in next 12, DEC, SC in remaining 6. (26)
7) *SC in next 11, DEC;* Repeat from * to * around. (24)
8) SC in next 3, DEC, *SC in next 6, DEC;* Repeat from * to * around, SC in remaining 3. (21)
9) *SC in next 5, DEC;* Repeat from * to * around. (18)
10) SC in next 2, DEC, *SC in next 4, DEC;* Repeat from * to * around, SC in remaining 2. (15)
11) *SC in next 3, DEC;* Repeat from * to * around. (12)
12) SC in each st around. (12)
13) *SC in next 4, DEC;* Repeat from * to * around. (10)
14) *DEC, SC in next 3;* Repeat from * to * around. (8)
15) *SC in next 2, DEC;* Repeat from * to * around. (6)
16) SC in each st around. (6)
17) DEC around. (3)
Finish Off, Leave tail to sew top closed.
If you’re interested in extra photos/guidance, check out the Premium PDF download, available at either Ravelry or Etsy.


Head/Body/Legs
Using only 1 strand for the remainder of the project
Using Cream, Varsity Red, and Black
G/6 4.25mm hook
In Cream
You’ll be attaching directly to the base of the hat, going around the posts in the first round of SC.
1) *FPSC in next 14, 2FPSC;* Repeat from * to * around. (32)
2-6) SC in each st around. (32)
Change to Varsity Red
7) FPSC in each st around. (32)
8) Going into the tops of the SC in Round 6, SC in each st around. (32)
9) SC in each st around. (32)
10) SC in next 8, 2SC, SC in next 15, 2SC, SC in remaining 7. (34)
11) SC in next 8, 2SC, SC in next 16, 2SC, SC in remaining 8. (36)
12) SC in each st around. (36)
For these next couple of color changes, you can either cut and reattach your colors or you can drop one and pick up the next leaving the first attached. The changes will be on the inside and it will leave less ends to worry about.
Drop Red, Change to Black
13) SC in each st around. (36)
14) *SC in next 11, 2SC;* Repeat from * to * around. (39)
Drop Black, Change to Red
15) SC in each st around. (39)
16) In FLO, SC in each st around. (39)
Change to Black
17) Going into the unworked Back Loops of Round 15- SC in next 9, DEC, SC in next 17, DEC, SC in remaining 9. (37) (See Photo below)
18) *SC in next 6, DEC;* Repeat from * to * around, SC in remaining 5. (33)
19) *SC in next 9, DEC;* Repeat from * to * around. (30)
20-21) SC in each around. (30)
Stuff most of the way
22) *SC in next, DEC;* Repeat from * to * around. (20)
Finish stuffing
23) DEC around. (10)
Finish off, leave tail to sew closed.
Arms
Using White and Varsity Red
G/6 4.25mm hook
Make 2
In White
1) Using the Magic Ring technique (OR Ch 2, join with sl st to first Ch to form a ring), SC 5 into ring. (5)
2) 2SC in each st around. (10)
3) SC in each st around. (10)
4) *SC in next 3, DEC;* Repeat from * to * around. (8)
Change to Varsity Red
5-10) SC in each st around. (8)
Finish off, leave a long tail to attach to the body.
Add a small amount of stuffing to the hand portion of the arm. I actually just use the tails from the yarn to fill the hand instead of trimming them. Too much stuffing and the arm will stick out straight instead of laying flat.
Nose
Using Cream
G/6 4.25mm hook
1) Using the Magic Ring technique (OR Ch 2, sl st to first Ch to form ring), SC 6 into the ring. (6)
2) SC in each st around. (6)
Finish off, leave a long tail to sew on.
Ears
Using Cream
G/6 4.25mm hook
Make 2
Using the Magic Ring technique (OR Ch 2, sl st to first Ch to form ring), SC, HDC, DC, HDC, SC into ring. (5) Pull ring tight, do NOT join.
Eyes
Using White
G/6 4.25mm hook
Make 2
Using the Magic Ring technique (OR Ch 2, sl st to first Ch to form ring), SC 8 into ring. (8) join
You can either embroider pupils onto your eyes with black thread or yarn OR you can use safety eyes. I liked mine with 6mm safety eyes.
Eyelids
Using Cream
G/6 4.25mm hook
Make 2
These are optional. I made this gnome without eyelids initially but after putting them on I liked him a little better with the eyelids but it is just one more thing to do. I think it’s cute either way though.
Ch 6,
Starting in 2nd from hook, sl st in each across. (5)
Finish off, leave a long tail to sew on.
Hair
Using Bernat Blanket Tiny or another substitute
H/8 5.0mm hook
Note:
This piece is worked in Rows. Each row ends with a Ch 1 and turn.
Ch 5,
1) Starting in 2nd from hook, SC 4. (4)
2) SC in first st, Ch 2, Skip 2 sts, SC in last. (2 SC, 2 Ch)
3) SC in first st, SC 2 into Ch-space, SC in last. (4)
4-24) SC in each st across. (4)
Test your piece out at this point to make sure that it isn’t going to be too short or too long. (Over or under stuffing your body can change the size of your head so it’s good to check.) The hair should wrap about halfway around the back of the head before the last two rows. If the piece doesn’t fill the space fully, you can also add a SC border along the edges.
25) SC in first st, Ch 2, Skip 2 sts, SC in last. (2 SC, 2 Ch)
26) SC in first st, SC 2 into Ch-space, SC in last. (4)
Finish Off. Leave a very long tail to sew on to the body.
Beard
Using Bernat Blanket Tiny
H/8 5.0mm hook
Note:
This piece is worked in Rows. Each row ends with a Ch 1 and turn, unless specified.
Leave a long starting tail to attach beard.
Ch 15,
1) Starting in 2nd chain from hook, SC across. (14)
2) SC in each st across (14)
3) DEC, SC in next 10, DEC. (12)
4) DEC, SC in next 8, DEC. (10)
5) DEC, SC in next 6, DEC. (8)
6) DEC, SC in next 4, DEC. (6)
7) DEC, SC in next 2, DEC. (4)
8) SC in each st across. (4)
9) DEC across. (2)
10) DEC. (1)
Ch 1, SC evenly around edges of beard. Join with sl st to first SC of border round.
Assembly
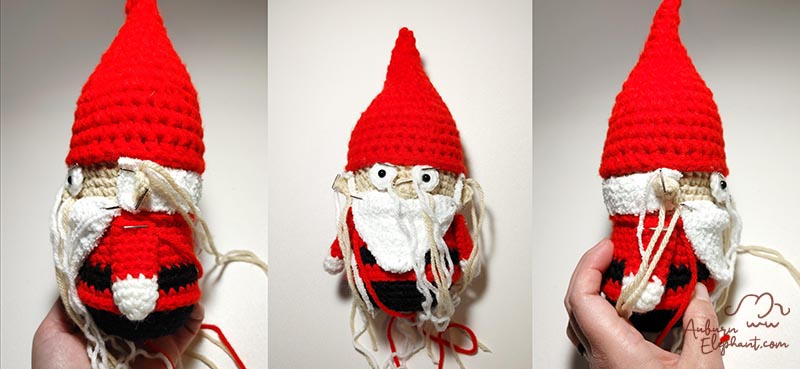
Using T-pins, bobby pins, or eyeballing, tack all your pieces into place before you stitch anything down. That way you can make sure you don’t end up with a wonky ear or nose.
Your body should have a very slight oval with the join seam on the back. To start, place arms on each side of the body, directly under the first row of the shirt color.
Place hair around the back of the head, using the arms as a guide to keep it even. Tack ears in the Ch-spaces of the hair. Center eyes and nose in the opening of the face. I like to place the eyes up as close to or even slightly under the brim of the hat. Place the eyelids over the top of the eyes and angled down slightly on the outer edges. The placement of these (or their omission) will change your gnome’s expression so play around with them until he has the attitude you want. I suggest placing these now but waiting to sew them down until the end. The nose will go in between the eyes and the start of the shirt. Once the nose is set, tack down the beard. You can overlap the top corners of the beard with the bottom corners of the hair to connect them and even curve it up on either side of the nose a bit. The top row of the beard should line up with the bottom row of the face.
Once you have all the pieces set where you’d like them, begin sewing them on. I would sew them down in the same order that you placed them but you can choose your own path.

Sew down the eyelids last so that you get the best placement for the expression you’re going for.
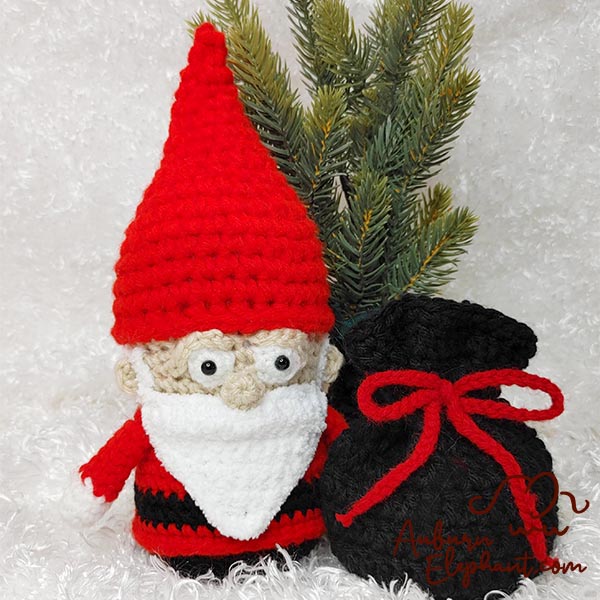
And there you go! A festive gnome to get you through the holidays! You can also find the pattern for his little bag o’ gifts here too! Check out my Simple Dice Bag. 🙂
While you’re here, check out these other Auburn Elephant patterns!
One thought on “Santa the Gnome”
Comments are closed.