
This post may contain affiliate links. If you use these links to buy something I may earn a small commission at no cost to you. Thanks.
…
Hi there! This is the first pattern I’m getting around to publishing for 2020! I am already a bit behind schedule as far as what I had hoped to have done. BUT… I’m still trying and that’s something.
I’ve been working on narrowing down my niche of designs to more Amigurumi and quick patterns. Now, the struggle is that really cool amigurumi pieces aren’t always that quick to make. One area that I will be focusing on are these loveys. I think they are adorable and make great gifts for people. They are relatively quick to work up (quicker than a full blanket and ami anyway) and so they are good for last minute makers and procrastinators *raises hand*…
I’ve got a whole year’s worth of ideas for these and plan to release some in sets. This Daisy Lovey, however, is sort of on it’s own. The idea morphed from a blanket square I designed that I will still release as a full pattern eventually but thought that at this point the Lovey version fit in better with my new focus. I hope you love it and the ones to come in the future!
A couple of disclaimers: This pattern is intended for personal use only. You are welcome to use the pattern to make and sell products, to keep for yourself, or to give away as gifts. I would appreciate receiving credit and a link back to the site, however. Please do not republish or distribute the pattern in any way, or use my photos in your listings.

I am not a robot, so if you find any typos, errors, or places that need clarification, please let me know so that I can fix my mistakes or offer extra guidance. 🙂
I hope you enjoy this crochet pattern. If you have any questions or comments you can leave them below OR email me at auburnelephant@gmail.com OR through the contact page on this site. I’d also love to see your finished creations! 🙂
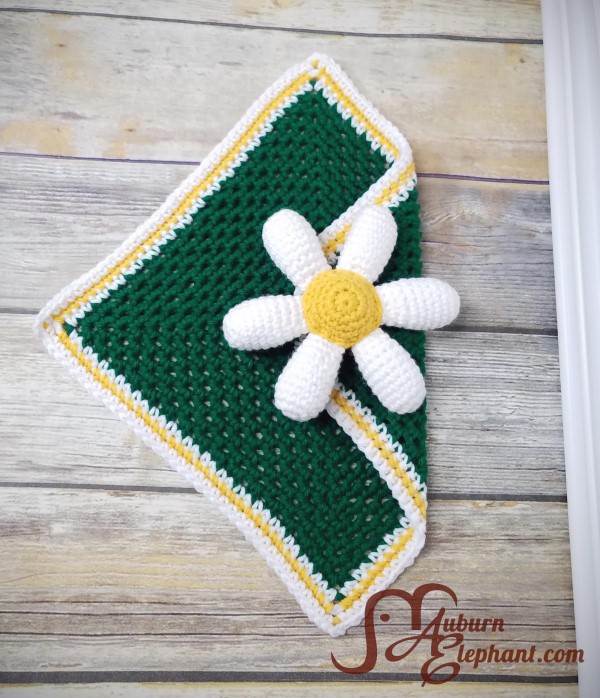
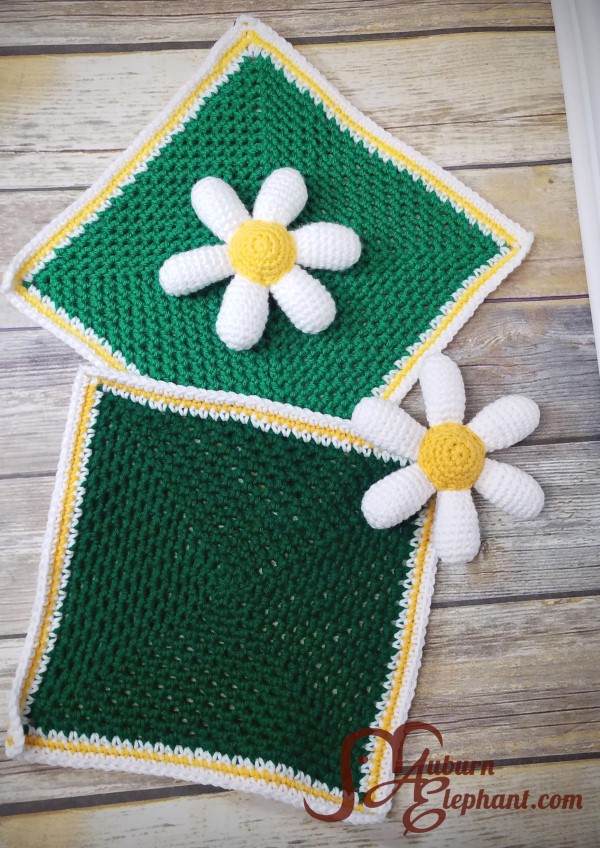
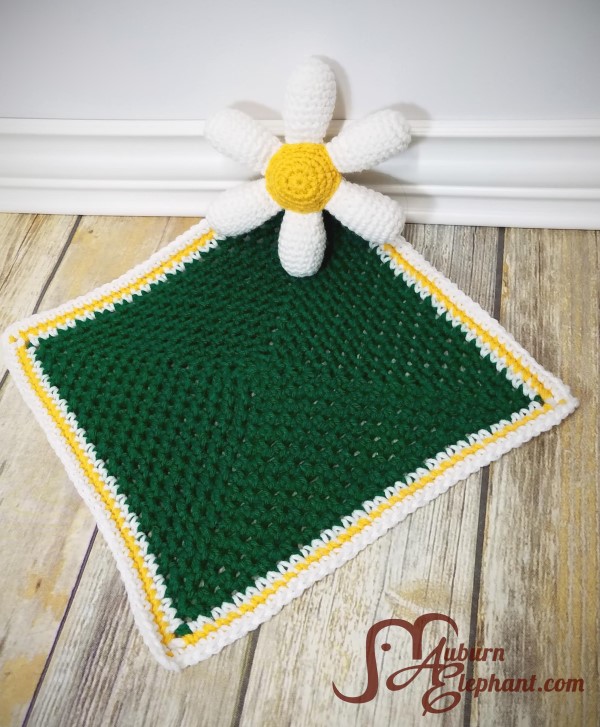
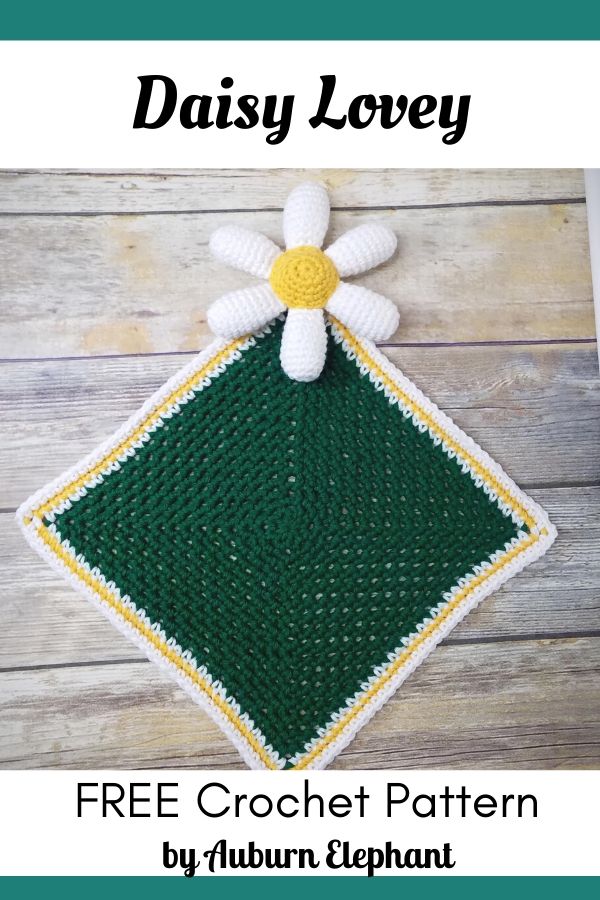
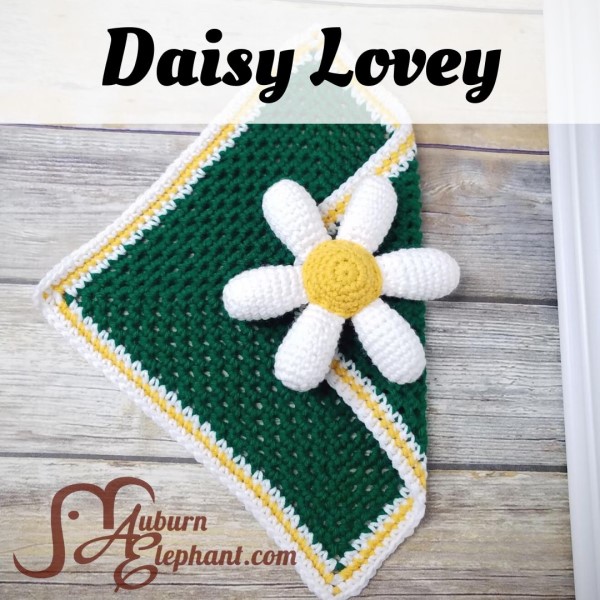
Daisy Lovey
Supplies Needed:
- I Love This Yarn, Medium Worsted Weight 4 (100% Acrylic, 355 yds, 7 oz), Green, 1 skein- 90 yards; White, 1 skein- 60 yards; Yellow, 1 skein- 30 yards
- I/9 5.50 mm
- G/6 4.50 mm
- Tapestry Needle, to weave in ends
- Polyfil, small amount to stuff petals
Stitches/Terminology Used: US terms
- Ch- Chain
- Sl st- Slip Stitch
- SC- Single Crochet
- DEC- Single Crochet Decrease, Using the Invisible Decrease method, insert hook up through front loops of next 2 stitches, yarn over, pull through front loops, yarn over, pull through to finish decrease
- 2SC- Single Crochet Increase, work 2 SC in the same stitch to increase
Notes:
- The repeated stitch in this pattern is a (SC, Ch 2) worked into the chain spaces of the previous rounds.
- Beginning Ch 3 will count as a SC and Ch 2.
- Beginning Ch 4 will count as SC and Ch 3, the start of the corner spaces. Corners: (SC, Ch 3, SC) into Ch-3 space of previous round.
- Each round will end with a sl st to the first Ch-space of round.
- You can check your gauge after Round 10 of the pattern. Your square should be approximately 6” x 6” at that point to end with a Lovey square of about 12” x 12”.
- If you would like to make a larger square, simply continue Round 4 until you get the size you want. Keep in mind that the edge counts on the border rounds will be different if you do.
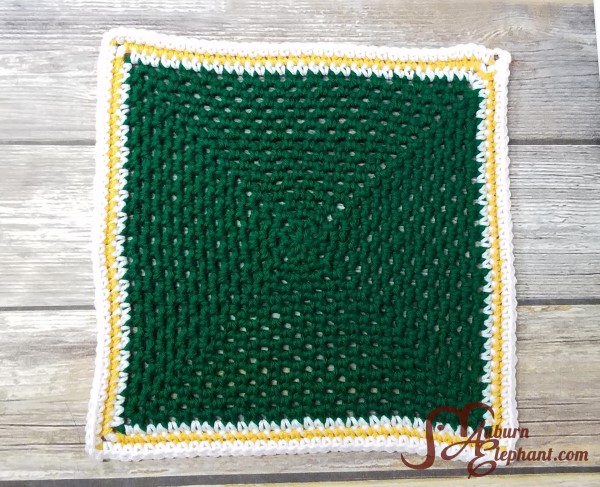
Lovey Square
With Green and I Hook
Round 1) Using the Magic Ring technique (OR Ch 3 and join with a sl st to first Ch to form a loop) Ch 3, *SC into the loop, Ch 2;* Repeat from * to * 6 more times. (8 SC, 8 Ch-2 spaces)
Round 2) Ch 3, *SC into next Ch-2 space, Ch 2;* Repeat from * to * around. (8 SC, 8 Ch-2 spaces)
Round 3) Ch 4, SC into starting Ch-space (corner 1 made), *Ch 2, SC into next Ch-2 space, Ch 2, SC into next Ch-2 space, Ch 3, SC into same Ch-2 space (next corner made);* Repeat from * to *, Ch 2, SC into next Ch-2 space, Ch 2. (12 SC, 4 Ch-3 spaces [corners], 8 Ch-2 spaces)
Rounds 4-18) Ch 4, SC into starting Ch-space, Ch 2, *SC into next Ch-space, Ch 2;* Repeat across side until you get to the corner (Ch-3 space). Work Corner stitch (SC, Ch 3, SC) in Ch-3 space. Continue around.
Cut Green, Change to White
Round 19) Ch 4, SC into starting Ch-space, SC into each SC and Ch-2 space across, (SC, Ch 3, SC) into each corner space, continue around. SC last into same space as starting. (Each side should have 37 SC.)
Cut (or Drop) White, Change to Yellow
Round 20) Ch 4, SC into each SC across, (SC, Ch 3, SC) into each corner space, continue around. SC last into same space as starting. (Each side should have 39 SC.)
Cut Yellow, Change to White
Round 21) Ch 4, SC into each SC across, (SC, Ch 3, SC) into each corner space, continue around. SC last into same space as starting. (Each side should have 41 SC.)
Finish off. Weave in all ends.
Plush Daisy
With White, Yellow, and G Hook
Notes:
- Pattern is written with pieces worked in joined rounds. You could choose to do them in continuous rounds if you prefer (disregard the next 2 notes), just be sure to use a stitch marker to track your rounds.
- Each round will begin with a Ch 1 and end with a sl st to the first SC of the round.
- Beginning Ch 1 will NOT count as a stitch.
- Gauge is not terribly important but I would try to keep it proportional to the lovey. Adjust your hook size if you feel the stitches need to be tighter. Finished Daisy should be about 6” in diameter, from petal end to opposite petal end, to go with the 12” x 12” lovey.
Petals
Make 6
Using White
1) Using the Magic Ring technique (OR Ch 3 and join with a sl st to first Ch to form a ring) SC 6 into ring. (6)
2) 2SC in each stitch around. (12)
3) SC in next 3, 2SC, SC in next 5, 2SC, SC in remaining 2. (14)
4-8) SC in each around. (14)
9) SC in next 3, DEC, SC in next 5, DEC, SC in remaining 2. (12)
10) SC in next 2, DEC, SC in next 4, DEC, SC in remaining 2. (10)
11) SC in next 2, DEC, SC in next 3, DEC, SC in last. (8)
12) SC in next 1, DEC, SC in next 2, DEC, SC in last. (6)
13) SC in each around. (6)
Finish off. Stuff petal with polyfil. You may need to use the blunt end of a crochet hook to push in the stuffing. You can also choose to stuff most of your petal after Round 10 when the opening is bigger, if you prefer.
I would suggest leaving at least one petal with a long tail to join them all together before adding the flower centers.
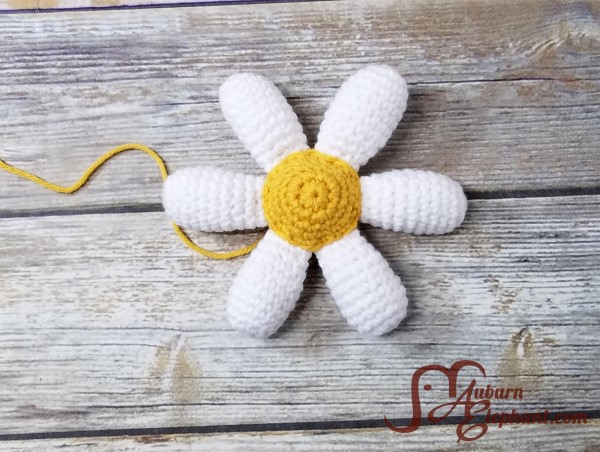
Daisy Center
Make 2
Using Yellow
1) Using the Magic Ring technique (OR Ch 3 and join with a sl st to first Ch to form a ring) SC 8 into ring. (8)
2) 2SC in each around. (16)
3) SC in each around. (16)
4) *SC in next, 2SC;* Repeat from * to * around. (24)
5) SC in each around. (24)
Finish off. Leave long tails on both pieces. My suggestion is to pull one tail back through to the center of the circle to use to sew on to the Lovey Square and use the other tail to sew the 2 centers together along with the petals.
Assembly
Once your Lovey Square is completed you may choose to block it before attaching the Daisy. Blocking helps to straighten out the square and help it hold its shape. Since this pattern uses acrylic yarn and the square will have some stretch due to the stitches used, blocking is completely optional.
There are a lot of different methods out there but the way that I do this is to wash the square either by hand or in a washing machine and then pin the square while wet to a foam mat and let dry.
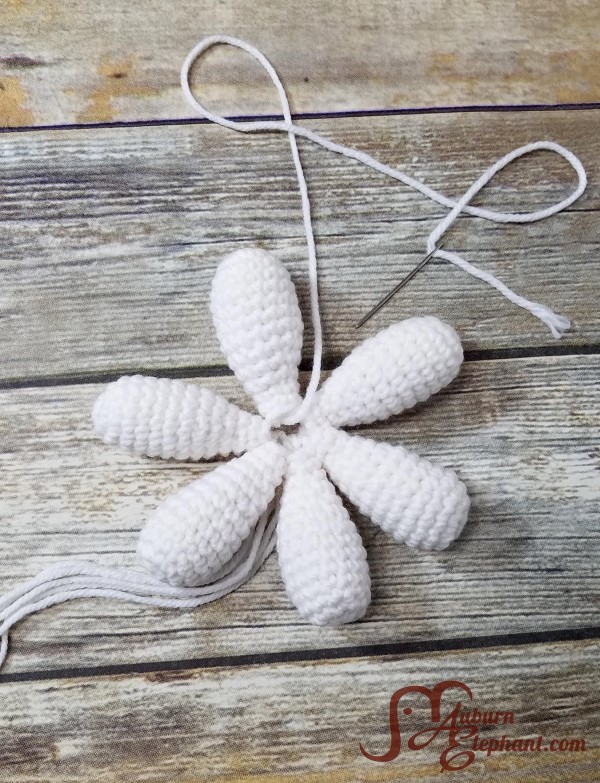
To assemble your Daisy, start with the petals. Lay them in a circle with the small, open ends pointing toward the middle. Take the long tail you left and using a needle sew through all the petals forming a ring. Tie off the end and weave it in or leave it to fill the center. If you left an end on each petal, you can tie those all together and use them to add filling to the center as well.
Once you have your petals together you’ll place the yellow centers on either side. Take the long end you left on a needle and sew through the petal and the other center piece. Sew through at about 3 rows from the end of the petal and 3-4 times per petal. I would avoid joining the center pieces in between the petals, it will create an odd spacing. Once you’ve sewn together five petals, add some stuffing to the center on either side. Finish sewing through the last petal. If you left a long tail on one of your centers and pulled it toward the middle, you can then use that to attach the daisy to the Lovey Square. If you did not, you can continue from sewing the centers on to attaching the Lovey Square.
I chose to attach my Daisy using only the very middle of the yellow center to the Lovey Square. You could also tack down the petals if you would like but I wanted them to be plush and grabbable for little ones! You can either center the Daisy in the middle of the square or set it off toward a corner.
There you go! Make sure all the ends are weaved in and that the Daisy is secure!
Such a sweet blankie (lovey). I hope to one day stitch!