This post may contain affiliate links. If you use these links to buy something I may earn a small commission at no cost to you. Thanks.
…
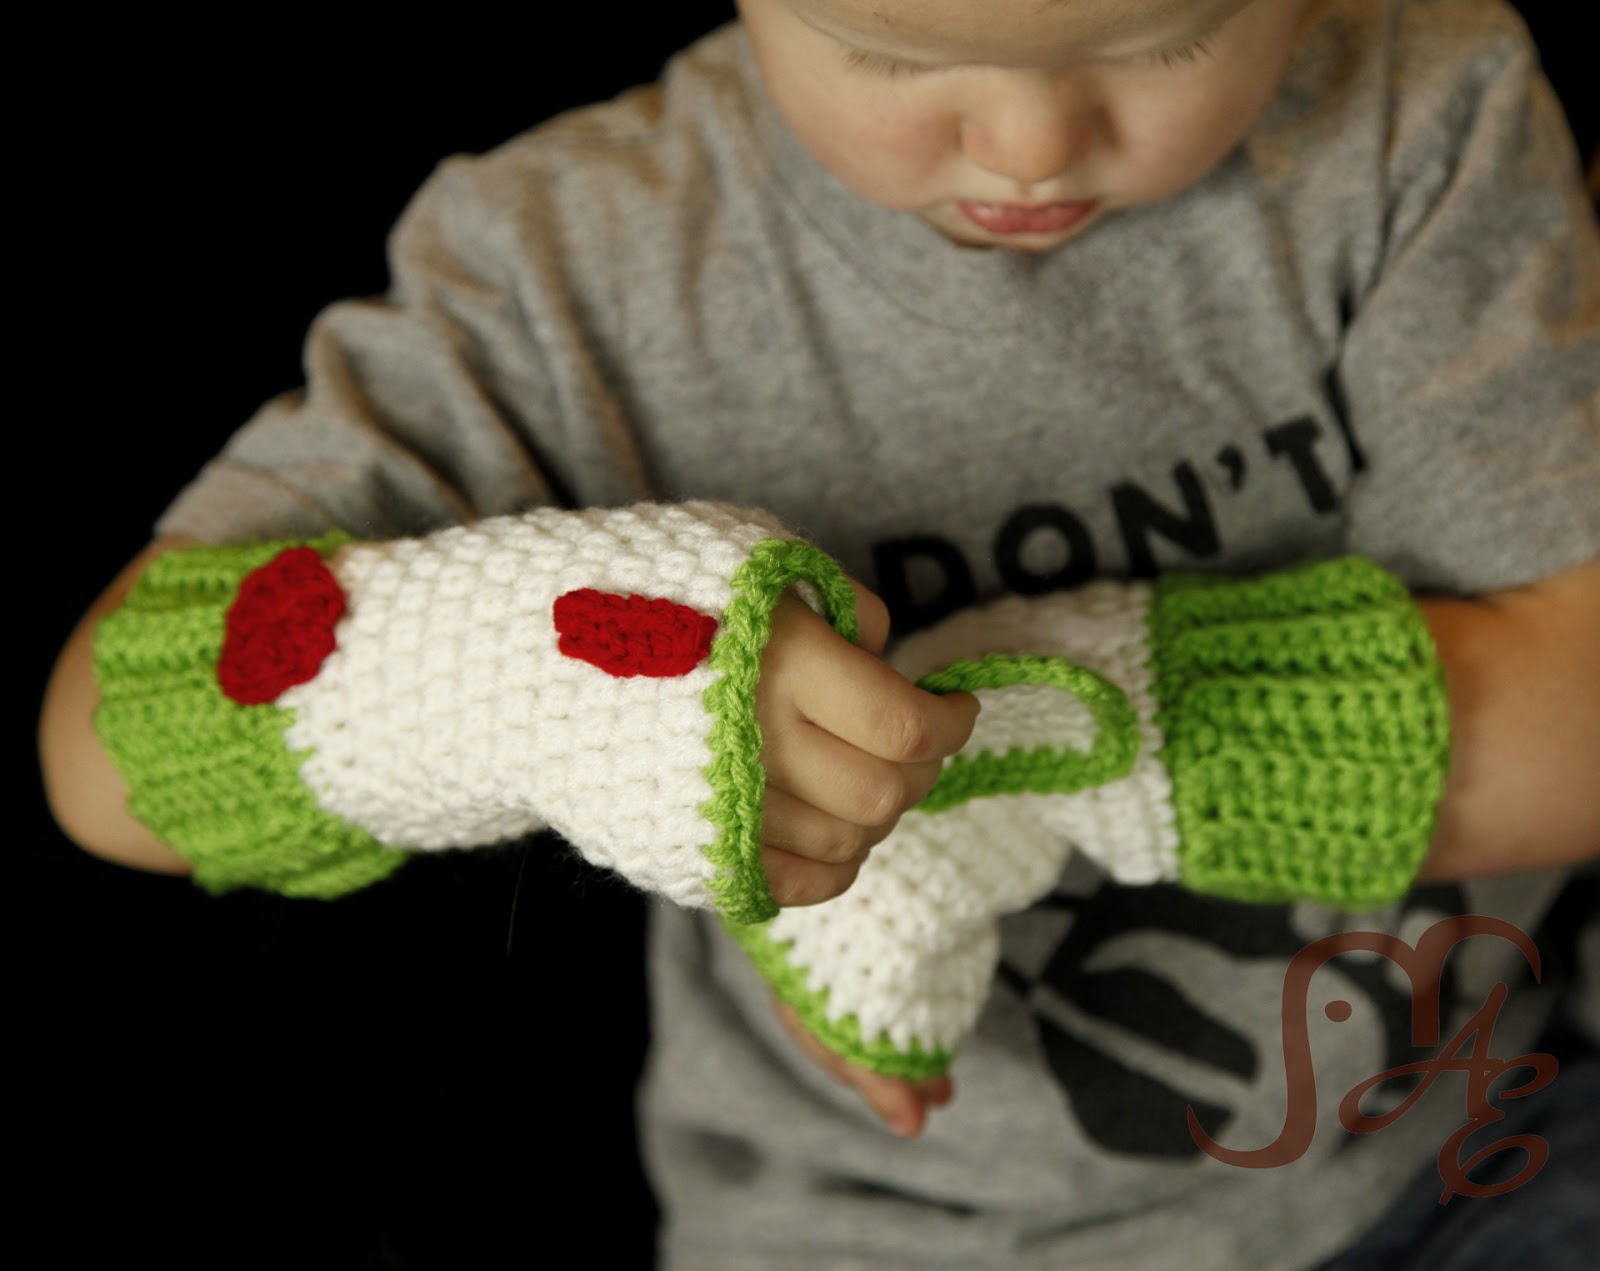
It was two years ago that I found my (at the time) 3-year-old running around the house with toilet paper tubes on his arms pretending to be Buzz Lightyear. I thought, I can do better than that. So I whipped up these little fingerless gloves and won some major Mom points!
You may notice that I design a lot of dress up things. I have two little boys with very active imaginations who LOVE to play dress up. They are in costumes almost every day. I like that they love these types of gloves though because they don’t require changing outfits for them to play. And if they want to wear them to the grocery store, it’s not quite as much of a scene as a full Iron Man costume is. (Iron Man glove pattern is on it’s way too 😉 )
And they have most definitely wore these gloves to the grocery store, the park, restaurants, and always around the house. They’ve gotten a lot of compliments and attention. My oldest, who “doesn’t talk much,” will often just laser people instead of actually responding to their questions or saying thank you. So you know, that’s cool. Haha!
The gloves are so much fun and let the kids be creative. And that’s the best part about being a kid (and a crocheter!)

A couple of disclaimers: This pattern is intended for personal use only. You are welcome to use the pattern to make and sell products, to keep for yourself, or to give away as gifts. I would appreciate receiving credit and a link back to the site, however. Please do not republish or distribute the pattern in any way, or use my photos in your listings.
I am not a robot, so if you find any typos, errors, or places that need clarification, please let me know so that I can fix my mistakes or explain things differently. 🙂
I hope you enjoy this crochet pattern. If you have any questions or comments you can leave them below OR email me at auburnelephant@gmail.com OR through the contact page on this site. I’d also love to see your finished creations! 🙂
Supplies Needed:
Red Heart Super Saver, Medium Worsted Weight 4 (100% Acrylic, 364 yds, 7 oz) White, 1 skein, Lime Green, 1 skein, Red and Black, small amount for details
Small strip of Velcro (if you want to add the comm panel)
Needle and Thread (for sewing on the Velcro)
Tapestry Needle for weaving in ends
H/8 5.0mm Hook
Stitches/Terms Used:
Sl st-Slip Stitch
HDC DEC- Half Double Crochet Decrease
BLO- Back Loop Only
DC- Double Crochet
Start with the Cuff
Ch 9,
1) Starting in 2nd chain from hook, SC across, Ch 1, turn. (8)
2-22) In BLO, SC in each across, Ch 1, turn. (8)
Sl st to the beginning chain to make a cuff, turn the cuff inside out so that the slip stitch seam is on the inside. Ch 1 (Chains do not count as stitches.)
Now start the hand part of the glove. This section is worked in joined rounds. Unless noted, each round begins with a Ch 2 and ends with a sl st to the first stitch of the round.
1) (In Green) (going evenly around the edge of the cuff) 2SC, SC in next 10, 2SC, SC in next 10. (24)
2) (Switch to White) SC in each around. (24)
3) HDC 2, HDC DEC, HDC in next 10, HDC DEC, HDC in next 8. (22)
4-8) HDC in each around. (22)
9) HDC 2, 2HDC, HDC in next 10, 2HDC, HDC in next 8. (24)
10) HDC 3, 2HDC, HDC in next 11, 2HDC, HDC in next 8. (26)
11-LEFT) HDC 6, Ch 3, skip 5, HDC 15. (21 HDC, 3 Ch)
11-RIGHT) HDC 15, Ch 3, skip 5, HDC 6. (21 HDC, 3 CH)
12-LEFT) HDC 6, HDC 3 across Ch space, HDC 15. (24)
12-RIGHT) HDC 15, HDC 3 across Ch space, HDC 6. (24)
13) (In Green) Ch 1, SC in each around. (24)
Finish Off, Weave in Ends
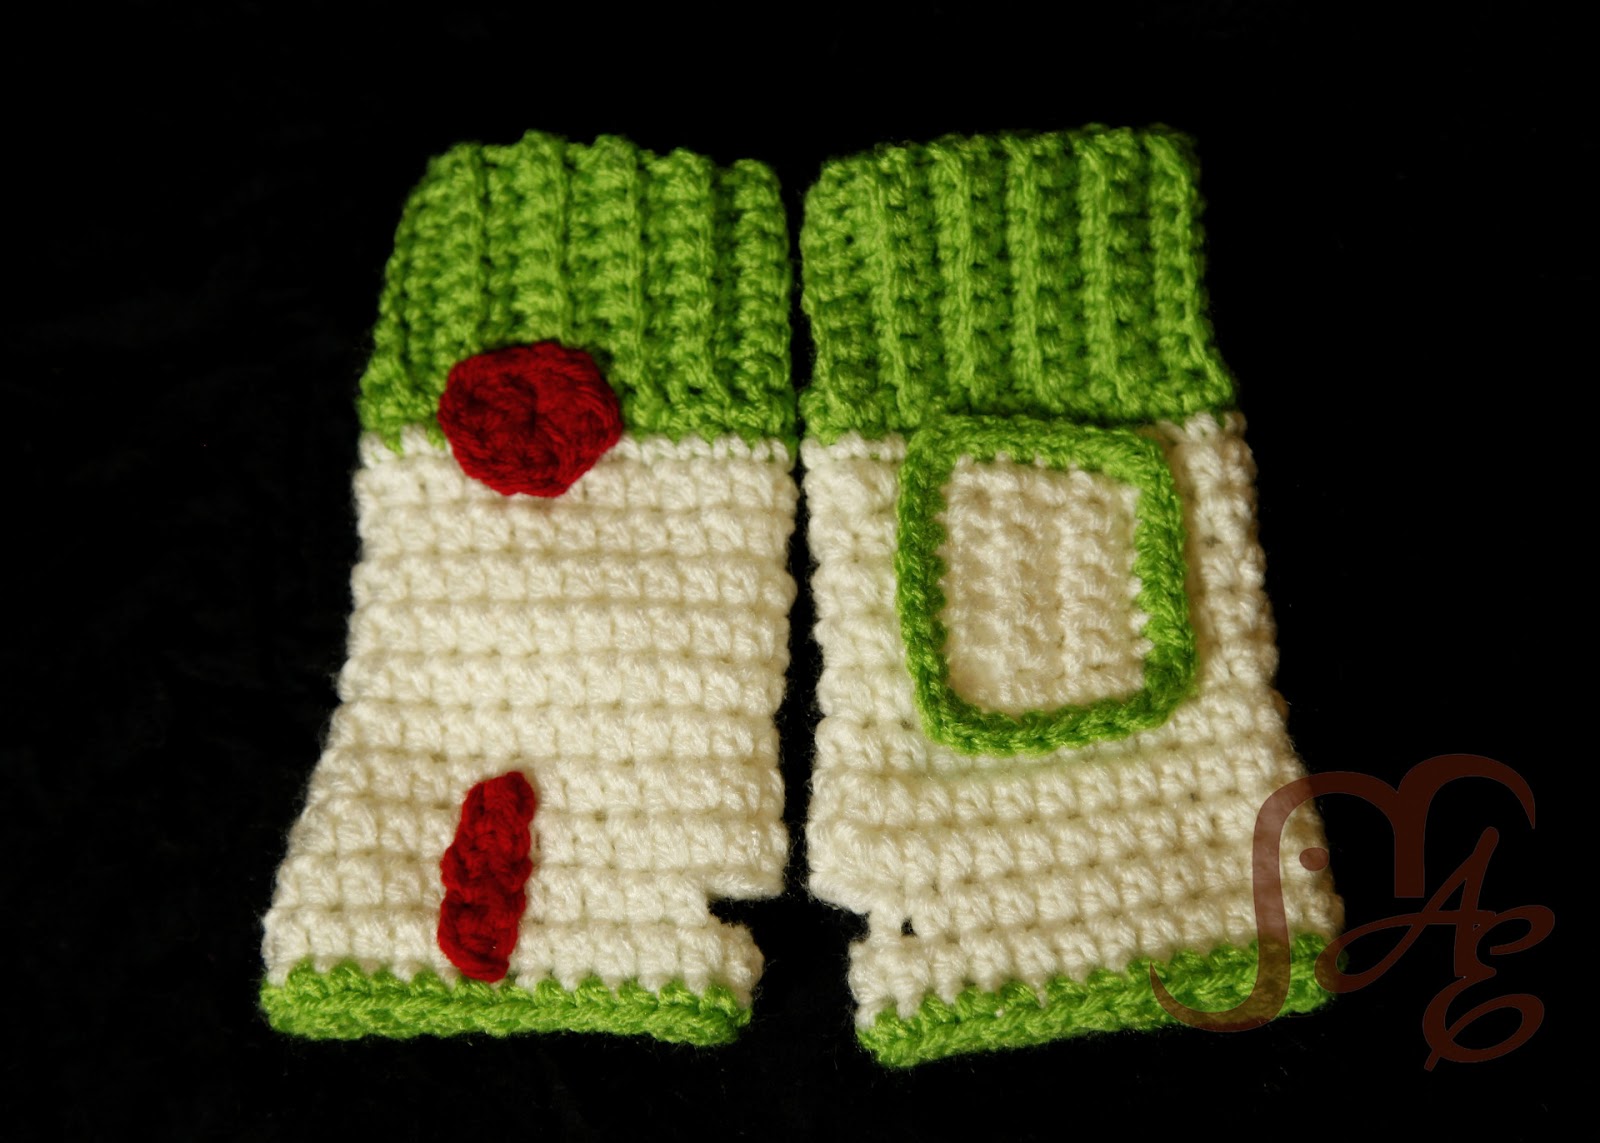
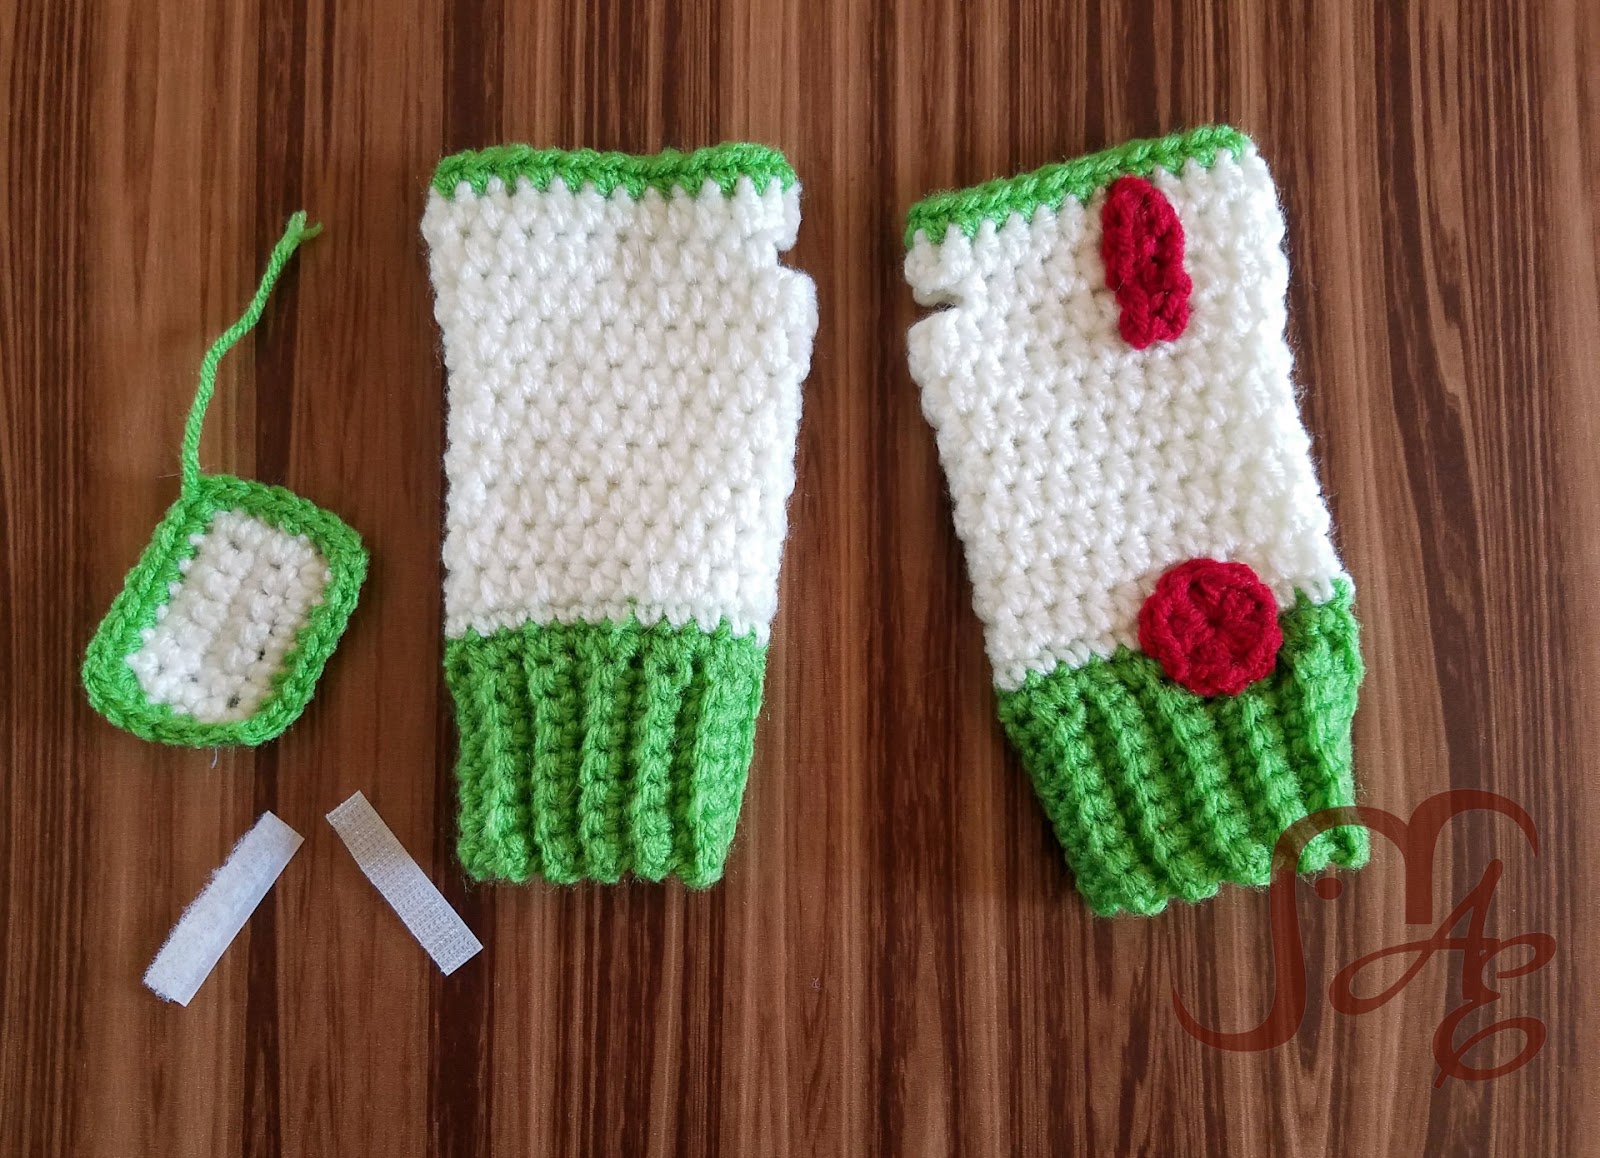
Details
Laser
(In Red) Ch 6. Starting in 2nd chain from hook, SC 5. Finish off. Leave long tail for sewing.
Laser Button
(In Red) Using the Magic Ring technique (OR Ch 3 and sl st to first chain to form a ring), DC 12. Join with a SS to top of 1st DC. Finish off. Leave long tail for sewing.
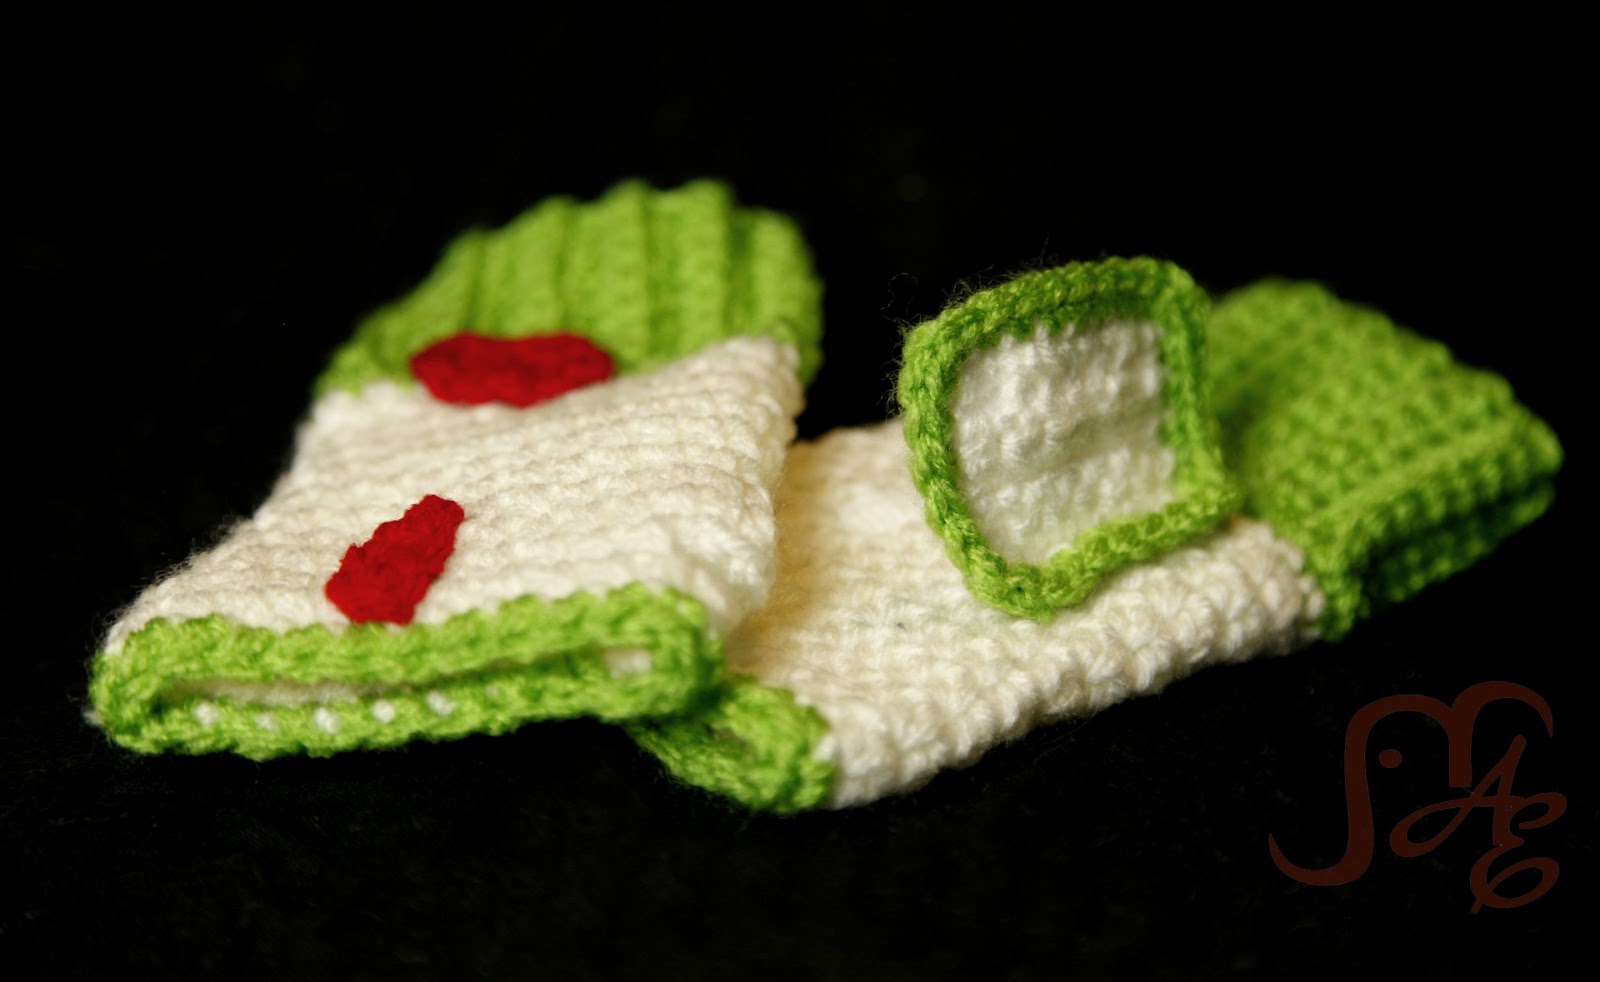
Comm Panel
(In White) Ch 9,
1) Starting in 2nd chain from hook, SC 8 across. Ch 1, turn.
2-5) SC in each across. Ch 1, turn.
Finish Off with white.
Attach Green.
SC around the outside of the white rectangle you made. Place 2SC in each of the corners.
Finish off. Leave long tail for sewing.
Assemble
Sew on the laser strip toward the top of the right glove. If you lay the glove flat you’ll want to put the laser a little to the right of center. Or if you have a young model available have them try it on and place it from there. (I learned after the first one that I did that if you put the laser in the center when the glove is flat it won’t look right when it is being worn.)
Go straight down from where you put on the laser and sew on the Laser Button on the cuff line.
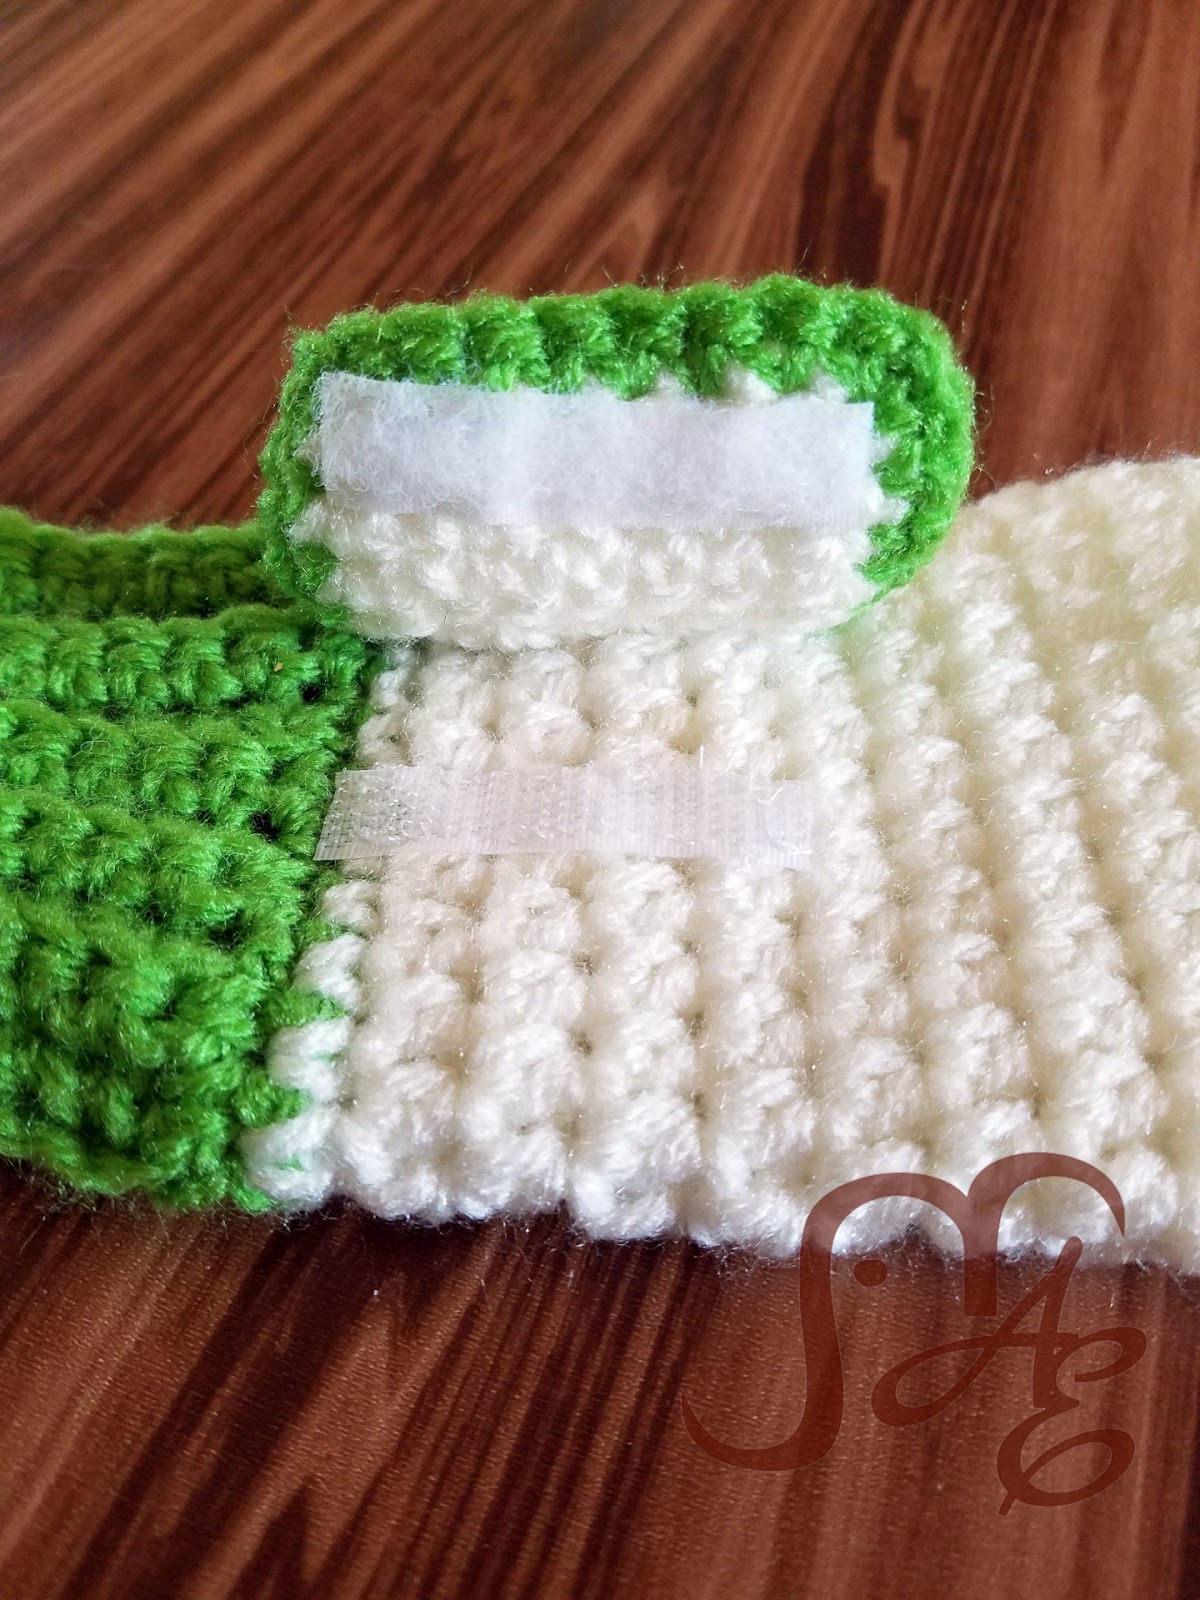
Initially I just put on the laser and button but my then 3-year-old said he needed a way to call Star Command so I added this Comm Panel. I basically make a flap with a thin strip of velcro on one edge so that it will stay shut. I would assume a small button would work too but I thought that would be too difficult for my littles to master one-handed. The velcro is also simple enough to attach and opens and closes easily. (Although, I should note that although normally yarn and velcro do not mix well, this flap is small enough and I used a thin piece of velcro so the chances of it getting caught on other places of the glove are small. I made the first pair of these 2 years ago and my boys have worn them regularly since and they are still holding together well.) I cut a 2-inch strip of white sew-on velcro and then cut that in half length-wise. This leaves a pretty thin piece that you can attach to the flap and glove. I would suggest sewing on the soft side of the velcro to the flap before stitching it down to the glove. It’s just easier to hold and work with before it is attached. You’ll need to use an actual sharp needle and I doubled a length of white thread to strengthen the hold. Make sure that you are stitching through the yarn and not just in between the stitches so that it holds in place. Then stitch down one of the long sides of the flap to the left glove. Again, a little to the left of the middle so that when it is worn it will be more centered. After that, line up the scratchy side of the velcro so that it will catch the velcro on the flap and not be exposed (that will lessen the likelihood of it catching on other things too).
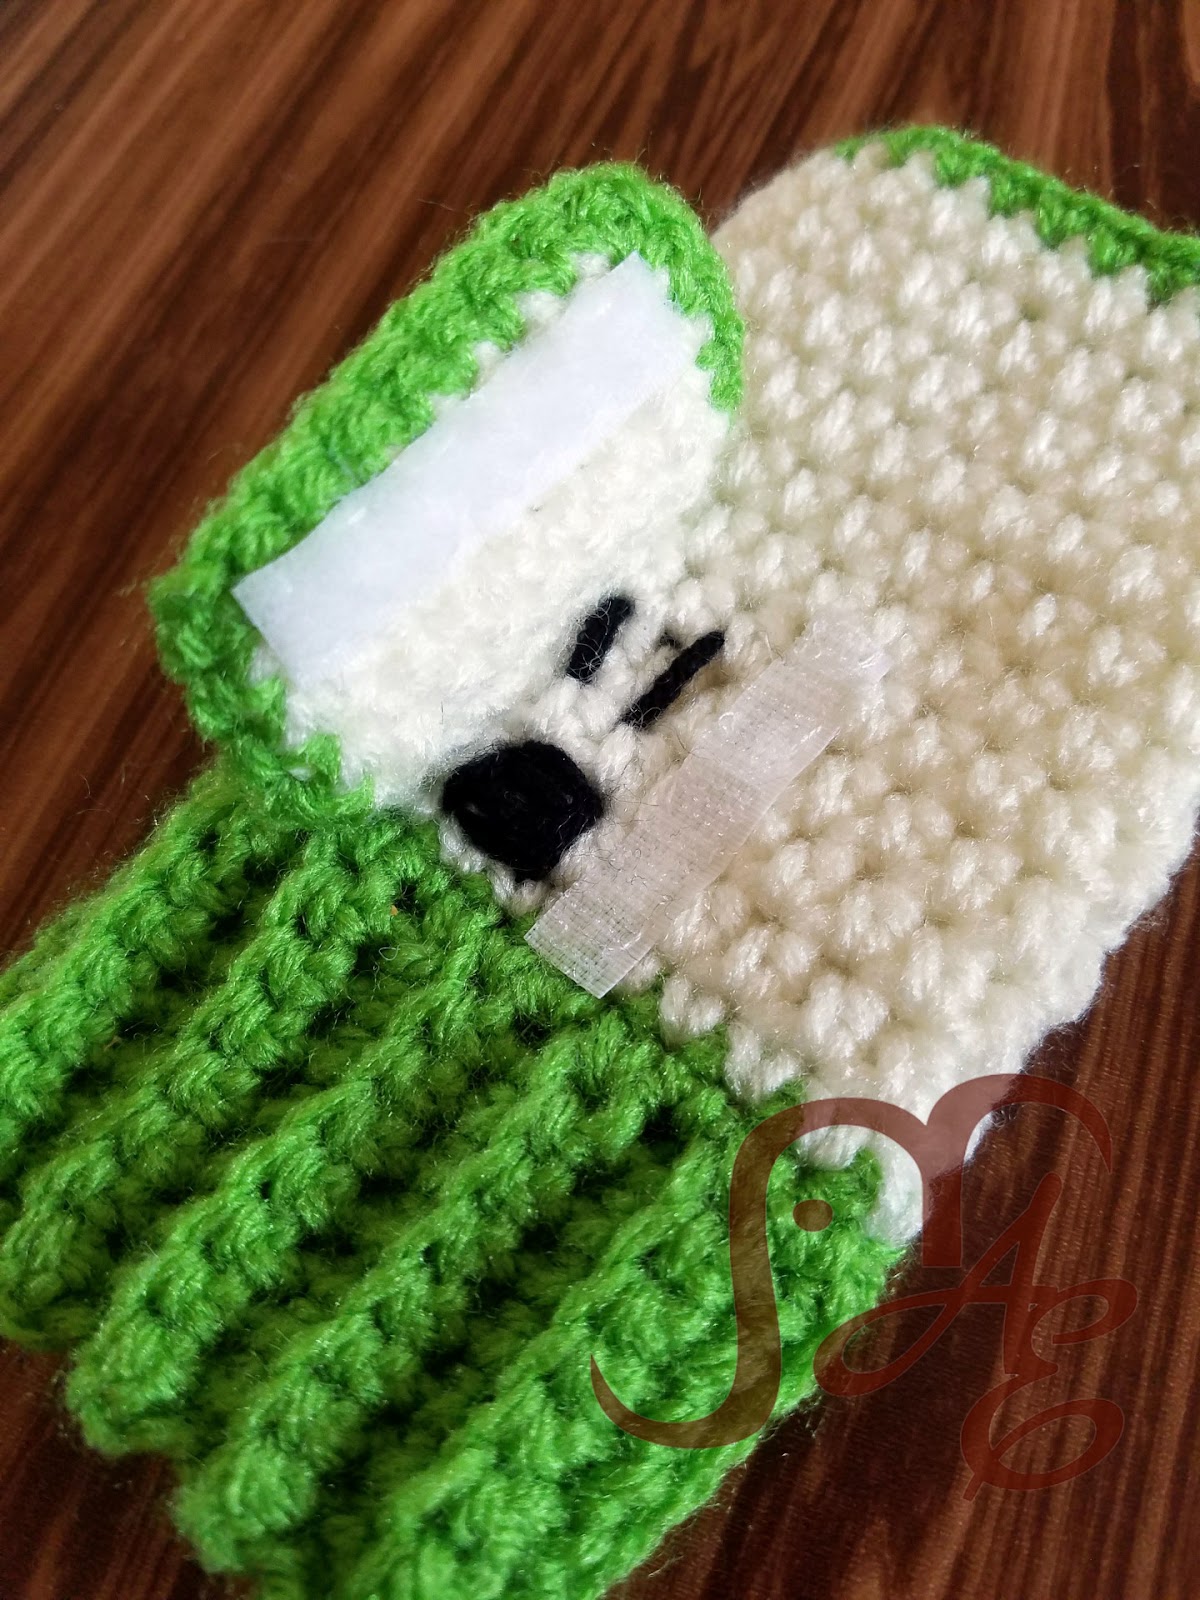
Once you have the flap on you can decide if you want to stitch some control buttons on under the flap. I just make a couple of lines and a little square with black yarn but you can leave it alone or make your own combo of shapes.
There you go! Your little Space Ranger is ready to save the Universe from the forces of Evil!