
This post may contain affiliate links. If you use these links to buy something I may earn a small commission at no cost to you. Thanks.
…
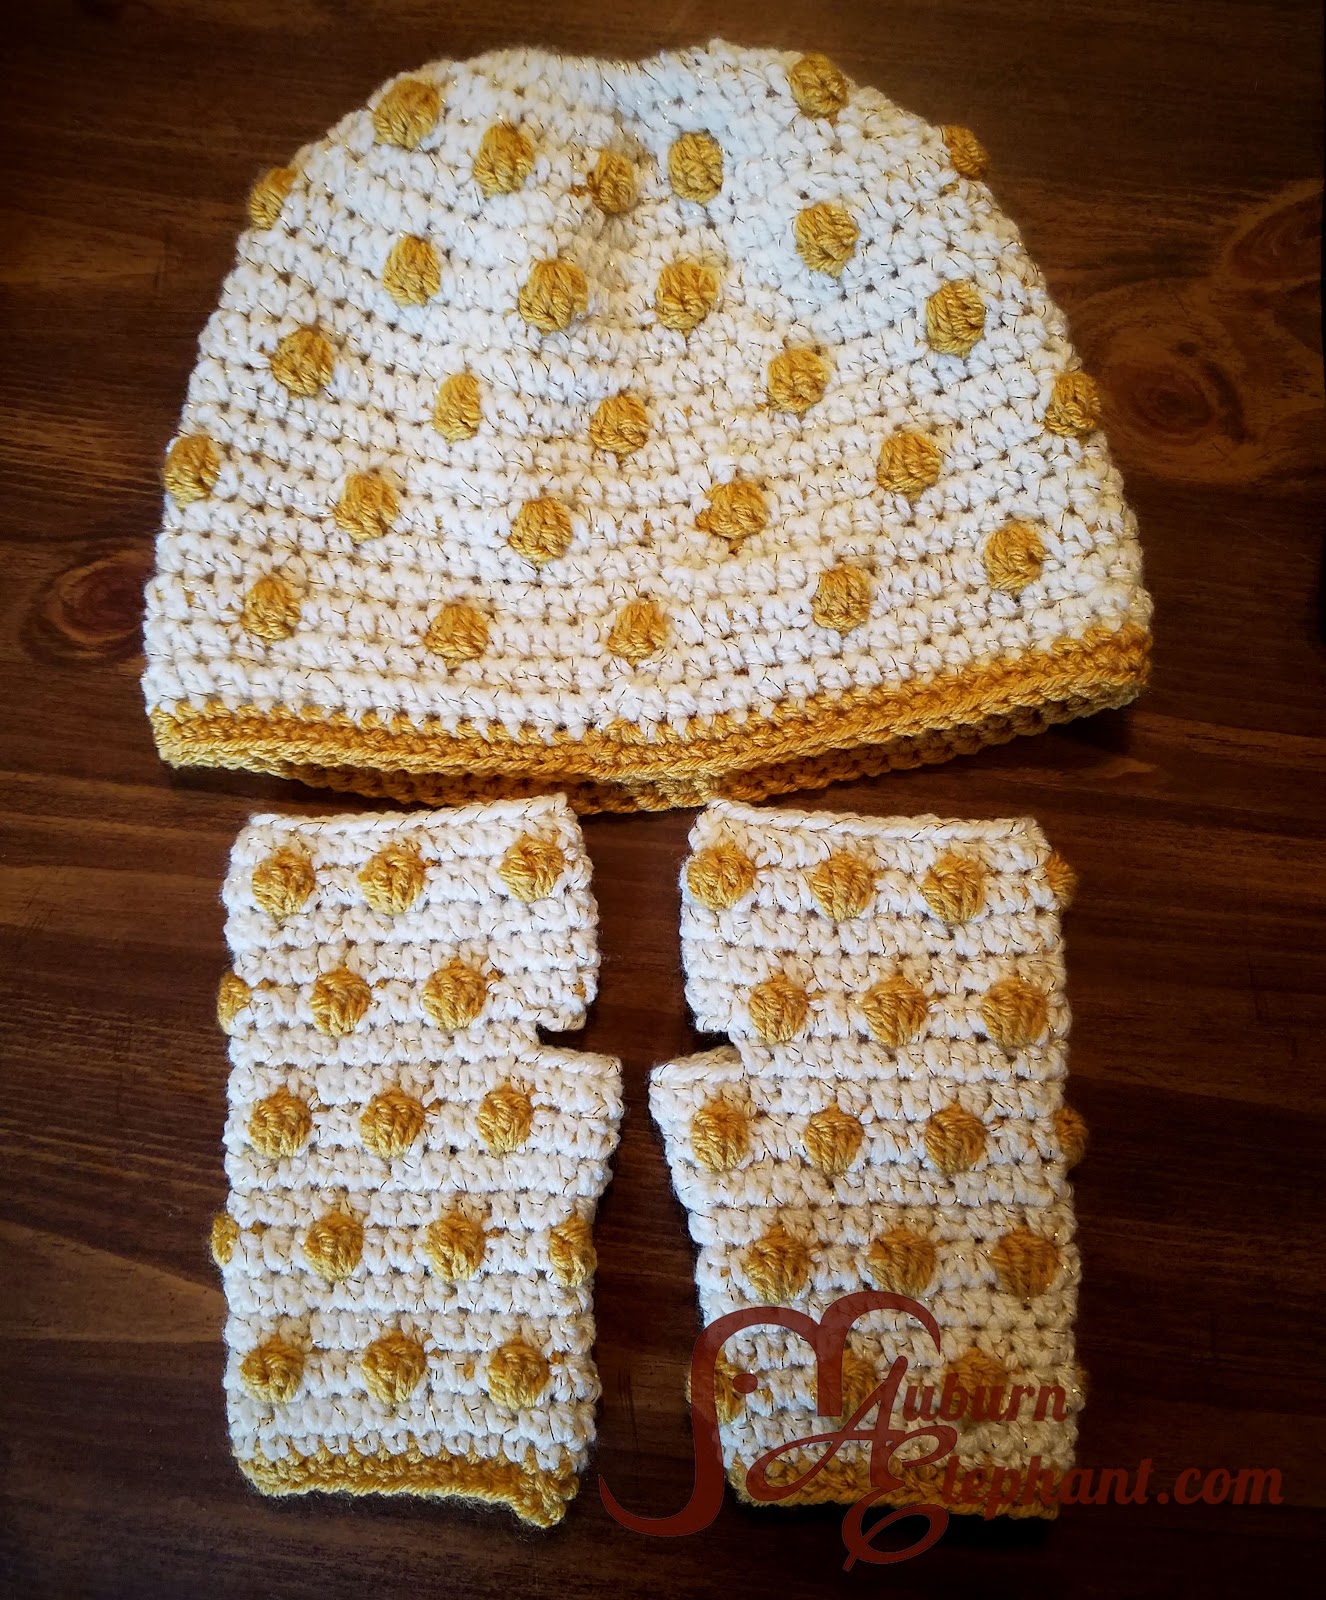
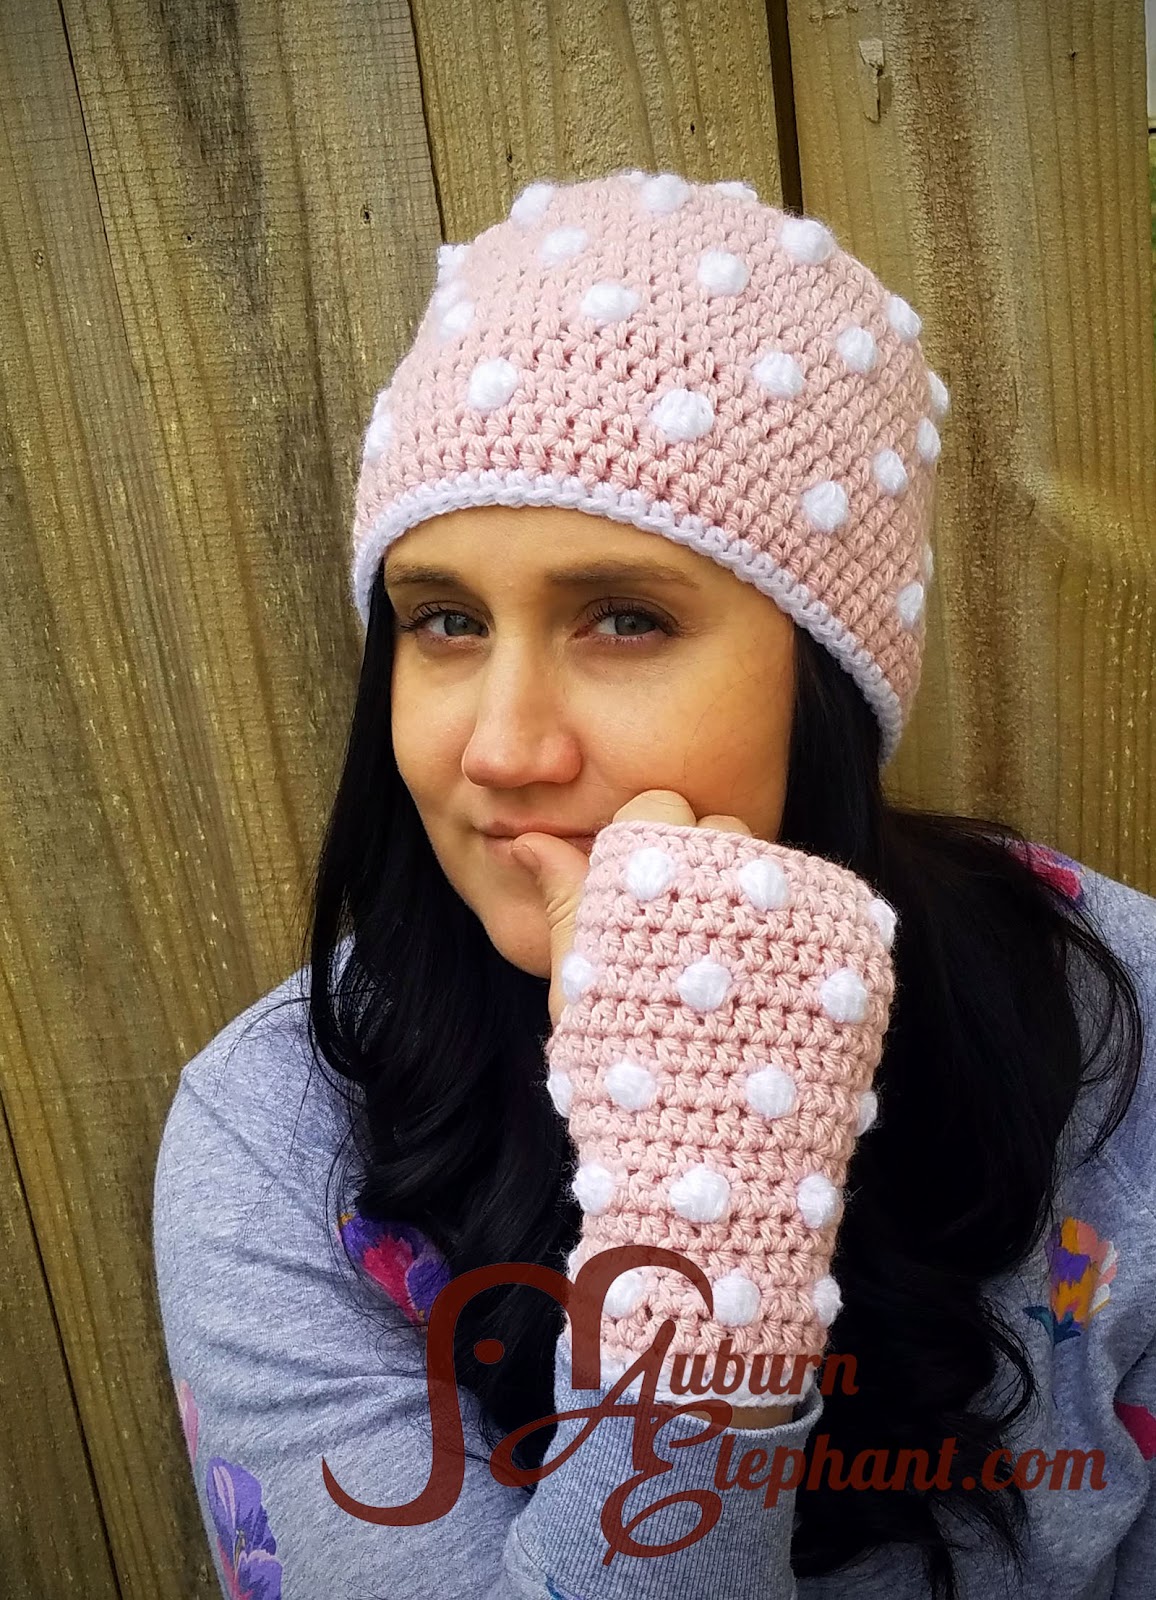
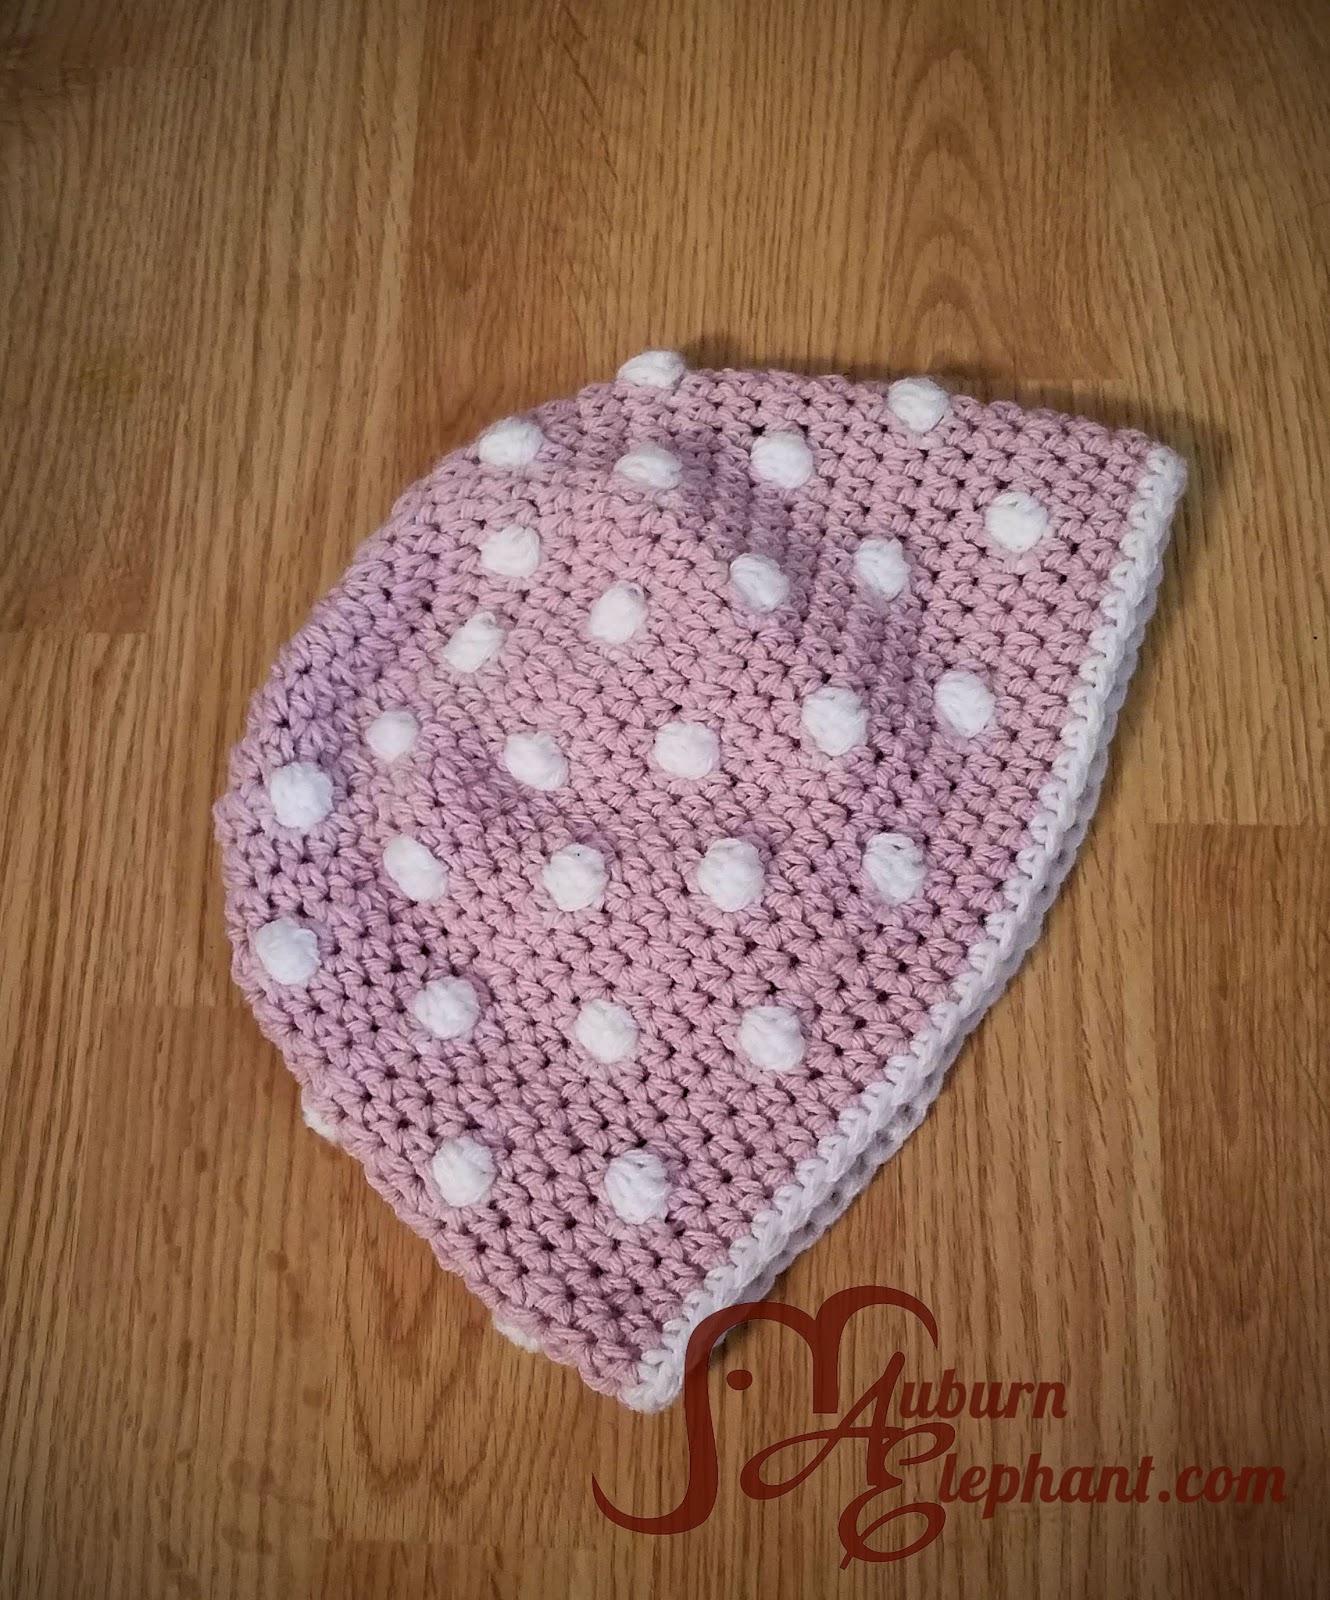
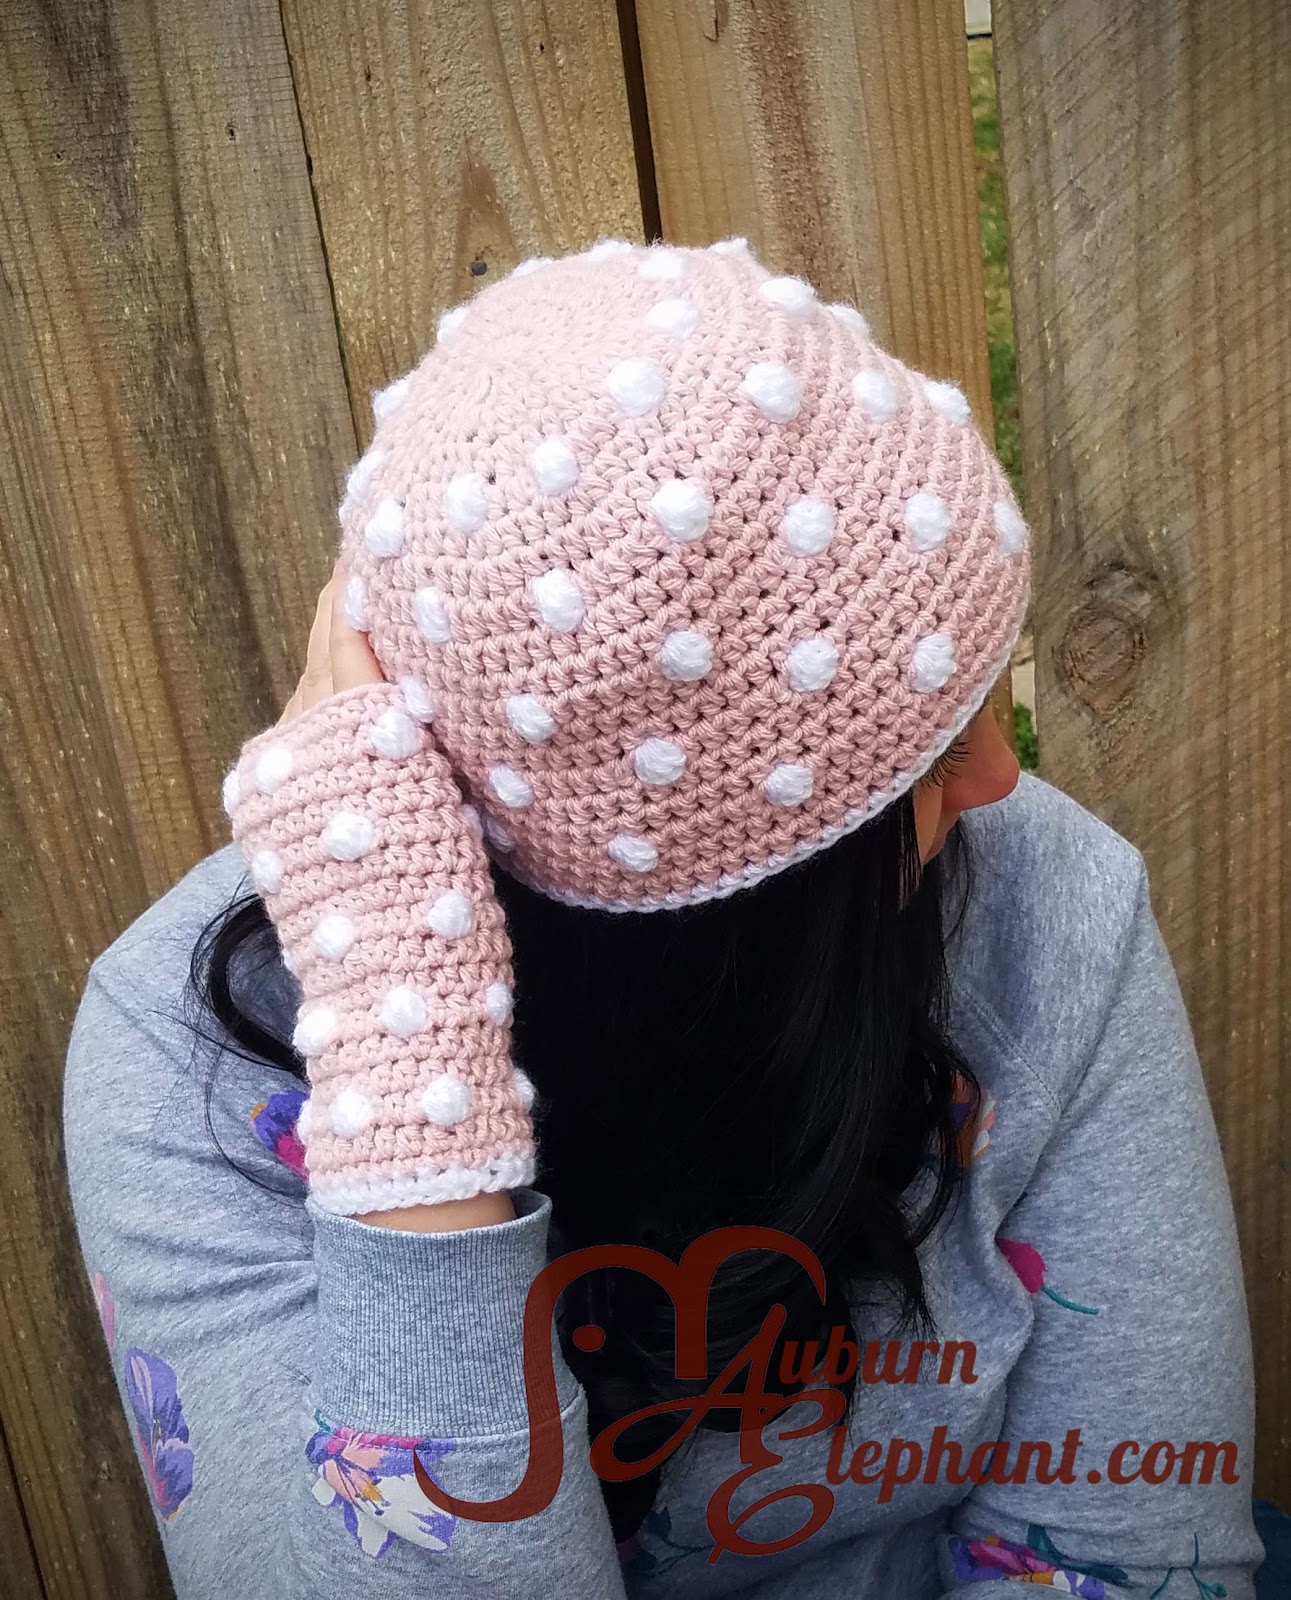
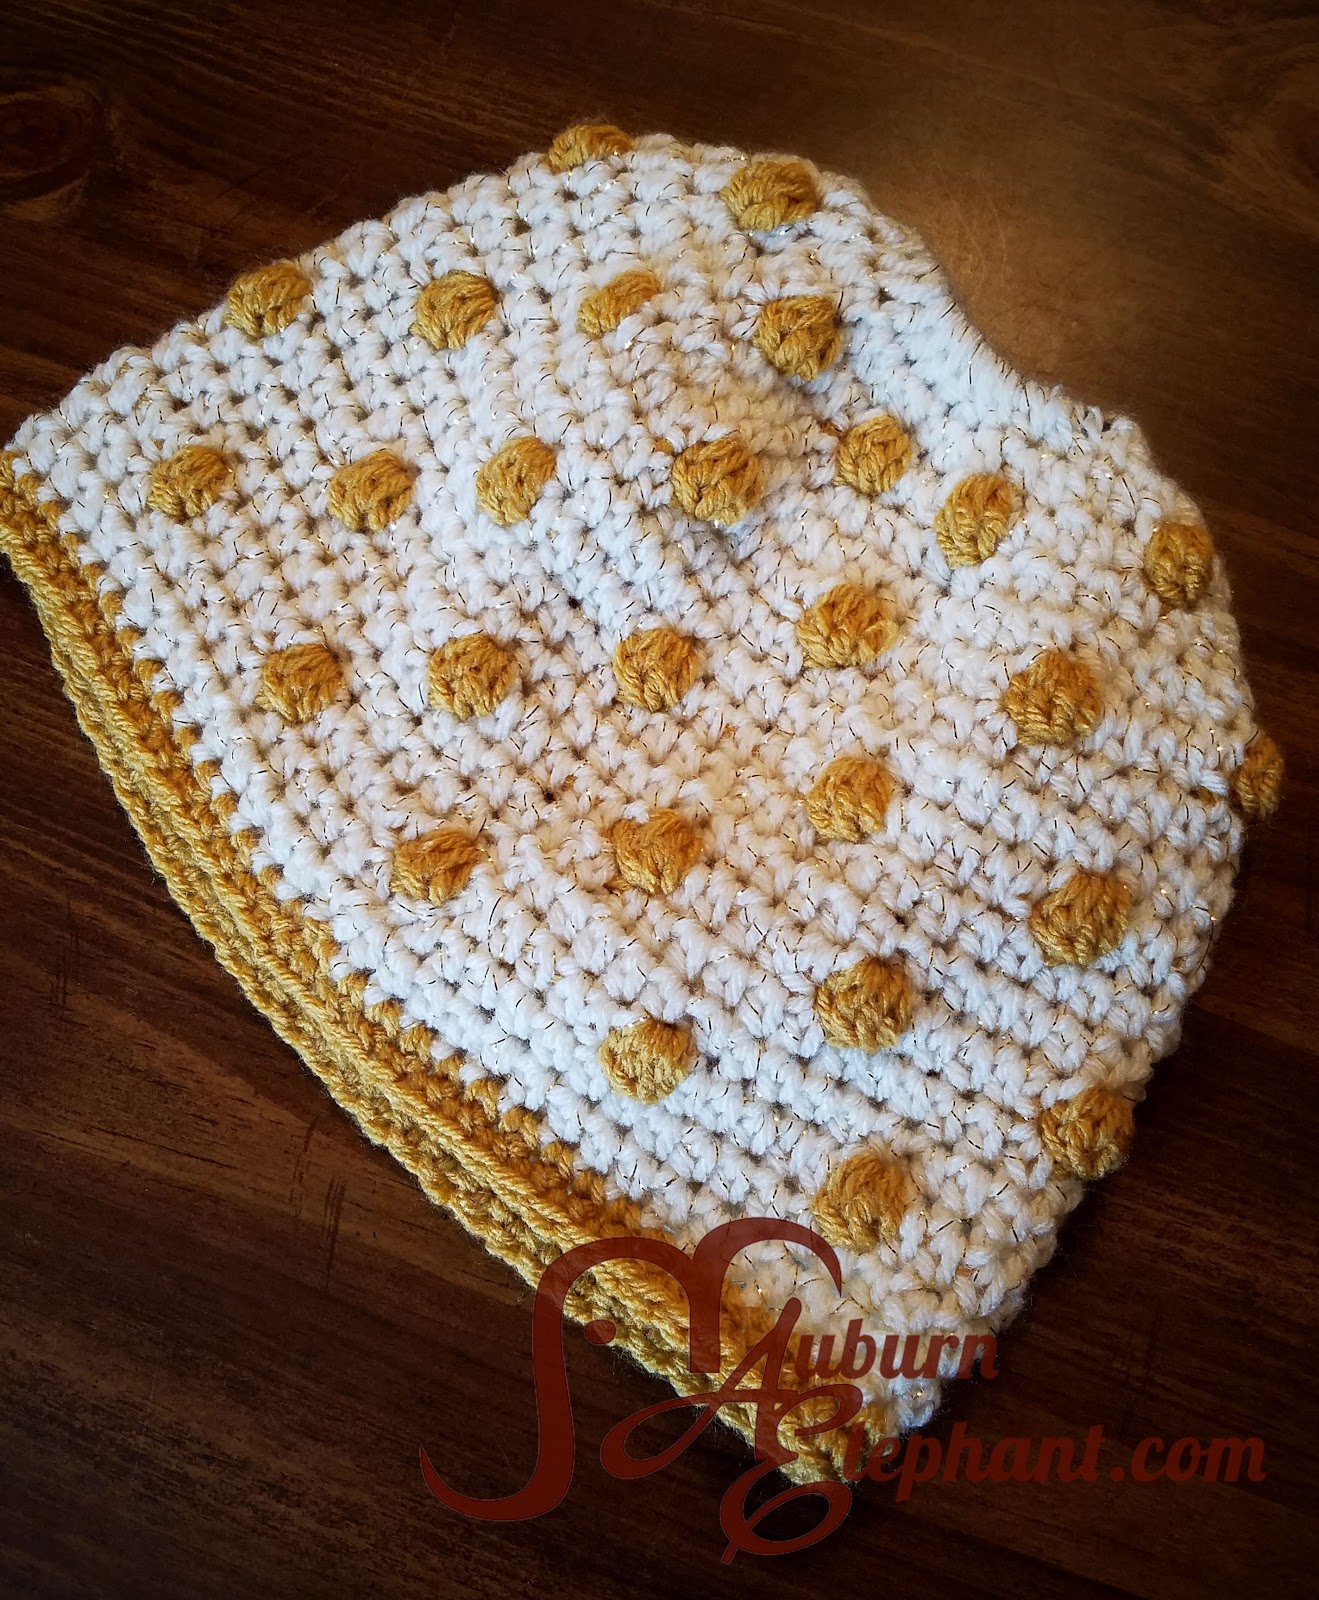
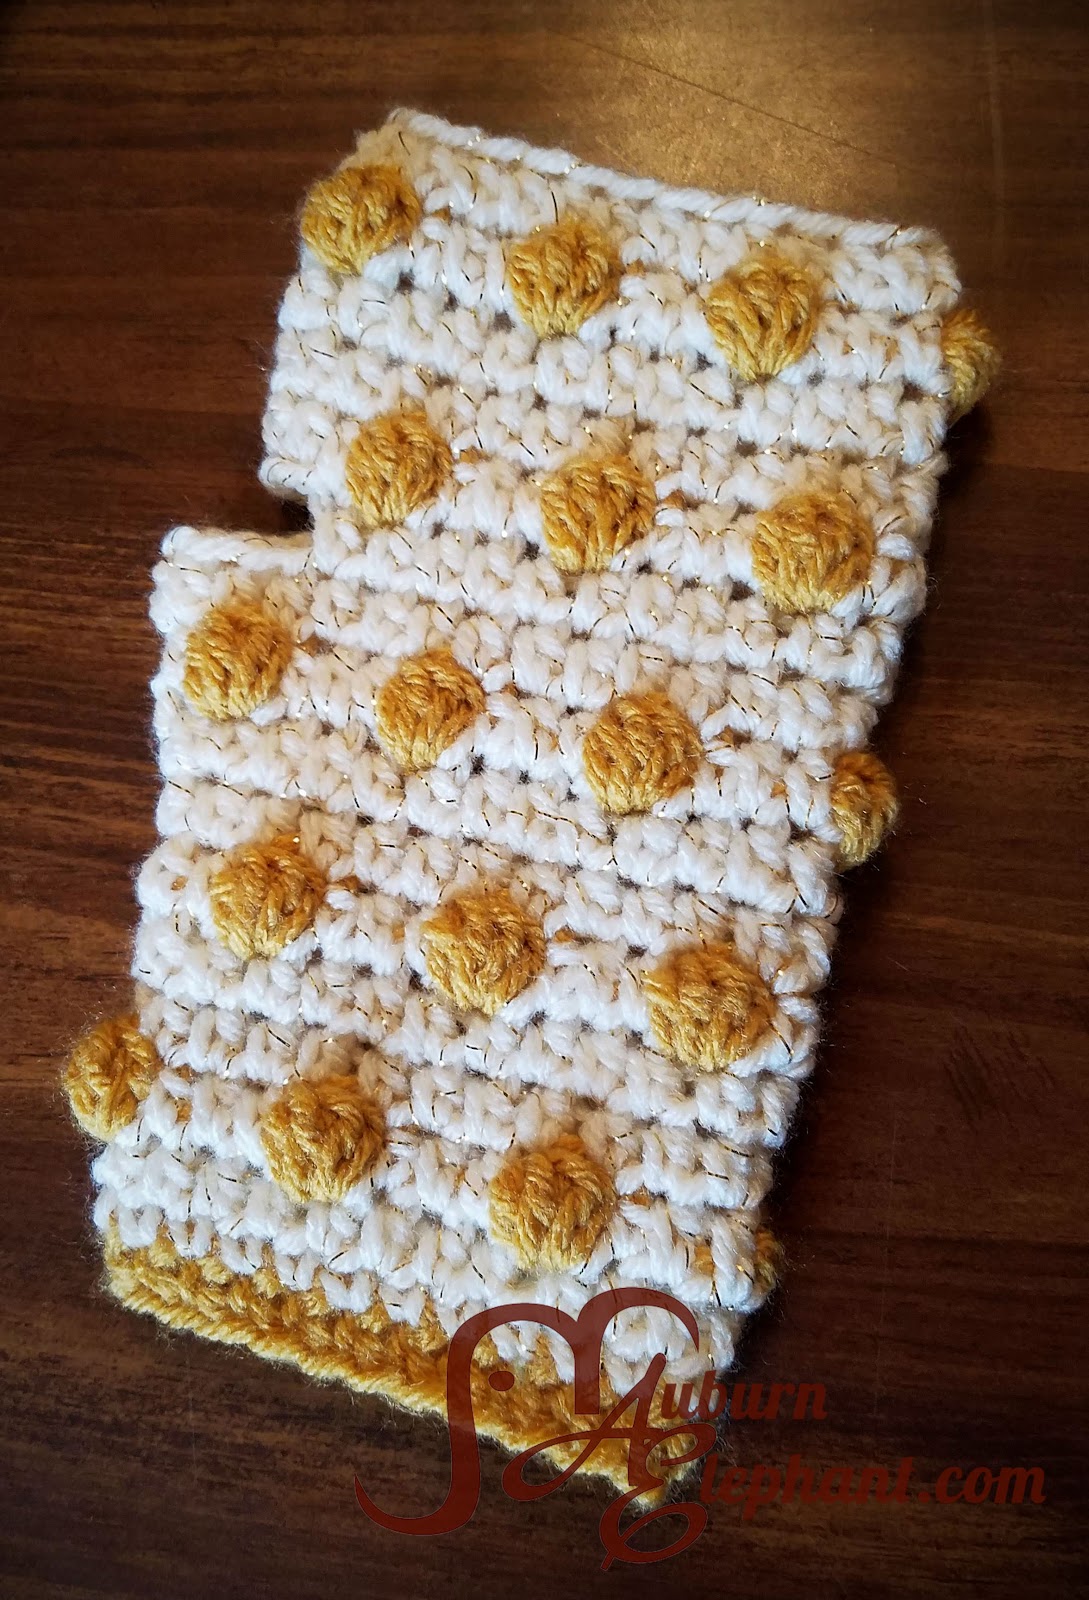
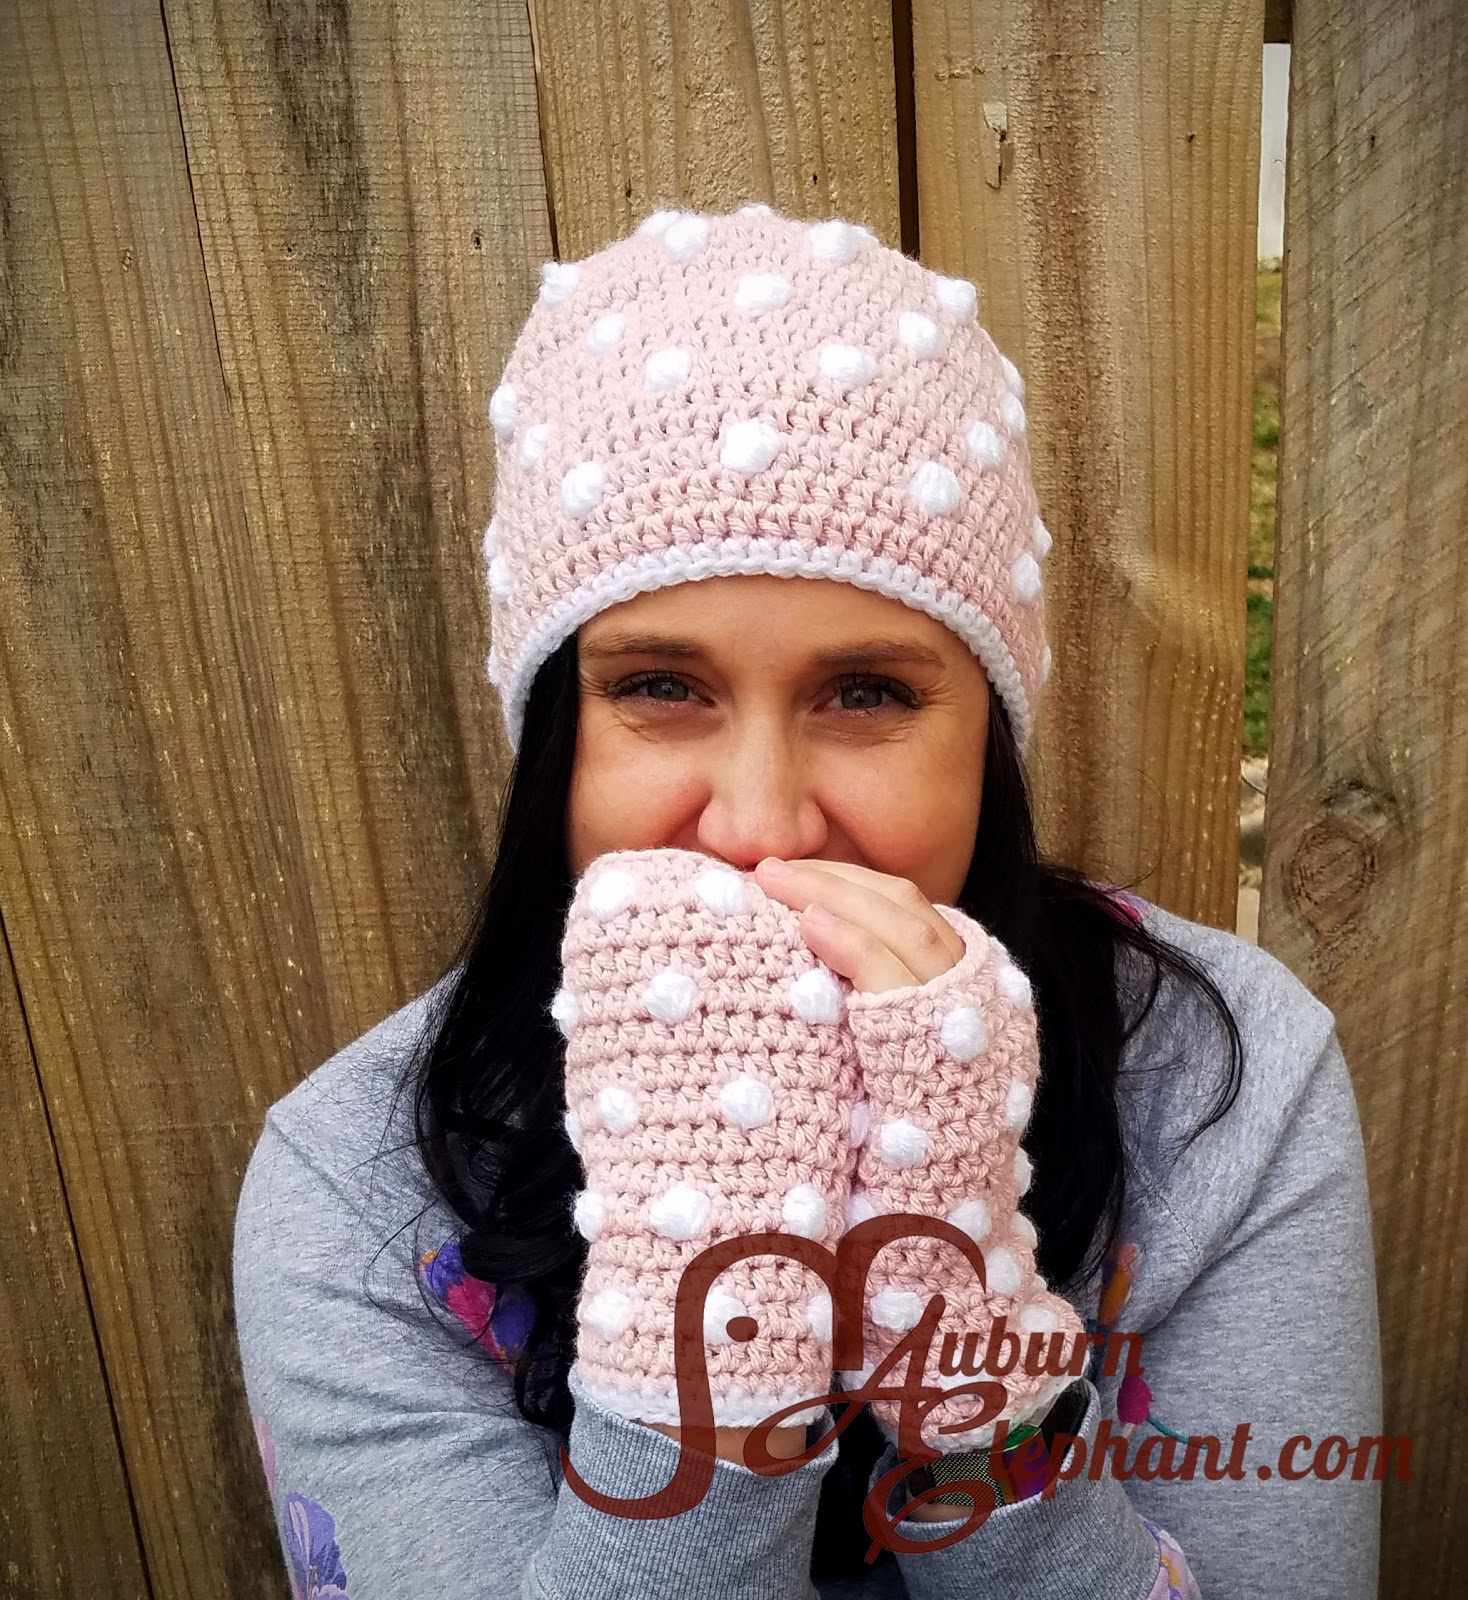
This pattern combines two of my favorite things: Polka Dots and Bobbles! I don’t know what it is about either that I love so much but I do! I think the polka dots are just fun and bobbles are so versatile! I use them for so many different types of projects. They add texture and definition and in this case dots!
My original design for these were the Ponytail/Messy Bun style by request. There’s a note about how to modify the pattern to fit that style but it is mainly written as a beanie style hat.

A couple of disclaimers: This pattern is intended for personal use only. You are welcome to use the pattern to make and sell products, to keep for yourself, or to give away as gifts. I would appreciate receiving credit and a link back to the site, however. Please do not republish or distribute the pattern in any way, or use my photos in your listings.
I am not a robot, so if you find any typos, errors, or places that need clarification, please let me know so that I can fix my mistakes or explain things differently. 🙂
I hope you enjoy this crochet pattern. If you have any questions or comments you can leave them below OR email me at auburnelephant@gmail.com OR through the contact page on this site. I’d also love to see your finished creations! 🙂
You can now purchase a Printable, Ad-Free, PDF-version of these patterns from Ravelry HERE!
Some Notes for both patterns:
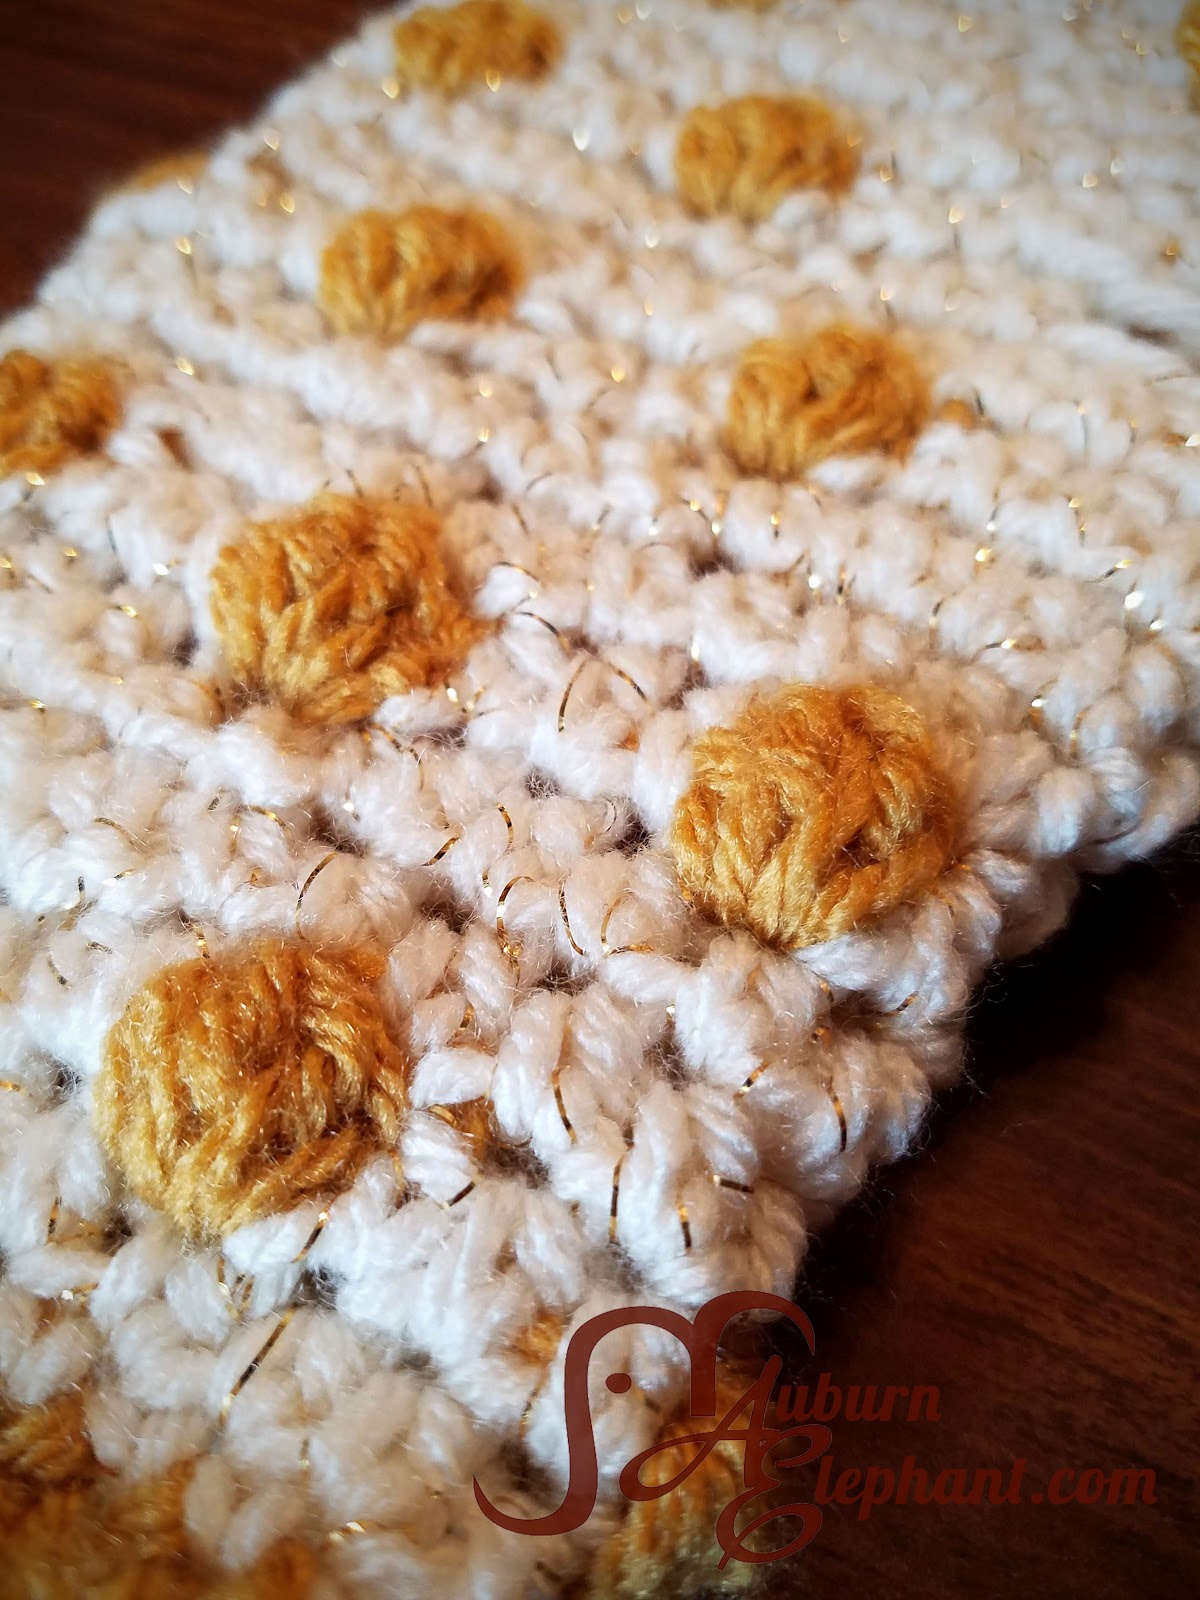
These patterns use the bobble stitch to make the dots. In general, Bobbles should be worked on the wrong side since they tend to stand out on the side away from you. I prefer to work hats and gloves with the right sides facing me so all I do is push the bobbles out toward me (the right side) with my finger as I am pulling the last stitch through.
You may notice some seemingly random spacing between bobbles, especially on the glove pattern. This is to try and keep the Bobbles staggered. If yours are not, you can adjust this by adding or subtracting HDC stitches from in between the Bobbles, just be sure to end with the correct totals at the end of each round.
For the color changes, you will want to do the last step of the stitch before a Bobble in the Bobble color. So since they are HDC you will do: In main color A- Yarn Over (YO), Insert hook into stitch, YO, Pull Through, YO in Color B, Pull Through 3 loops. Now you will have your accent color on your hook. Begin the Bobble with Color B, *YO, Insert into stitch, YO, Pull through, YO, Pull Through 2 Loops* (2 Loops on Hook) Repeat from * to * until there are 5 loops on your hook. YO with Color A and Pull through all 5 Loops. Bobble complete and Color Changed.
Hat
Supplies
I Love This Yarn, Medium Worsted Weight 4 (100% Acrylic, 355 yds, 7 oz) 2 colors, 1 skein of each
I/9 5.5mm Hook
Needle to weave in ends
Stitches/Terms
Ch- Chain
Sl st- slip stitch
SC- Single Crochet
HDC- Half Double Crochet
Bobble- *Yarn Over (YO), Insert into next stitch, YO, Pull through, YO, Pull Through 2 Loops* (2 Loops on Hook) Repeat from * to * until there are 5 loops on your hook. YO and Pull through all 5 Loops
Hat Notes:
Hat is worked in continuous rounds, mark beginning of rounds with a stitch marker or scrap piece of yarn.
In Color A
1) Using the Magic Ring technique (OR Ch 3 and join with a sl st to first ch to form a loop) HDC 11. (11)
2) 2HDC in each around. (22)
3) *HDC in next, 2HDC* Repeat from * to * around. (33)
4) *HDC in next 2, 2HDC* Repeat from * to * around. (44)
5) HDC in next 2, *Bobble in Color B, HDC in next 3* Repeat from * to * around, HDC in last. (11 Bobbles, 33 HDC)
6) *HDC in next 3, 2HDC* Repeat from * to * around. (55)
7) *HDC in next 4, 2HDC* Repeat from * to * around. (66)
8) HDC in next 2, Bobble, *HDC in next 5, Bobble* Repeat from * to * around. HDC in last 3. (11 Bobbles, 55 HDC)
9-10) HDC in each around. (66)
11) HDC, Bobble, *HDC in next 5, Bobble* Repeat from * to * around. HDC in last 4. (11 Bobbles, 55 HDC)
12-13) HDC in each around. (66)
14) *Bobble, HDC in next 5* Repeat from * to * around. (11 Bobbles, 55 HDC)
15-16) HDC in each around. (66)
17) *HDC in next 5, Bobble* Repeat from * to * around. (11 Bobbles, 55 HDC)
18-19) HDC in each around. (66)
20) HDC, SC, sl st (change to color B) Ch 1, SC in each around. SC past stitch marker to start of color B. Sl st to 1st SC in Color B to join. Finish off. Weave in ends.
Ponytail Hat Option!!
To make this hat with an opening for a ponytail (or messy bun) you’ll need a basic hair tie. I prefer using the hair tie because it gives you more stretch. You can buy one in a color that matches the yarn you’ll use for the hat, or one that matches your hair color, or just use whichever one you happen to have on your wrist. To start, put a slip knot on your hook, then chain 2 around the hair tie. Continuing to go around the hair tie, do 33 HDC in color A. From there follow the pattern above starting on Round 4.
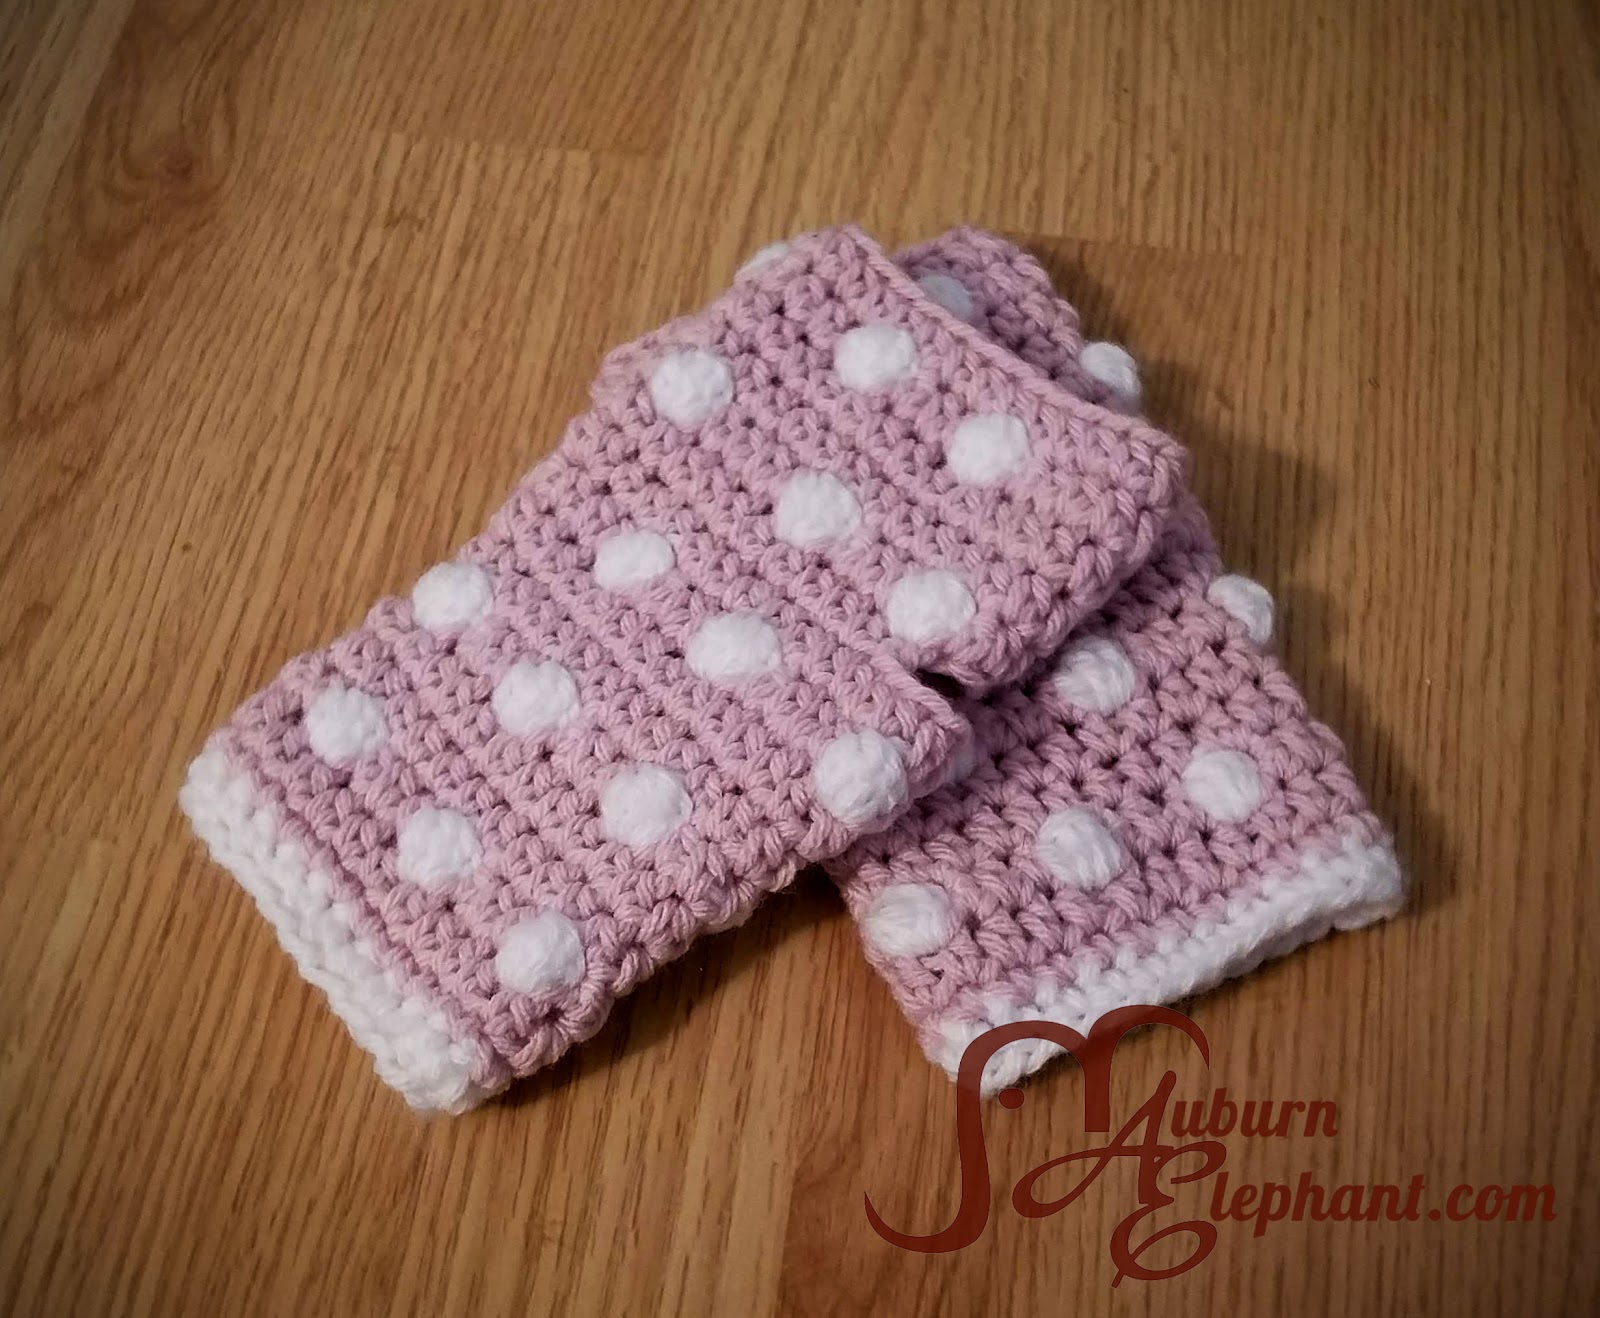
Gloves
Supplies
I Love This Yarn, Medium Worsted Weight 4 (100% Acrylic, 355 yds, 7 oz) 2 colors, 1 skein of each
H/8 5.0mm Hook
Needle to weave in ends
Stitches/Terms
Ch- Chain
Sl st- Slip Stitch
SC- Single Crochet
HDC- Half Double Crochet
Bobble- Bobble Stitches *Yarn Over (YO), Insert into next stitch, YO, Pull through, YO, Pull Through 2 Loops* (2 Loops on Hook) Repeat from * to * until there are 5 loops on your hook. YO and Pull through all 5 Loops
Glove notes:
The gloves are worked in joined rounds. Each round will begin with a Ch 1 and end with a sl st to the first stitch of the round.
In Color B (if using the same colors as for the Hat)
Ch 24, join with a sl st to form a circle
1) SC in each around. (24)
In Color A
2) SC in each around. (24)
3) HDC in each around. (24)
4) HDC, *Bobble, HDC in next 3* Repeat from * to * around. HDC in last 2. (18 HDC, 6 Bobbles)
5-6) HDC in each around. (24)
7) *Bobble, HDC 3* Repeat from * to * around. (18 HDC, 6 Bobbles)
8) HDC in next 5, 2HDC, HDC in next 11, 2HDC, HDC in next 6. (26)
9) HDC in next 6, 2HDC, HDC in next 12, 2HDC, HDC in next 6. (28)
10) *HDC in next 4, Bobble* Repeat from * to * 2 more times (3 total Bobbles), HDC in next 3, Bobble, HDC in next 4, Bobble, HDC in next 3, Bobble. (6 Bobbles, 22 HDC)
11) HDC in next 7, 2HDC, HDC in next 14, 2HDC, HDC in remaining 5. (30)
From here on follow steps for Left side or Right Side
Left 12) HDC in next 6, Ch 5, Skip 8, HDC in remaining 16. (22 HDC, 5 Chains, 8 skipped)
Left 13) HDC in next 3, Bobble, HDC in next 8, Bobble, HDC in next 3, Bobble, HDC in next 4, Bobble, HDC in next 4, Bobble in last. (5 Bobbles, 22 HDC)
Left 14-15) HDC in each around. (27)
Left 16) HDC in next 3, Bobble, HDC in next 5, Bobble, HDC in next 6, Bobble, HDC in next 3, Bobble, HDC in next 4, Bobble, HDC in last. (5 Bobbles, 22 HDC)
Left 17) HDC in each around. (27)
Finish Off, weave in ends.
Right 12) HDC 20, Ch 5, Skip 8, HDC in remaining 2. (22 HDC, 5 Chains, 8 skipped)
Right 13) HDC in next 3, Bobble, HDC in next 5, Bobble, HDC in next 4, Bobble, HDC in next 4, Bobble, HDC in next 6, Bobble in last. (22 HDC, 5 Bobbles)
Right 14-15) HDC in each around. (27)
Right 16) HDC in next 2, Bobble, HDC in next 5, Bobble, HDC in next 5, Bobble, HDC in next 3, Bobble, HDC in next 4, Bobble, HDC in last 3. (22 HDC, 5 Bobbles)
Right 17) HDC in each around. (27)
Finish Off, weave in ends.
Special Shout Out to my 7-year-old for taking such awesome photos of this uncooperative model! 😉
