
This post may contain affiliate links. If you use these links to buy something I may earn a small commission at no cost to you. Thanks.
…
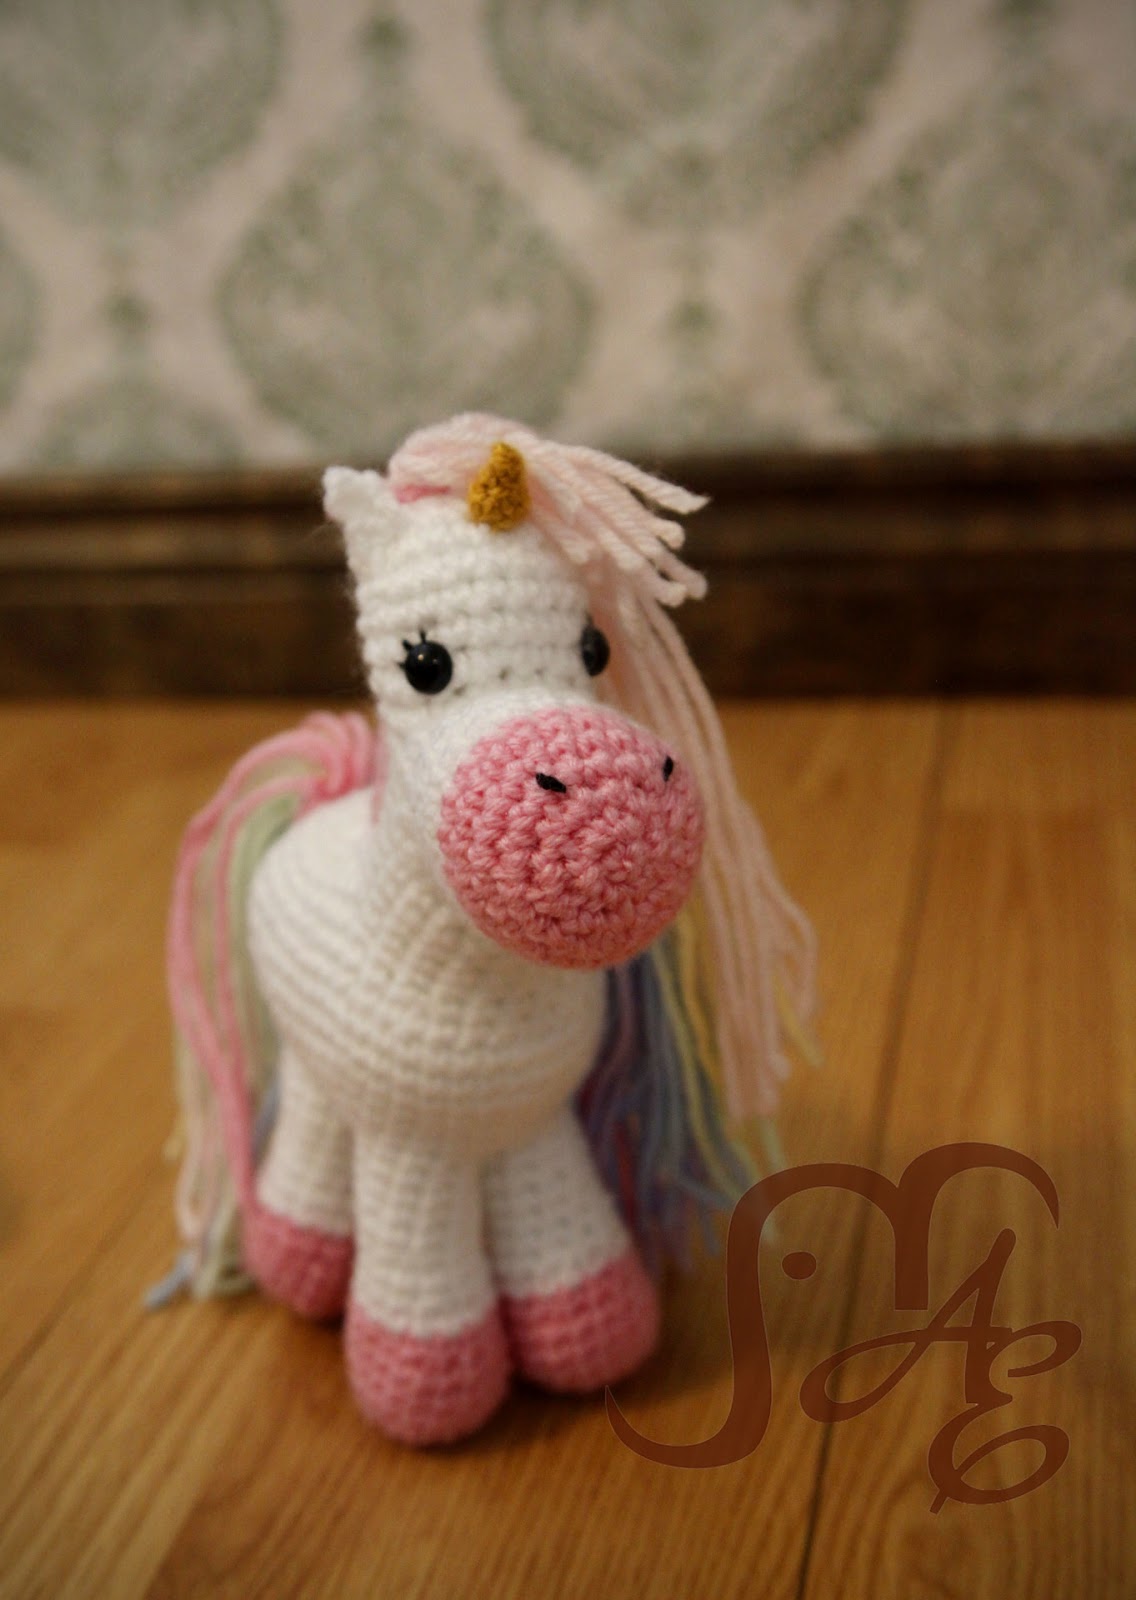
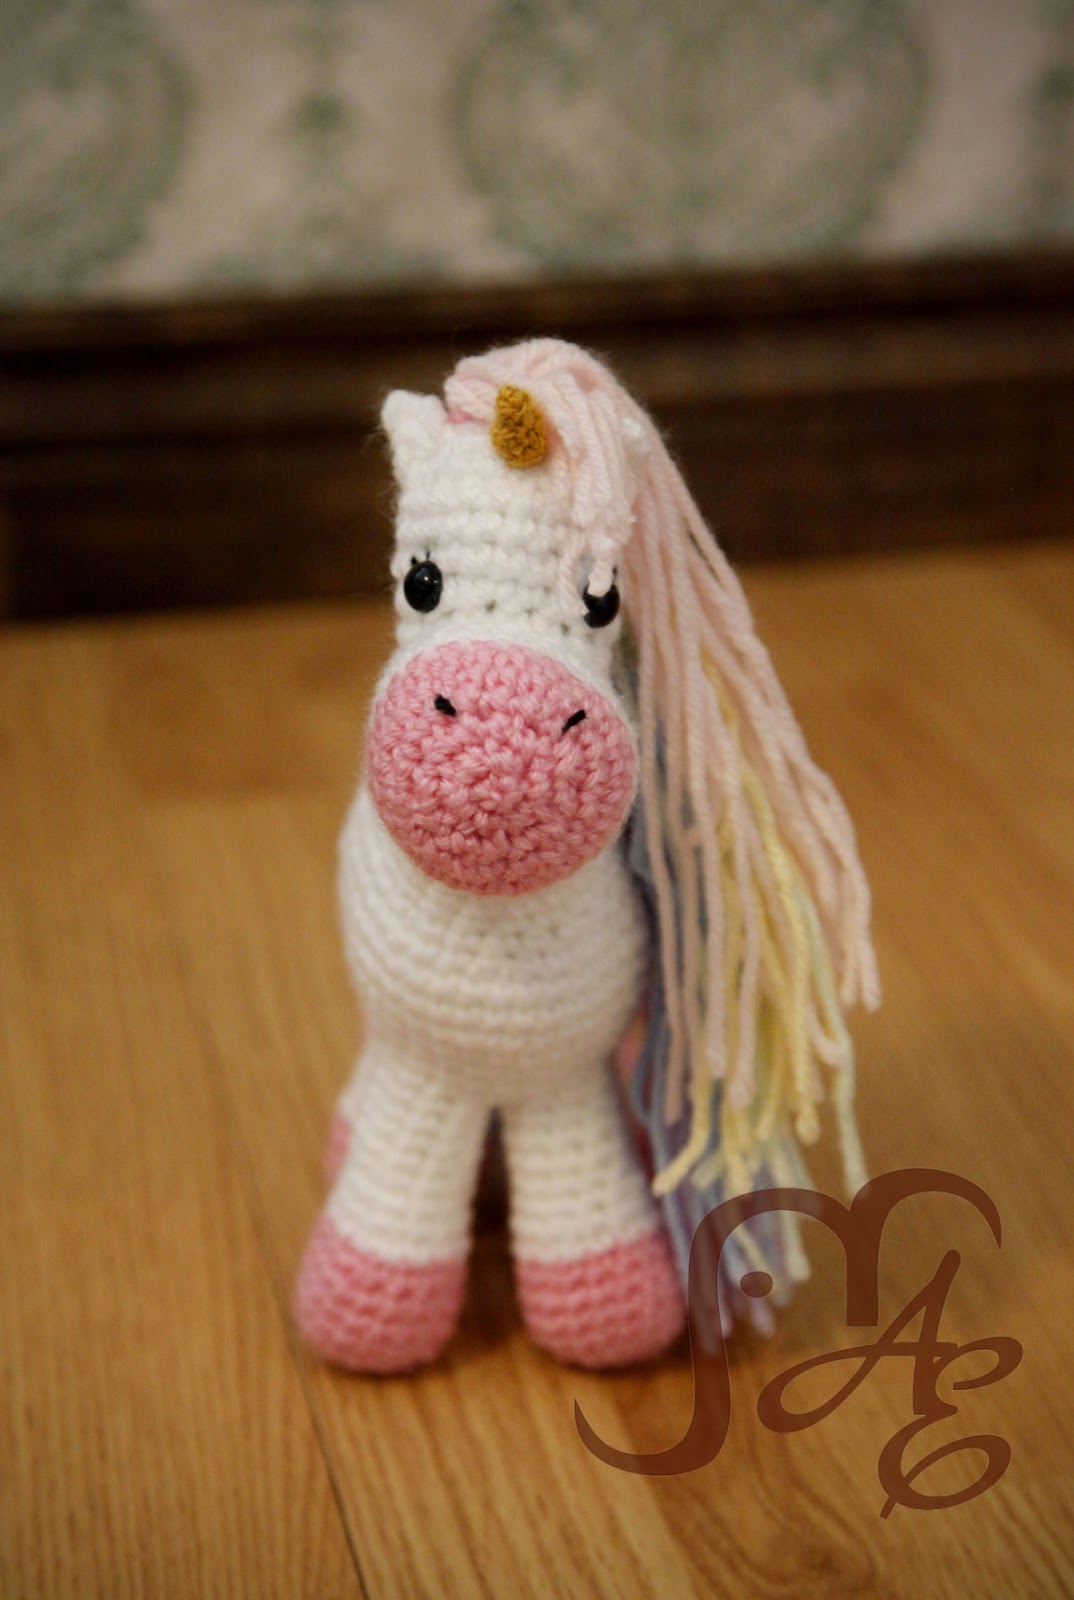
After I finished working up the Unicorn Photo Set, I couldn’t resist creating a little Unicorn Plush to go along with it! I think she came out super cute! With my amigurumi you’ll find that I try to make them as much one piece as possible. The first few dolls I made were Ninja Turtles from a pattern I found on Pinterest. They were really cute but there were SOOO many pieces. And after a couple of weeks in the hands of my toddlers they were already starting to loosen. I am aware that this could be solely based on my sewing on skills but even done well I feel like those sewn on pieces are more prone to coming apart.
I made a few other superhero dolls after that. They also had lots of individual pieces that had to be attached. They also didn’t stay solidly together for that long. If they were going to be shelf sitters there would be no problem. But when your 3-year-old drags Captain America around by his arm and swings him around like nunchucks he’s more than likely going to come apart. I realized that this was going to be an issue so I decided to figure out a way to crochet all the pieces together rather than having to sew them on. So far it has been working out to do them this way and I haven’t had any of them come apart yet! Doll patterns are in the works as well so check back for those!
If you are interested in making this cute Rainbow Unicorn set for a magical baby in your life you can find all the patterns here!

UPDATE (3/25/2018): It was pointed out to me this pattern had some issues. I’ve fixed the stitch counts and added some extra photos and explanations. The PDF download links at the bottom were also updated. I hope this works much better for everyone now. Thanks!!!

A couple of disclaimers: This pattern is intended for personal use only. You are welcome to use the pattern to make and sell products, to keep for yourself, or to give away as gifts. I would appreciate receiving credit and a link back to the site, however. Please do not republish or distribute the pattern in any way, or use my photos in your listings.
I am not a robot, so if you find any typos, errors, or places that need clarification, please let me know so that I can fix my mistakes or explain things differently. 🙂
I hope you enjoy this crochet pattern. If you have any questions or comments you can leave them below OR email me at auburnelephant@gmail.com OR through the contact page on this site. I’d also love to see your finished creations! 🙂
Unicorn Plush
Supplies Needed:
Worsted Weight Yarn
G/6 4.25mm Hook
Tapestry Needle for weaving ends
10mm Safety Eyes
Polyfil Stuffing
Stitches Used:
2SC- Single Crochet Increase. Do 2 SC in the same stitch.
DEC- SC DEC- SC Decrease- Single Crochet 2 stitches together. I like to use an invisible decrease. (Photo steps below) Insert hook up through the front loop of the next 2 stitches, Yarn Over, Pull through both front loops, Yarn over, pull through to finish the single crochet.
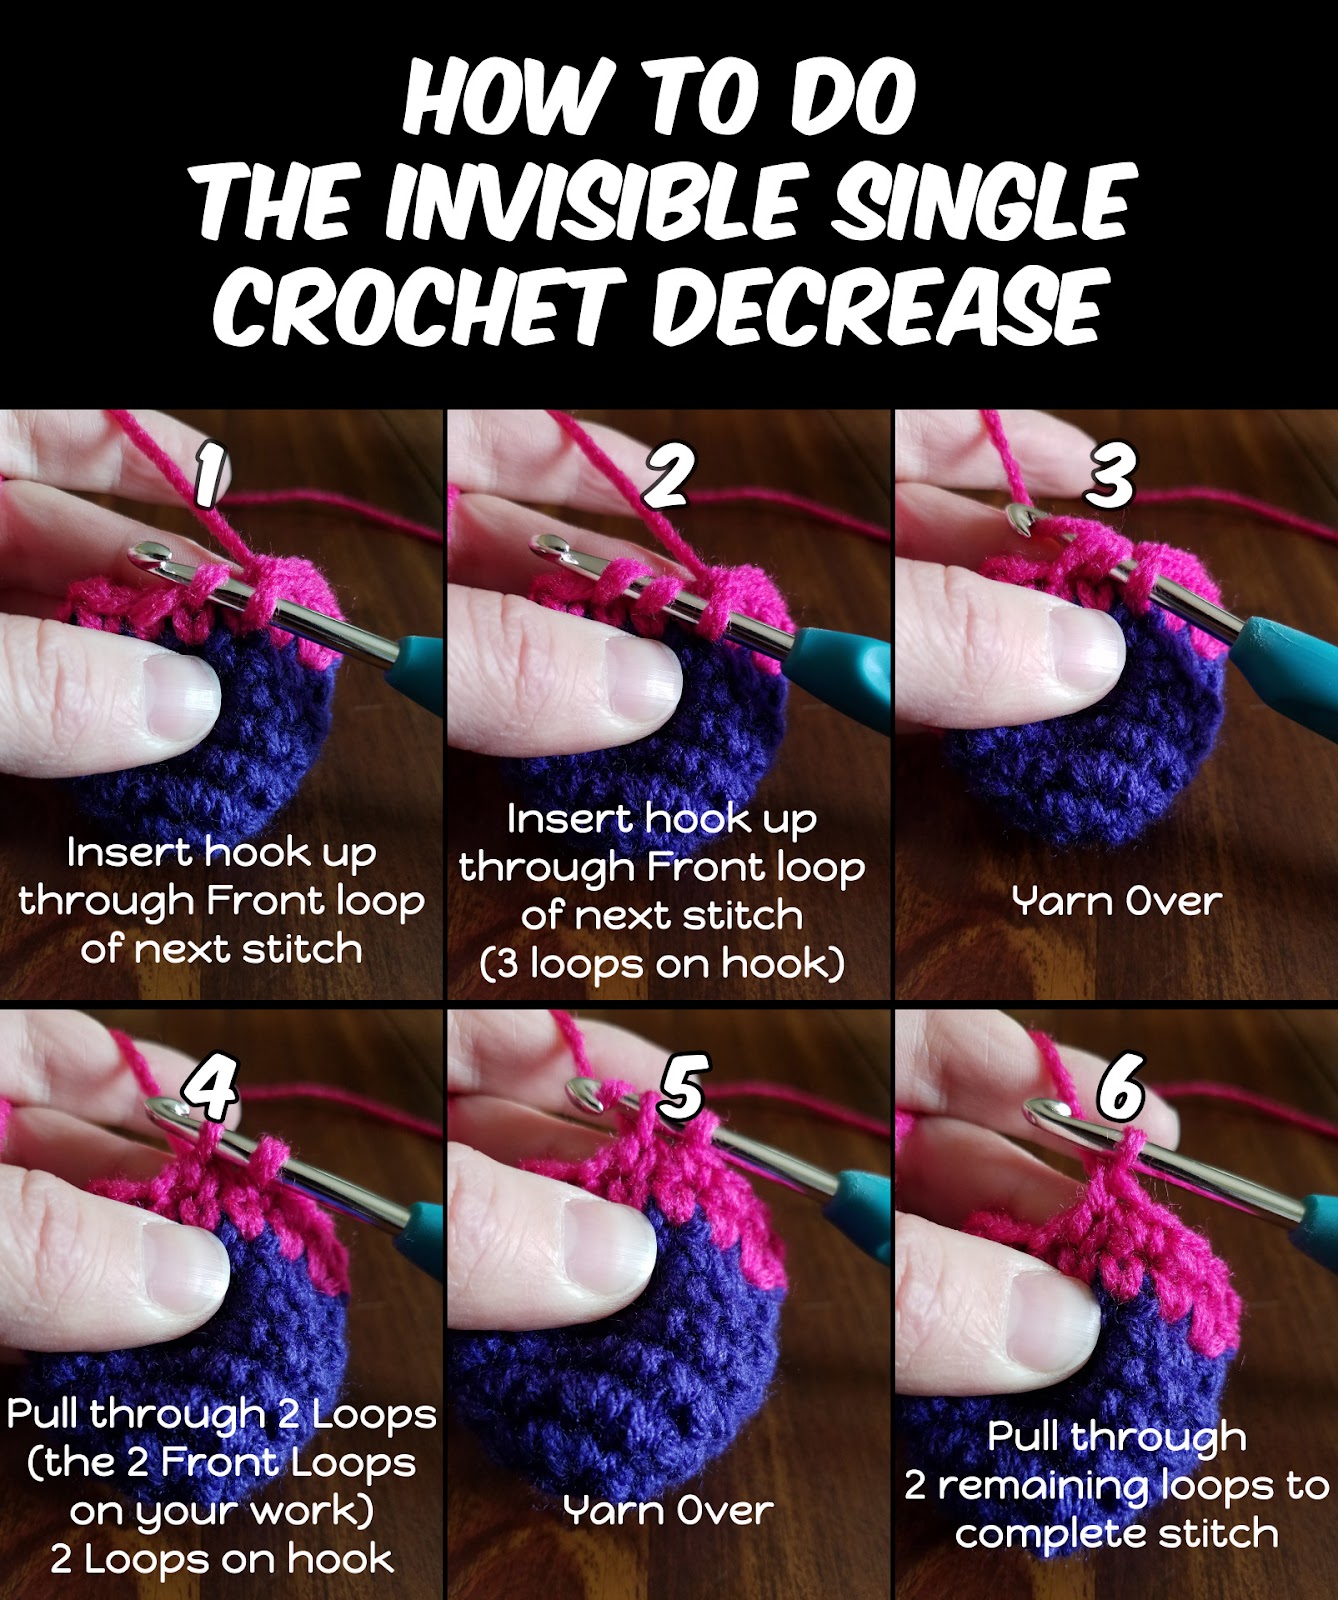
SC3TOG- SC 3 stitches together. SC Decrease over next 3 stitches. You can use the same “invisible” technique as above, just go through the next 3 Front Loops.
Loop Stitch (optional)- Insert hook into stitch, wrap yarn around your finger (or for a long loop-something that you can pull against), yarn over the bottom of the loop, pull through, yarn over, pull through both loops. Watch for a video and photo tutorial.
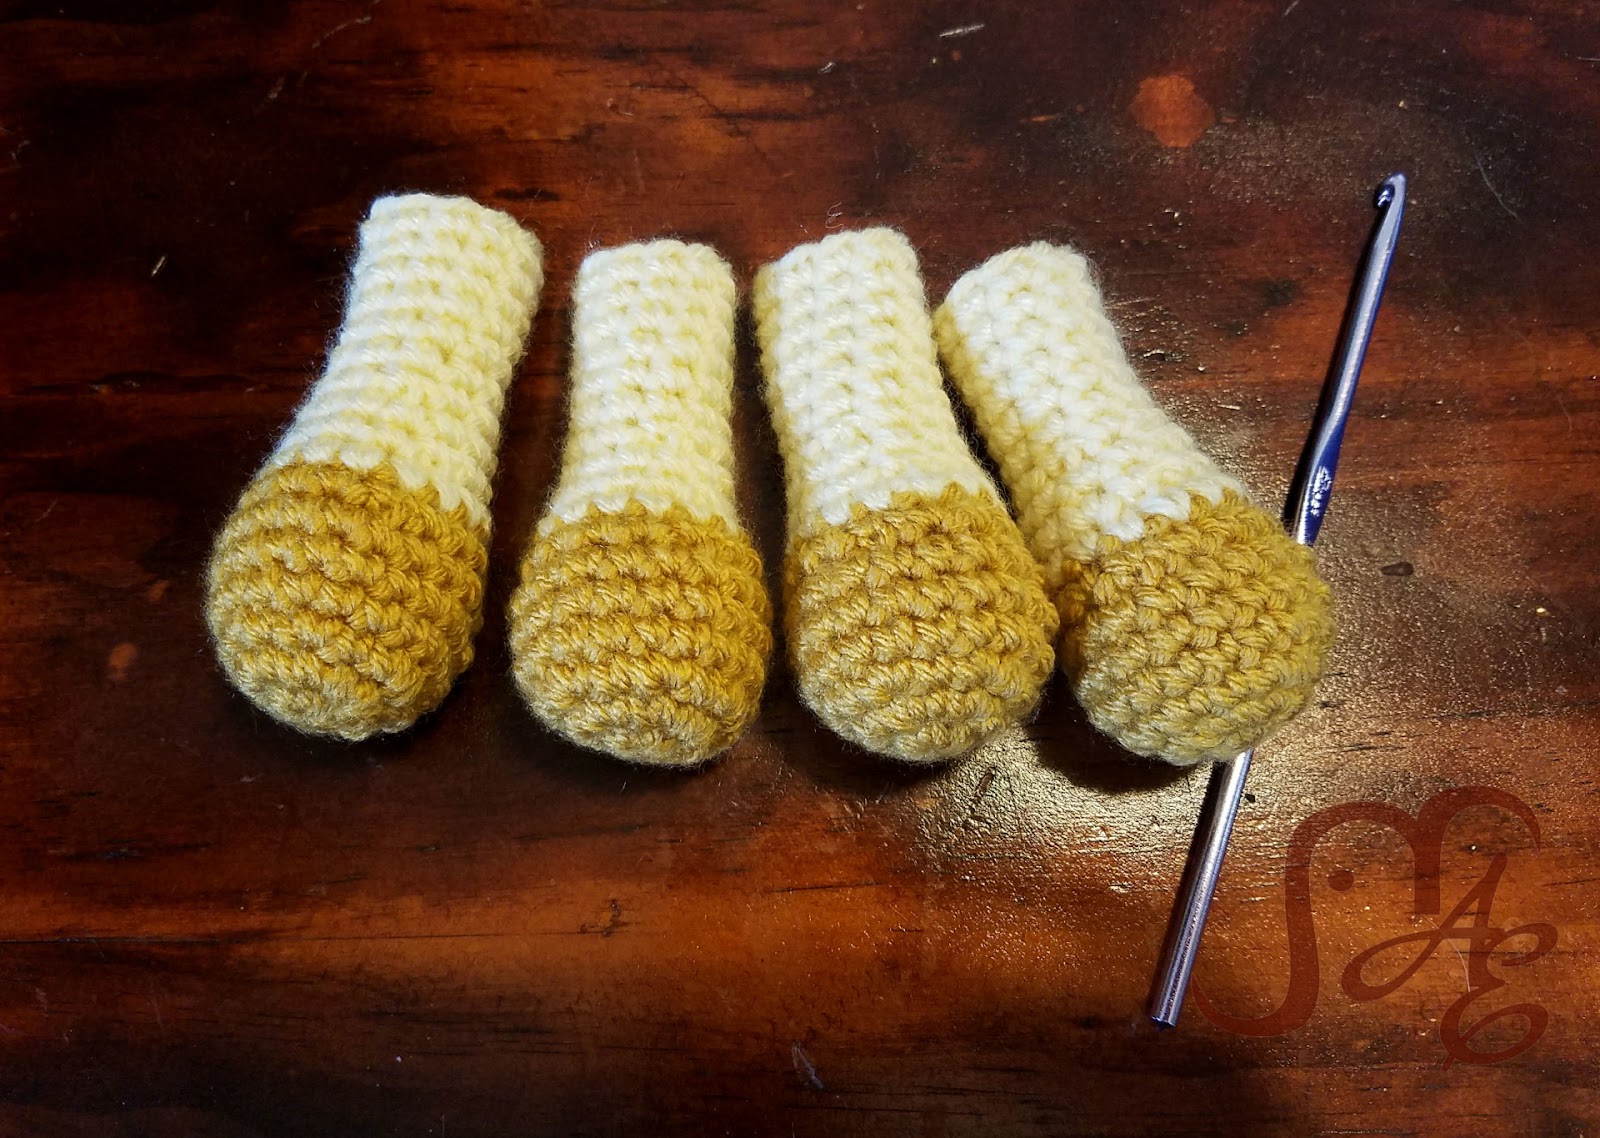
Legs
Make 4
These are worked in joined rounds. Each round begins with a chain 1 and ends with a slip stitch to the top of the first single crochet. Chains do not count as stitches.
1) MR 6 SC (6)
2) 2SC around (12)
3) *SC in next stitch, 2SC in next* Repeat from * to * around (18)
4-6) SC around (18)
7) *SC in next 4, SC DEC* Repeat from * to * around (15)
Change Colors
8) SC around (15)
9) *SC in next 3, SC DEC* Repeat from * to * around (12)
10) SC around (12)
11) *SC in next 4, SC DEC* Repeat from * to * around (10)
12-14) SC around (10)
Finish Off. Stuff.
Body
I suggest leaving a long tail so that you can stitch close any gaps you might notice. Except when specified, this section is worked in continuous rounds, mark the beginning of your round with a marker.
1) Ch 4, In 2nd chain from hook 2SC, in next chain SC, 3SC in last chain, (continue onto other side of the starting chain), SC, SC (8)
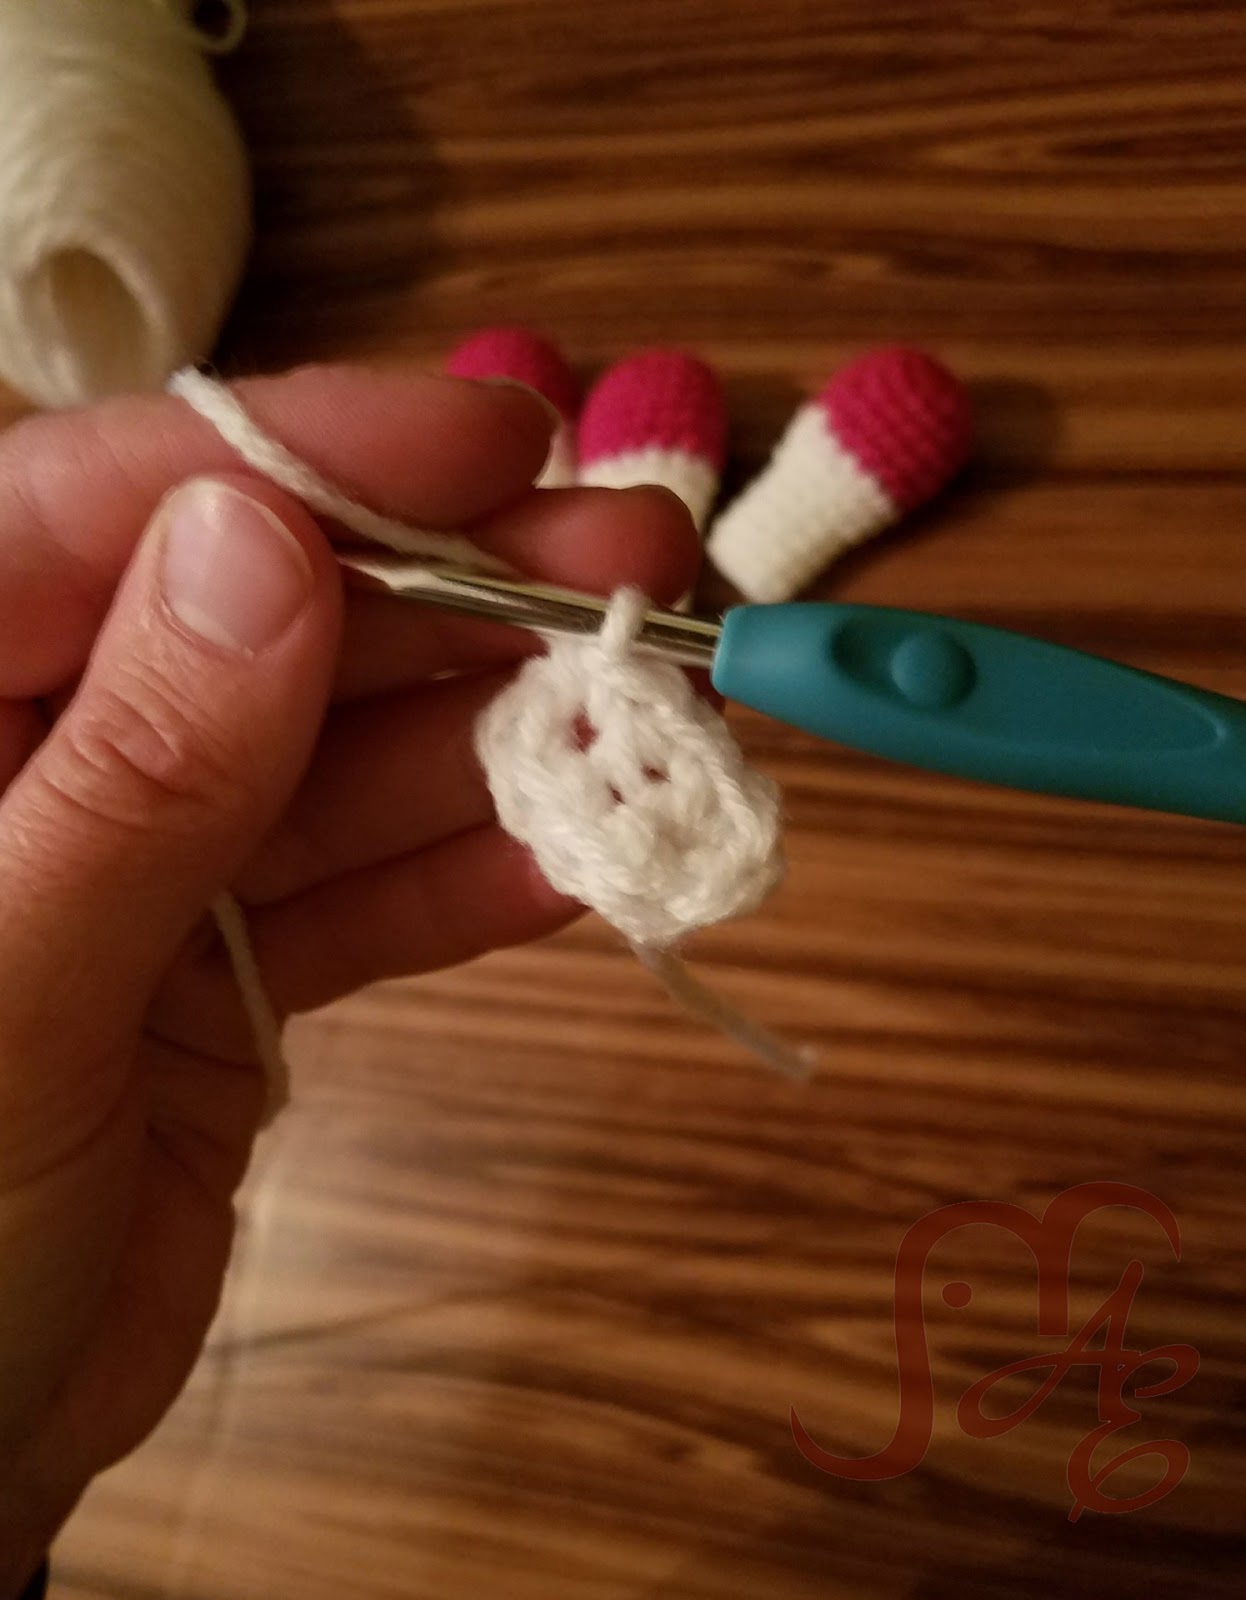
Beginning Body oval made after Round 1.
2) 2SC, 2SC, SC, 2SC, 2SC, 2SC, SC, 2SC, SS to top of first SC of round. (14)
Here you’ll connect the legs. To do this, insert the hook from the inside to the outside of the leg (it doesn’t make a huge difference which stitch you start in, I usually try to put the seam toward the inside though), then through the next stitch on the body, yarn over and pull through all the way to complete a SS. Follow instructions in Round 3.

To attach legs, insert hook from inside to outside of a leg, then insert hook through next stitch on body. Yarn Over and pull through.
3) SS 3 through leg, 2SC in next stitch on the belly, SS 3 through next leg, SS 3 through next leg, 2SC in next stitch on the belly, SS 3 through leg. (4 SC, 12 SS)
First leg attached, then 2 SC into next stitch onto the body oval.

After Round 3, all legs are attached on the inside. Round 4 will go around the outside of the legs.
4) The first stitch of this round will be on the first leg you attached. Each leg has 10 stitches around the top. We used 3 to SS to the belly piece leaving 7 unworked. SC around the leg in each of the unworked stitches, then SC into the 2 that you put on the belly piece. Continue SC around in the unworked stitches on the legs and onto the 2 SC on the belly. (32 total- 7 SC around Leg 1, 2 SC on belly, 7 SC around Leg 2, 7 SC around Leg 3, 2 SC on belly, 7 SC around Leg 4)
5-6) SC around (32)
7) *SC 4, 2SC* around. SC in last 2 (38)
8) SC around (38)
9) *SC 5, 2SC* around. SC in last 2 (44)
10-11) SC around (44)
12) *SC 5, DEC* around. SC in last 2 (38)
13) SC 2, DEC, *SC 4, DEC* Repeat from * to * around. SC in last 4. (32)
14) SC 2, DEC, DEC, SC 22, DEC, DEC (28)
15) SC 11, CH 5, Skip 10, SC 7 (18 SC, 5 Chains, 10 unworked)
16) *SC 2, DEC* repeat around. SC in last 3 (18) (Be sure to work into the Chains instead of the chain space-you’ll need the other side of the chain for the neck. You’ll have a decrease on the chain section, you may find it easiest to just skip instead of trying to do the invisible decrease on that part.)
17) *SC, DEC* repeat around. (12)
18) SC3TOG, DEC, SC, SC3TOG, SC, DEC (6)
Finish Off. Leave tail to close hole.
Also, if you haven’t already, weave in the starting tail. If you notice any gaps on the belly, you can use this to close them up.
Photos are from Gerri the Giraffe, so the colors are different but the basic shape is the same.

Neck and Head
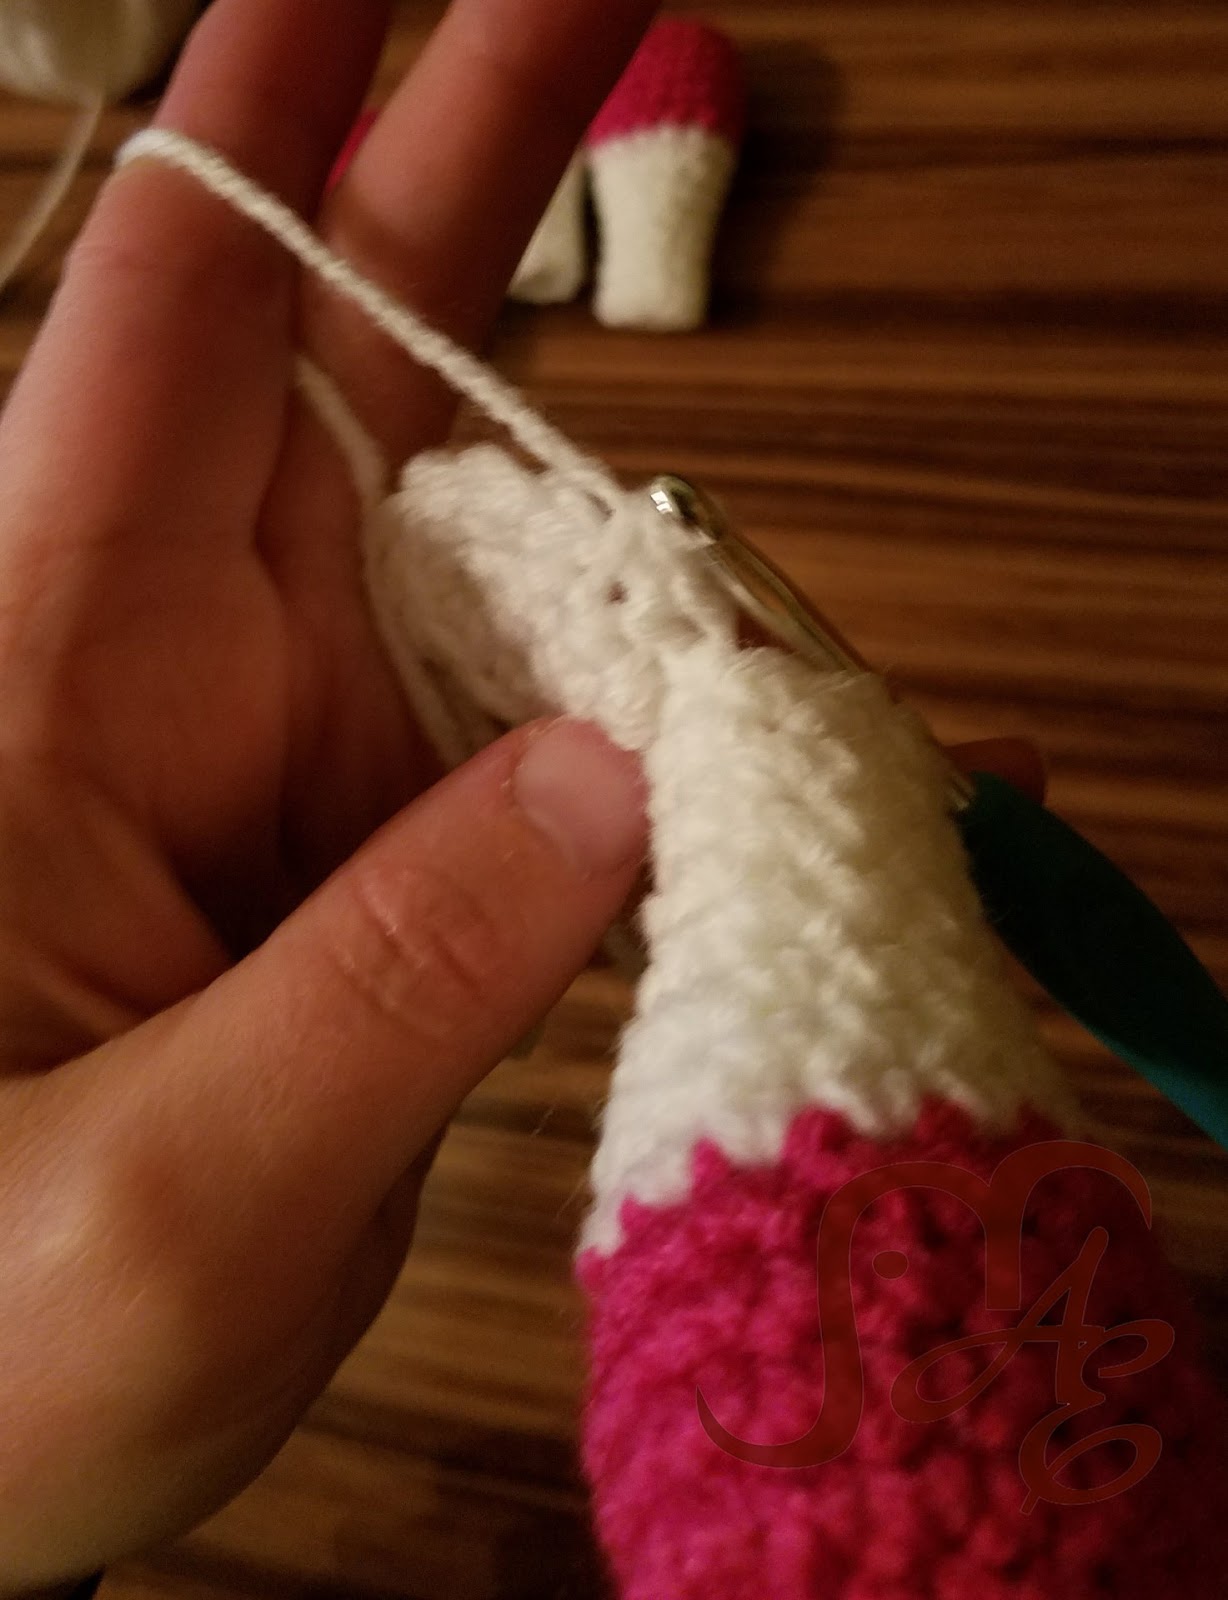
Attach Yarn at the left-hand corner of the opening- the 1st unworked SC on Round 15.
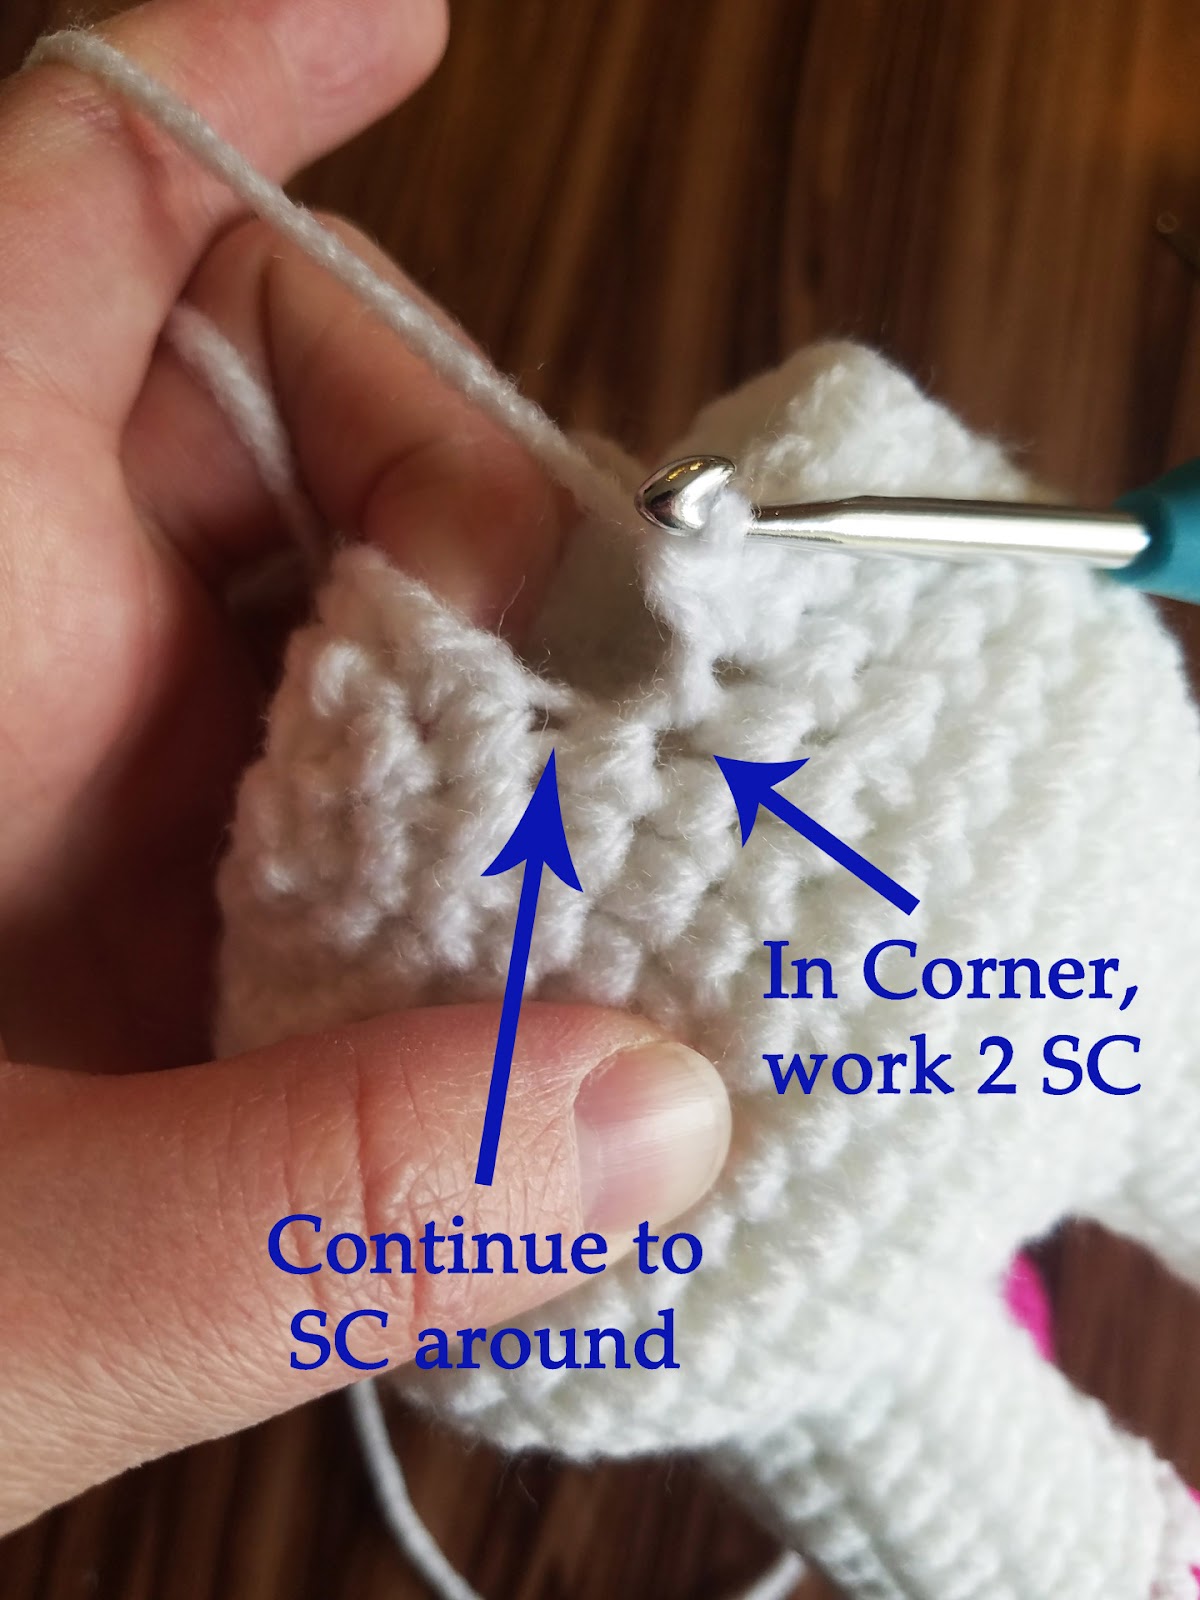
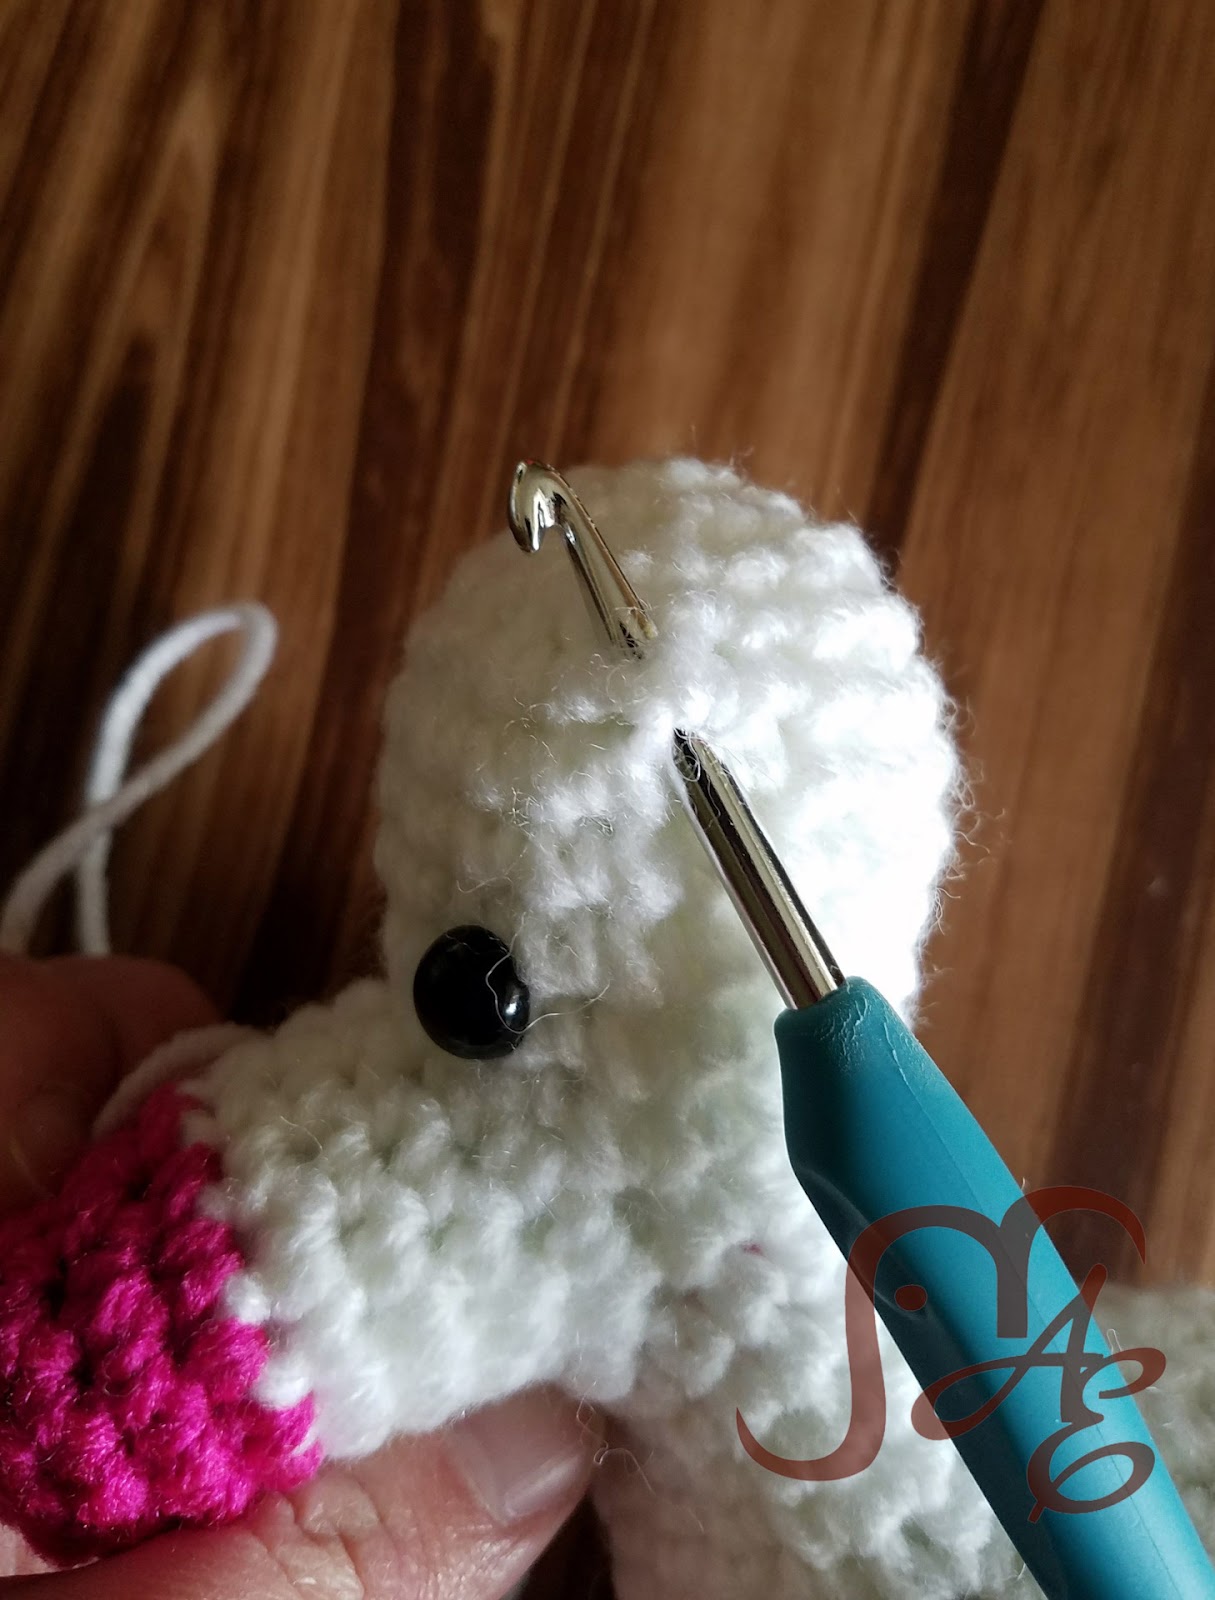
1) SC around (There were 10 unworked SC from Round 15 of the body plus the 5 Chains. You’ll work one SC in each of those PLUS 2 SC in each corner. See Photo. Should end up with 19 SC)
2-4) SC around (19)
5) SC 3, loosely Slip Stitch in next 5 stitches, SC 11 (SS loosely so that you can go through the slip stitch in the next round too.) (14 SC, 5 SS)
6) SC 3, SS 5 in the SS of last round, SC 5, 2SC, SC 2, 2SC, SC 2 (16 SC, 5 SS)
7) SC 1, Ch 5, Skip 9 stitches (skipping 2 SC, 5 SS, 2 SC), SC 11 (Your skipped stitches should be centered on the front of the chest, make adjustments if needed.) (12 SC, 5 Chains)
8) SC in each chain and around (Just like on the body to start the neck, be sure to crochet into the chain and not the space, you’ll need the other side of the chain when you start the nose.) (17)
9) *SC 3, 2SC* around, SC in last (21)
10-12) SC around (21)
13) *SC 3, DEC* around, SC in last (17)
14) *SC 2, DEC* around, SC in last (13
15) *SC, DEC* around, SC in last (9)
16) DEC 4 times, leave last stitch unworked (5)
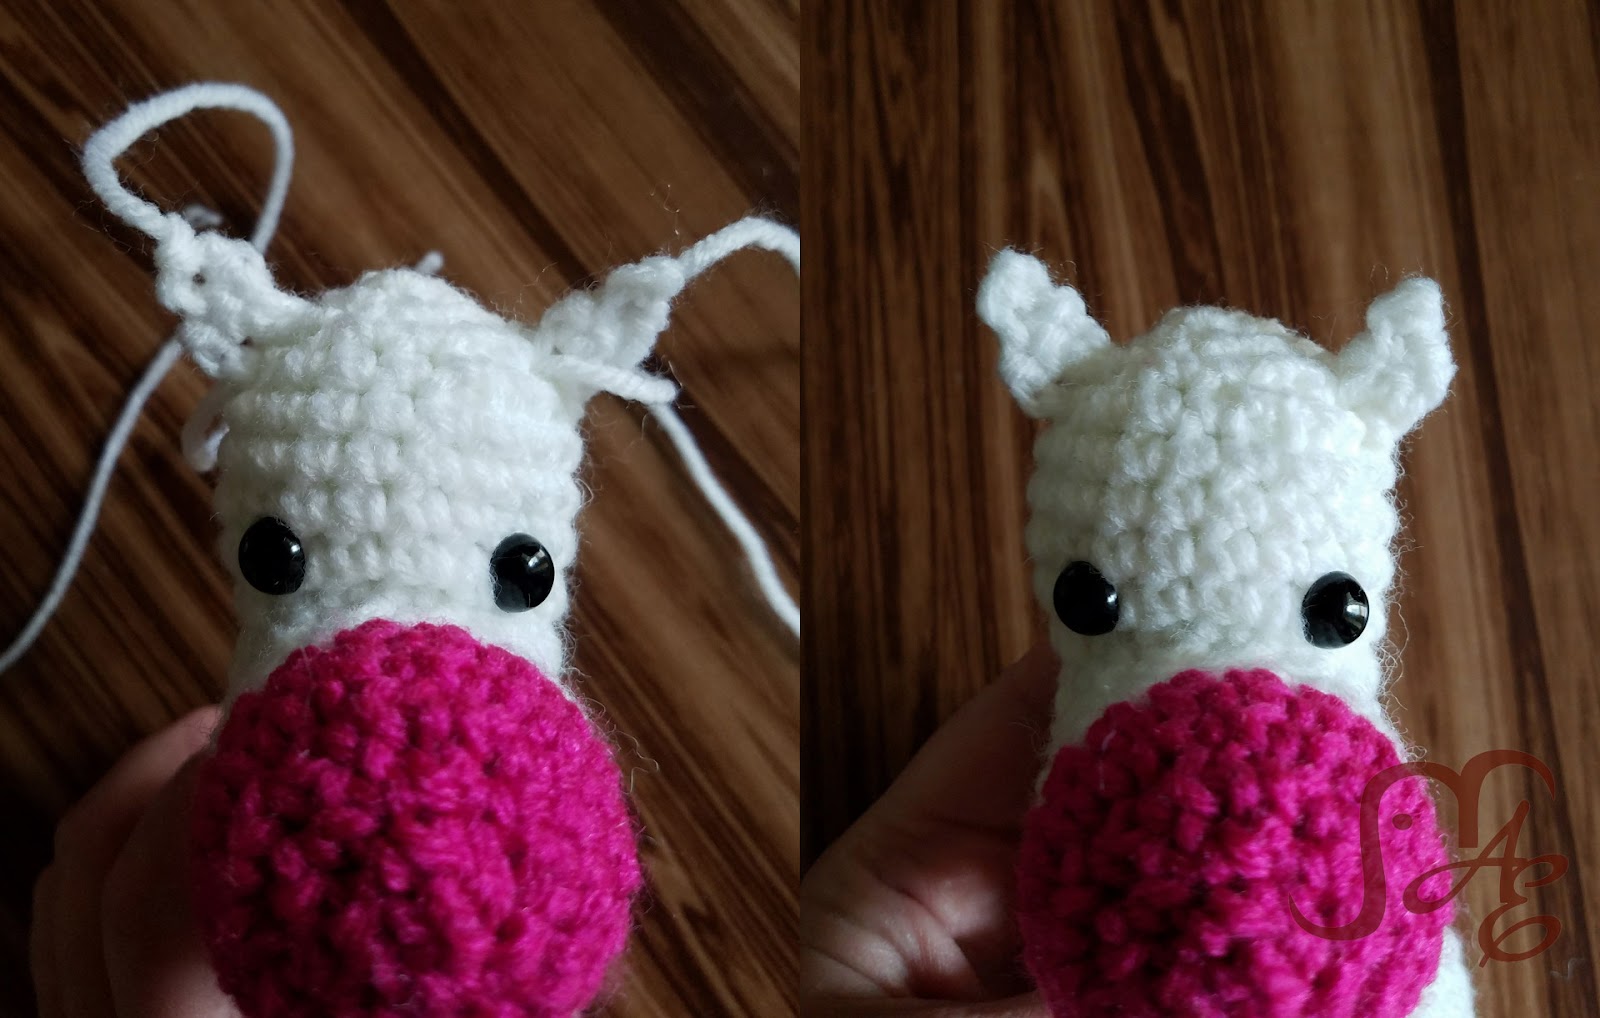
Finish Off. Stuff Neck and top of head. You can place eyes at this point or wait until you have part of the nose made. (your choice, just try to make them even.)
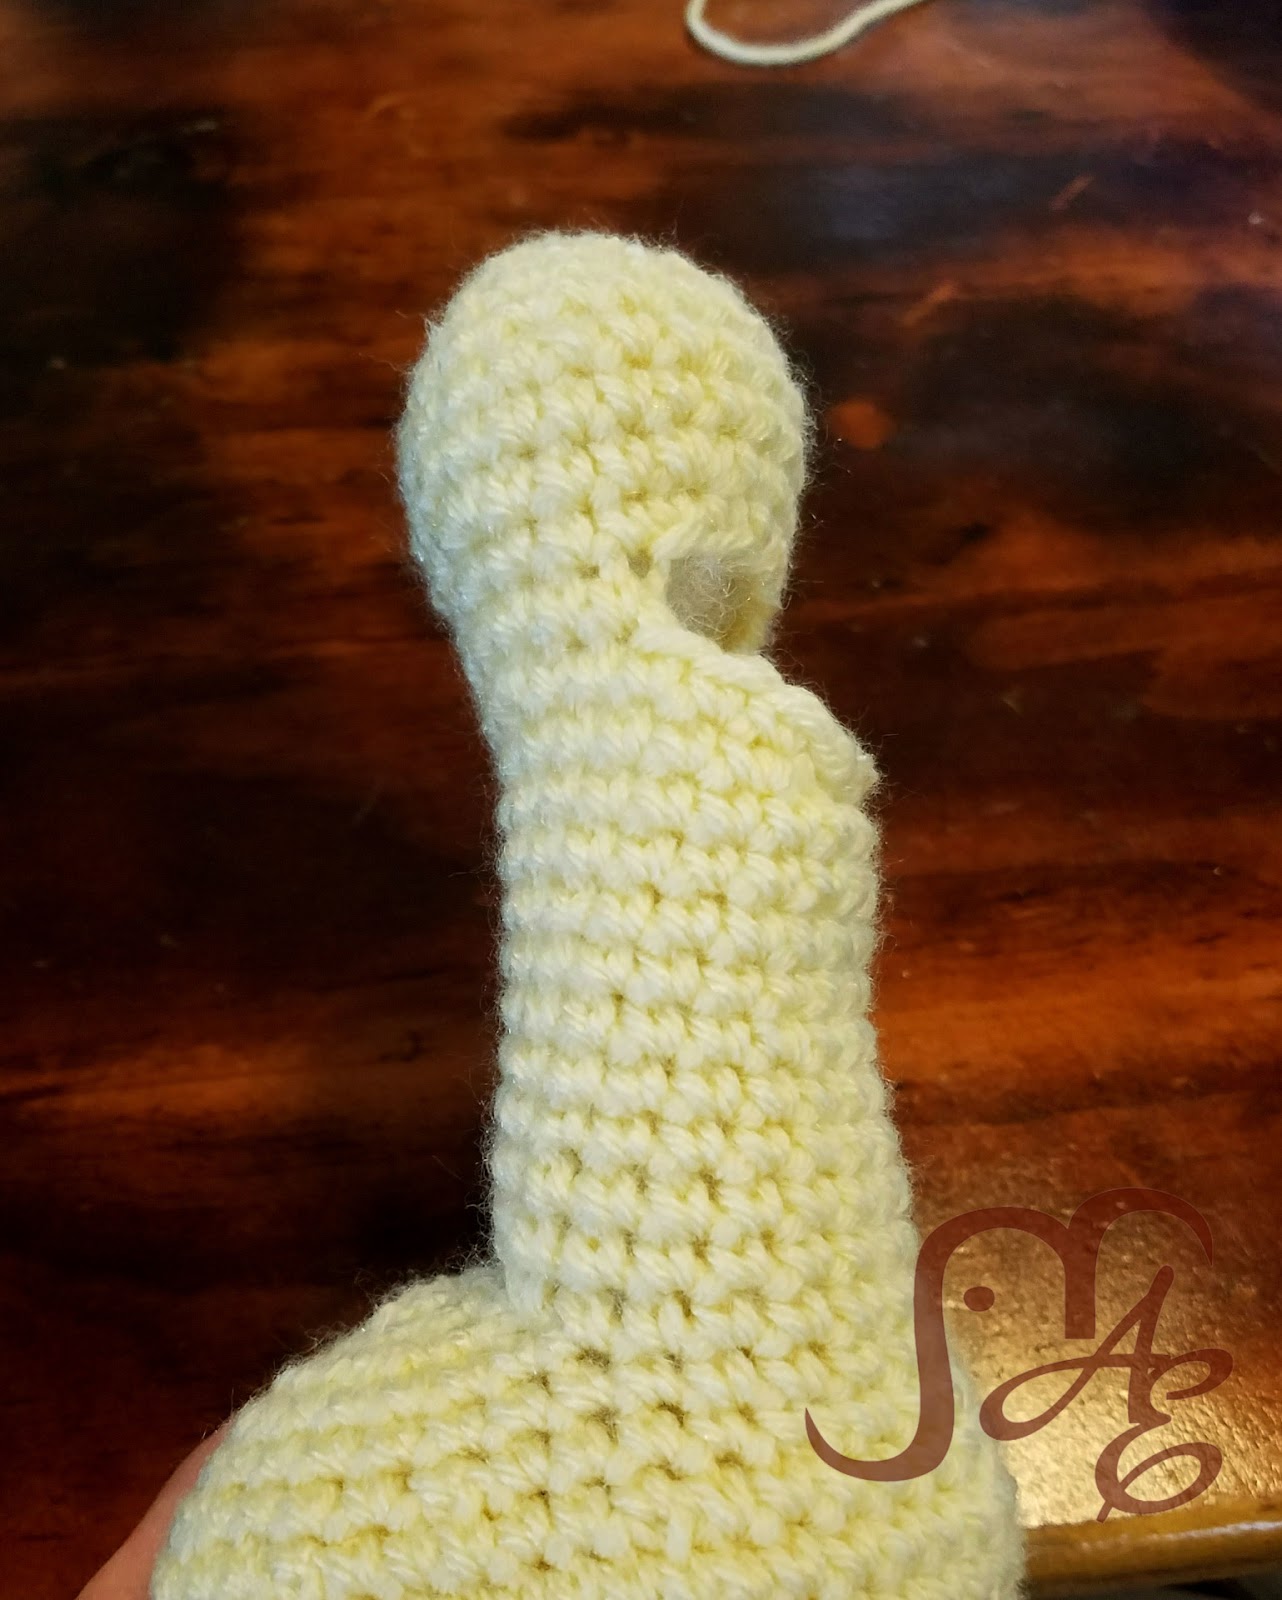
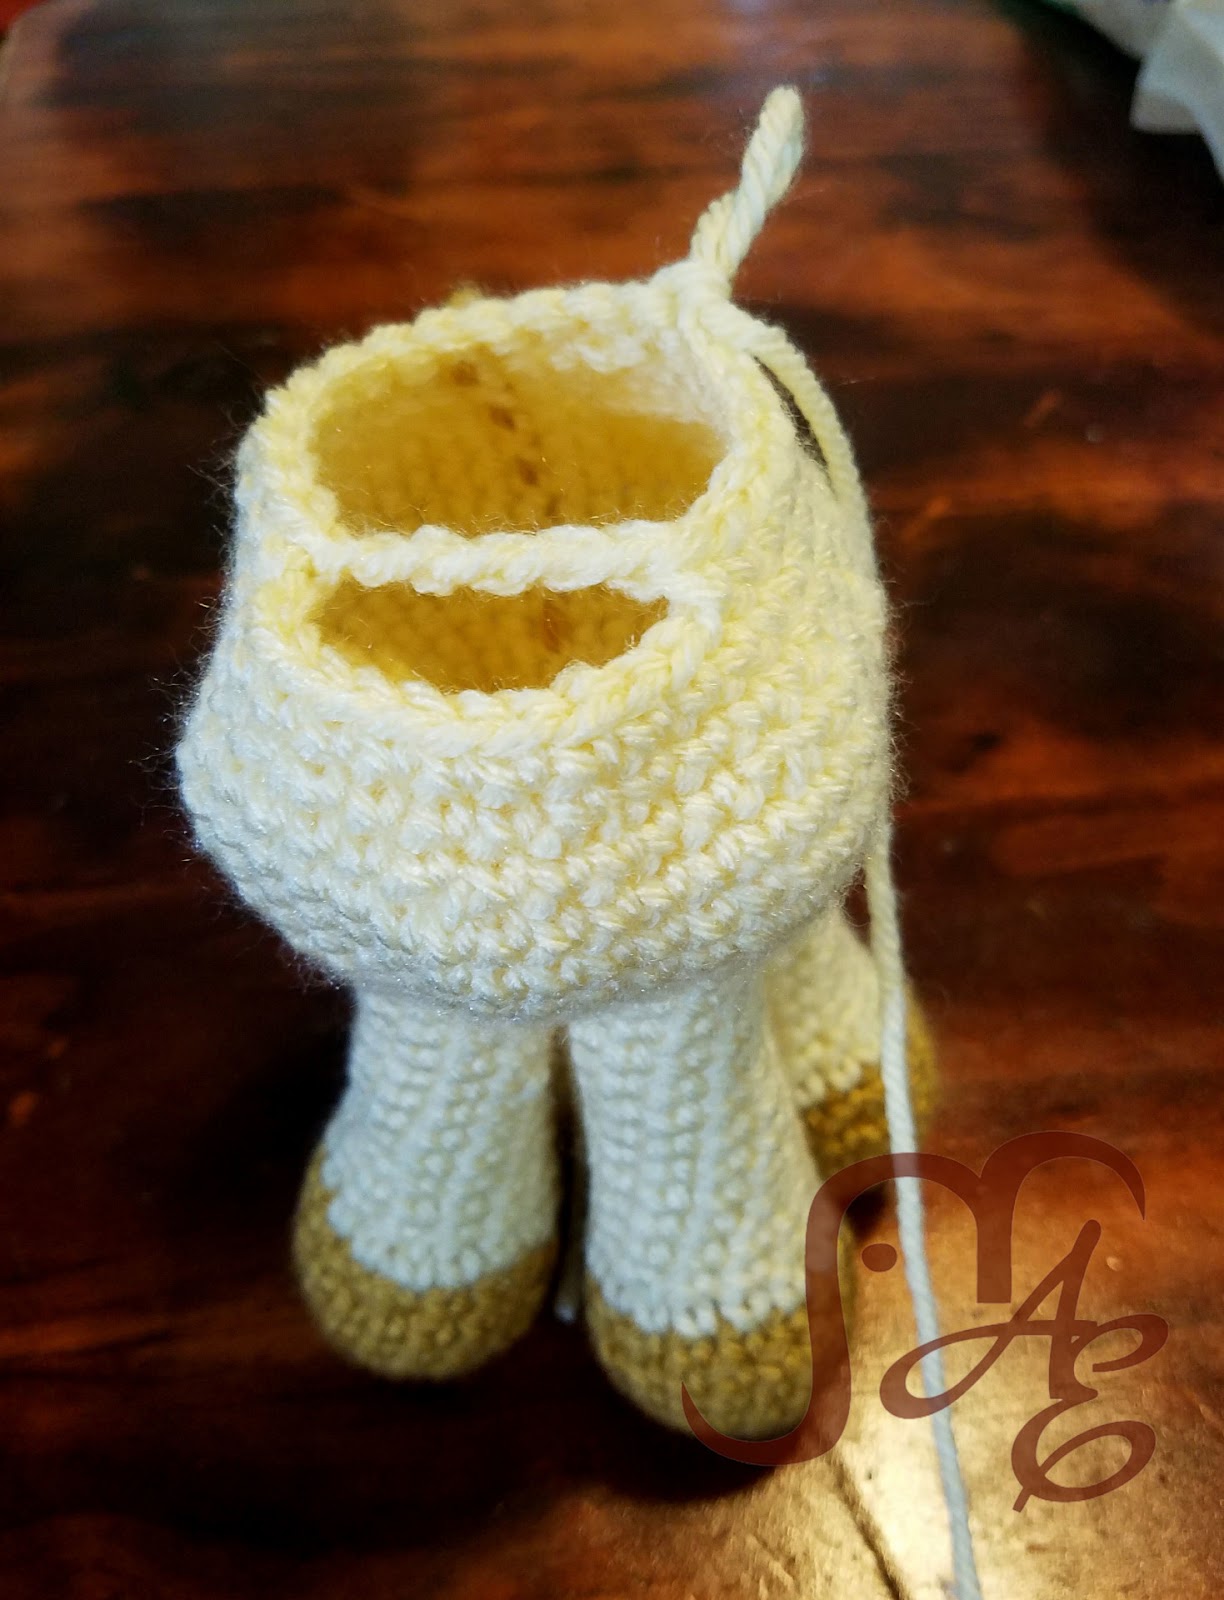
Photo is from Gerri the Giraffe, so the neck is longer than your Unicorn’s should be but opening will look the same.
Muzzle/Nose
Attach Yarn at the corner of the opening- the 1st unworked SC on Round 7
1) SC around (There were 9 unworked stitches from Round 7 of the neck [2 SC, 5 SS, 2 SC] plus 5 Chains. You’ll work one SC in each of those PLUS 2 SC in each corner. (The same as you did to start the neck.) (Should end up with 18 SC)
2-4) SC around (18)
5) SC 5, change colors, SC 13 (this puts the color change seam under the muzzle so it isn’t as noticeable) (18)
6-7) SC around (18)
8) *SC 2, DEC* around. SC in last 2 (14)
If you haven’t placed the eyes yet, be sure to do so before the opening gets too small.
9) *SC, DEC* around, SC in last 2 (10)
Finish Stuffing
10) DEC around (5)
Finish off, leave tail to sew hole shut. Weave in ends.
Ears
Decide where you want your ears to be. They should be about evenly spaced on the sides of the head.
1) Insert your hook around the post of the single crochet of the round you chose. SC around that stitch. SC around the post of the stitch above that one. Chain 1, turn. (2 SC)
2) SC 2 across. Ch 1, turn. (2)
3) Skip next, SC. Ch 1, turn. (1)
4) SS. Finish Off. (1)
Repeat for the other side.
I use the beginning and ends strands to shape the ears a bit as I weave them in.
I try my very best in my amigurumi to not have to sew on pieces, especially little ones. I find it tedious and I’m always worried that they’ll come off. I do a lot of details like this- stitching right into the project. If you aren’t a fan (or can’t understand my directions.) You can start with a Chain 3 and then follow the rest of the steps and then sew it on.
Horn
A tiny horn like this was kind of difficult using worsted weight yarn and a G hook like I usually do. I think embroidery floss would work well with an E or F hook. I did not have any on hand in the right color so I improvised and separated the strands of my worsted yarn. I took 2 of the 4 strands and an F hook to do this.
1) MR SC 4 (4)
2) SC around (4)
3) 2SC, SC in next 3 (5)
4) SC around (5)
(You could repeat Row 4 if you want a longer, more pronounced horn. I liked it being small.)
You shouldn’t need to stuff it at all, just finish off. Leave tail for sewing.

Mane
I made this part using the long loop stitch (pull each loop around 8-10”, you can trim it later). Like I mentioned in my Unicorn Photo Set pattern, even if the stitch itself takes a little longer, I find it so much easier than attaching individual strips of yarn. But, if you prefer, you can do it that way. Either attach the yarn directly into the neck of your unicorn, or single crochet a strip and tie strips onto that and then sew the piece on. I would suggest the second option so that you can make sure the pieces line up and are centered.
1) Chain 4, in 2nd chain from hook, Loop stitch, Loop Stitch in next 2. Ch 1, turn. (3 Loops)
2) SS 3 across. Ch 1, turn. (3 SS)
3) Going over the SS of the last row, Loop Stitch 3 across. Ch 1, turn. (3 Loops)
Repeat rows 2 and 3 until you reach the length you need. About 12 Loop stitch rows. When I used the 6 rainbow colors, I changed colors every 2 loop stitch rows.
Leave a long tail to sew on. Line up the mane starting between the ears and go straight down the neck. Cut a few short pieces of yarn to tie on to the top of the mane (between the ears) for your Unicorn “bangs”.
Tail
Using a long loop stitch again, OR SC a circle and tie on strips.
1) MR 6 Loop Stitches, join to first stitch with SS. (6 Loops)
2) Ch 1, 2 Loop Stitches in each around (12 Loops)
You could do another increase round if you want the tail to be a little bigger. If you are using the 6 rainbow colors, you’ll want to change colors every 3 stitches.
Leave a long tail for sewing on.

Pieces all ready to get put together. I suggest sewing the Mane down first, centering it between the ears, then attaching the Horn and Tail.
Details
You can decide if you want to add eyelashes and nostrils to your Unicorn. You can also fray the yarn on the mane and tail to give it a fluffy curly look. Just untwist each strand. Yes, this does take a little time but I like the way it turns out!


loved it. I am currently doing the crochet headwig , will do the unicorn after that. Have one query though cam we do this with bulky yarn.
Thank you! You should be able to use a bulky yarn with no problem although I’ve never tried it with this unicorn pattern. Hedwig comes out great with a bulky yarn though! Obviously, you will just want to go up a couple of hook sizes and the end result will be bigger. Good luck! I’d love to see how it turns out. 🙂
Sure btw headwig is beautiful and my daughter loves it. Thank You:)
I was wondering how much yarn is needed for this pattern? I see the weight needed but not the yards needed. Thanks!
Frankly, I’m not sure. This pattern is an early design and I did not track the yardage. Based on some similar later patterns, I would guess no more than 200 yards total for the body. The mane and tail will take a few yards of each color used. I’m sorry I can’t be more specific. I hope this helps!
That is SUPER-DUPER helpful!!! THANKS!!