This post may contain affiliate links. If you use these links to buy something I may earn a small commission at no cost to you. Thanks.
…
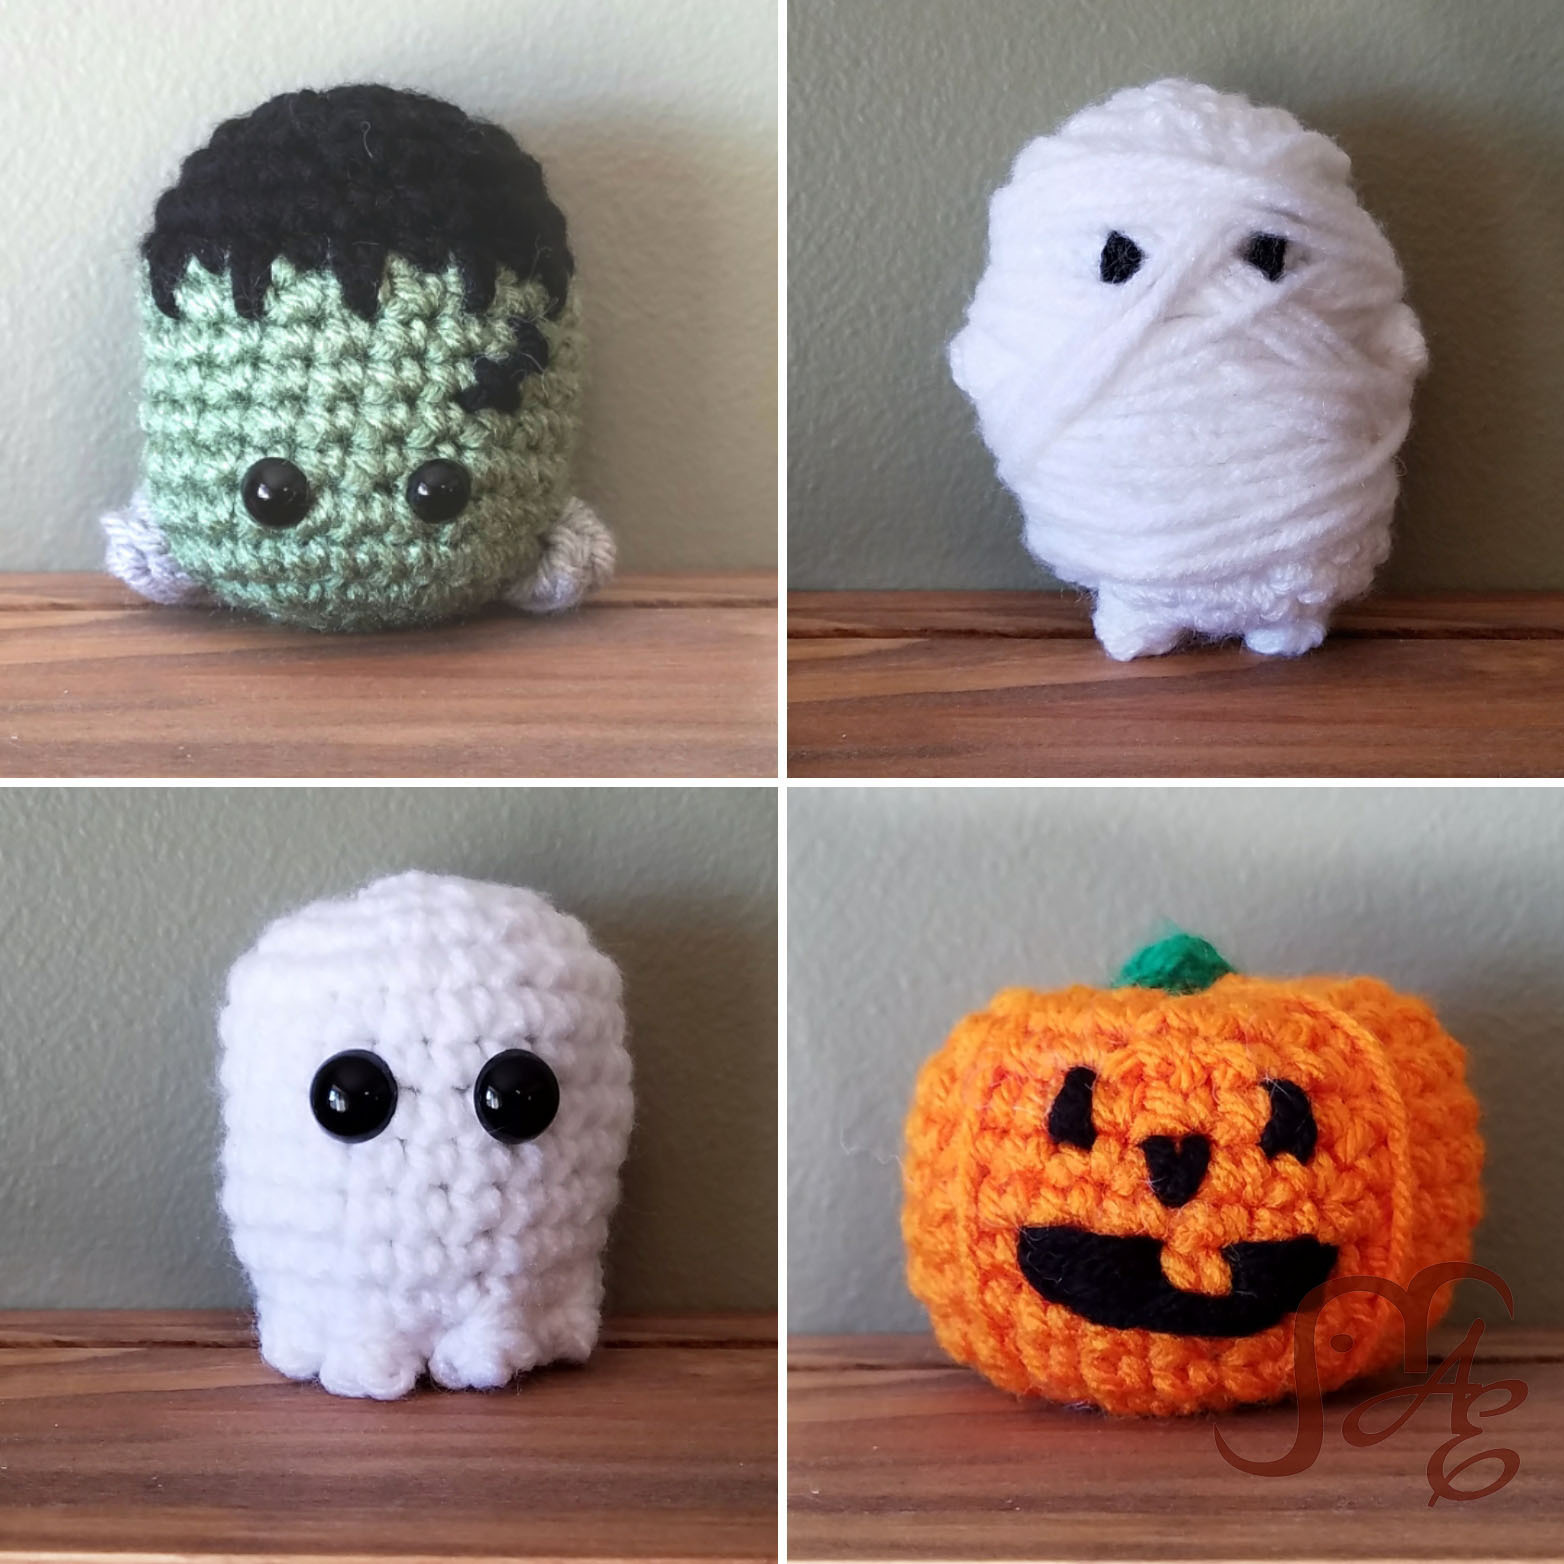
I will be honest. I’m not really into holidays. They were never a big deal growing up. I mean, we celebrated them but not to an extreme. We dressed up for Halloween and went trick-or-treating but mostly for the candy. We never decorated that I can remember. And now as an adult, I find it’s way too much work to decorate and then take down, and store, and remember where you put them for the next year. I’m probably just a little on the lazy side when it comes to that. BUT! I did come up with these little Halloween-themed minis and I kind of love them! They are little so they are super quick to make and would make great decorations for a desk or as gifts.
I’m all about things that are quick and cute so keep an eye out for more Mini patterns to come!
Happy Halloween!!!!

Mini Ghost

Supplies Needed:
G/6 4.25mm Hook
Red Heart Super Saver, Medium Worsted Weight 4 (100% Acrylic, 364 yds, 7 oz) white, 1 skein
Safety eyes, I would suggest between 8 and 12 mm. You can even mix and match sizes if you want.
Tapestry needle
Stitches Used: (in US terms)
MR- Magic Ring
SC- Single Crochet
Bobble- *Yarn Over, Insert hook into stitch, Yarn Over, Pull through, Yarn Over, Pull through 2 loops* Repeat from * to * 3 more times, until you have 5 loops on your hook, Yarn Over, Pull through 5 remaining loops.
Dec- SC dec
Mini Ghost is worked in continuous rounds. You will not join each round. Use a stitch marker or piece of yarn to hold your place.
1) MR 8 SC (8)
2) 2SC around (16)
3) *Bobble, 2SC in next* Repeat from * to * around (8 bobbles, 16 SC)
4-12) SC in each around (24)
13) *SC, DEC* Repeat from * to * around (16)
14) SC around (16)
Place eyes. Use your judgment and creativity! Stuff.
15) DEC around (8)
Finish off. Leave tail to sew closed the hole.
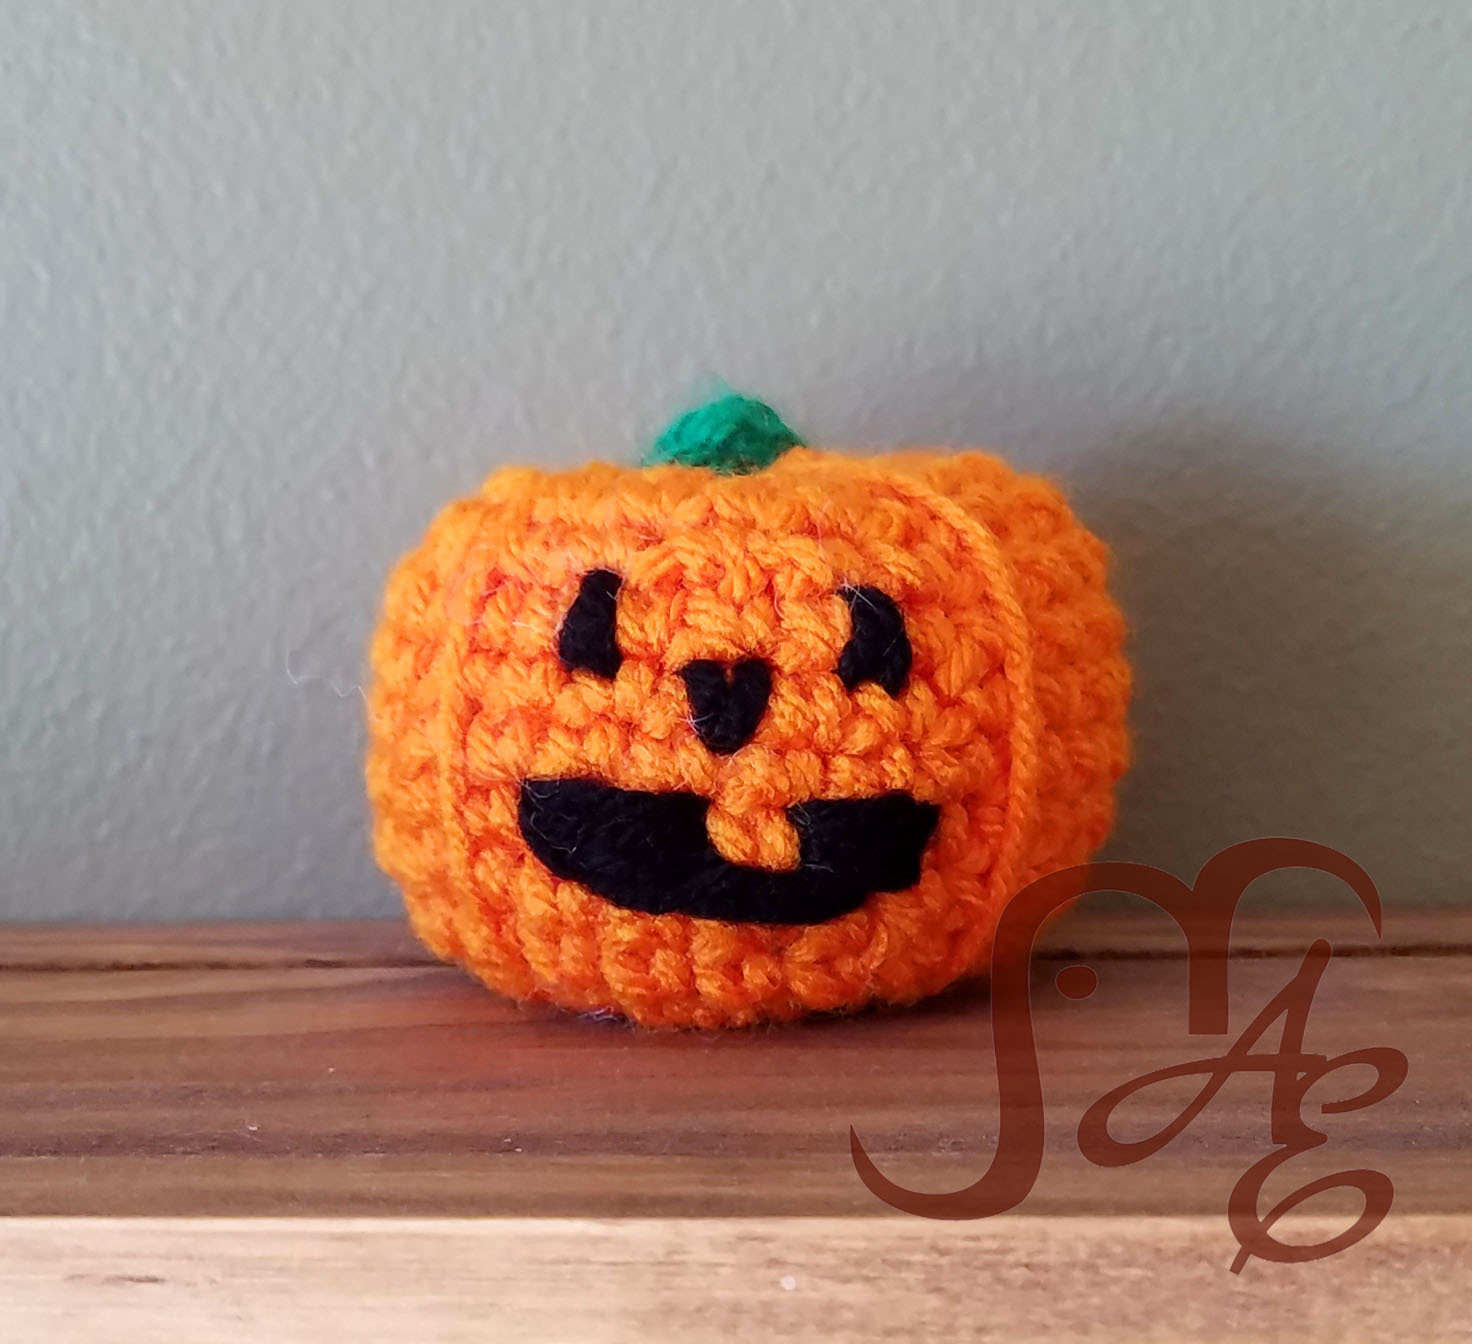
Mini Pumpkin/Jack-o-lantern
Supplies Needed:
G Hook
Worsted yarn in Orange, Green, Black (for Jack-O-Lantern face)
Yarn needle
Stitches Used: (in US terms)
MR- Magic Ring
SC- Single Crochet
TBobble- Triple Bobble (I’m sure I didn’t make up this stitch but I hadn’t come across it before and calling it a ‘TBobble’ makes me chuckle.) *Yarn Over twice (like you are about to do a triple crochet), Insert hook into stitch, Yarn Over, Pull Through, Yarn Over, Pull through 2 loops, Yarn over, pull through 2 loops* Repeat from * to * 3 more times until you have 5 loops on your hook, Yarn Over, Pull through 5 remaining loops.
Dec- SC dec
Mini Pumpkin is worked in continuous rounds. You will not join each round. Use a stitch marker or piece of yarn to hold your place.
1) MR 8 SC (8)
2) 2SC in each around (16)
3) SC around (16)
4) *SC, 2SC* Repeat from * to * around (24)
5-10) SC around (24)
11) *SC 2, DEC* Repeat from * to * around (18)
12) SC around (18)
13) *SC, DEC* Repeat from * to * around (12)
Stuff your pumpkin
14) DEC x 2, In Green TBobble, back to orange, SC, DEC x 3 (1 TBobble, 6 SC)
Leave long orange tail to close the hole and add the pumpkin “ridges” if you want.
If you are making the Jack-O-Lantern face, use a strand of black and embroider on the face as you like. Each one of mine came out a little differently.
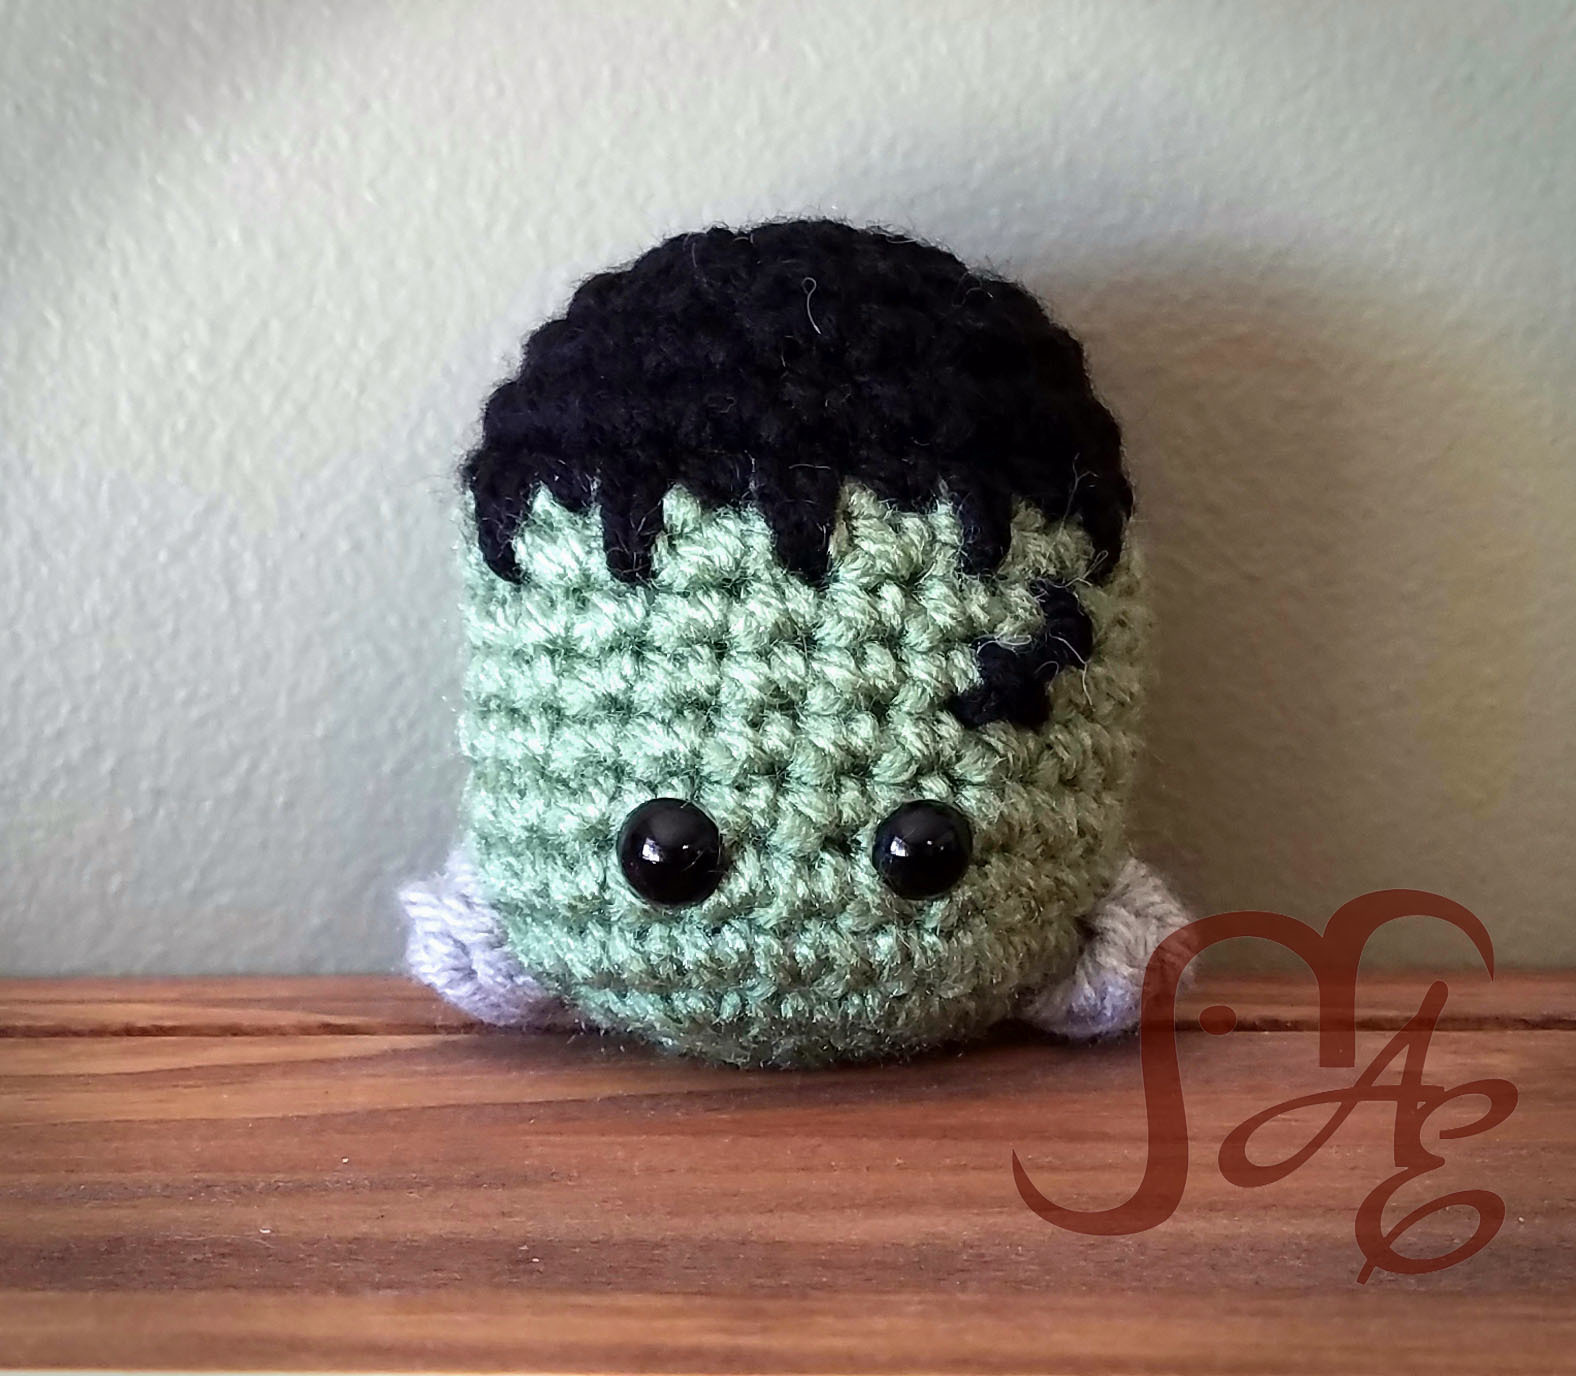
Mini Frankenstein
Supplies Needed:
G Hook
Worsted yarn in Green, Black, and Grey
Safety eyes, I would suggest between 6 and 12 mm. You can even mix and match sizes to give him a pieced together look.
Yarn needle
Stitches Used: (in US terms)
MR- Magic Ring
SC- Single Crochet
Bobble- *Yarn Over, Insert hook into stitch, Yarn Over, Pull through, Yarn Over, Pull through 2 loops* Repeat from * to * 3 more times, until you have 5 loops on your hook, Yarn Over, Pull through 5 remaining loops.
TBobble- Triple Bobble (I’m sure I didn’t make up this stitch but I hadn’t come across it before and calling it a ‘TBobble’ makes me chuckle.) *Yarn Over twice (like you are about to do a triple crochet), Insert hook into stitch, Yarn Over, Pull Through, Yarn Over, Pull through 2 loops, Yarn over, pull through 2 loops* Repeat from * to * 3 more times until you have 5 loops on your hook, Yarn Over, Pull through 5 remaining loops.
Dec- SC dec
Spike- Spike stitch. Worked the same as a SC except that you will insert your hook into the row below your working row.
Frankenstein is worked in joined rounds. So each round begins with a ch 1 (does not count as a stitch) and ends with a ss to the top of the first SC. This makes it so the color change at the hairline is a little neater.
In Green
1) MR 8 SC (8)
2) 2SC in each around (16)
3) *SC, 2SC* Repeat from * to * around (24)
4) SC 5, switch to grey TBobble, back to green SC 11, switch to grey TBobble, back to green, SC 6 (2 TBobbles, 22 SC)
5-10) SC around (24)
In Black
11) SC 8, *Spike, SC* Repeat from * to * 5 times, SC 6 (You can also skip the spike stitches here and either give your Frankenstein a straight hairline or stitch on the spikes later.) (5 Spikes, 19 SC)
12) SC around (24)
13) *SC, DEC* Repeat from * to * around (16)
Place your eyes before you stuff after this round. I went lower on the head because I didn’t plan on adding a mouth. If you want to give this guy a mouth, you may want your eyes to be higher. Stuff as much as you like and continue.
14) DEC around (8)
Finish off, leave long tail to sew shut the hole and if you want use that same tail to sew on a few stitches to your Frankenstein’s head, or adjust the hair if you skipped the spike stitches.
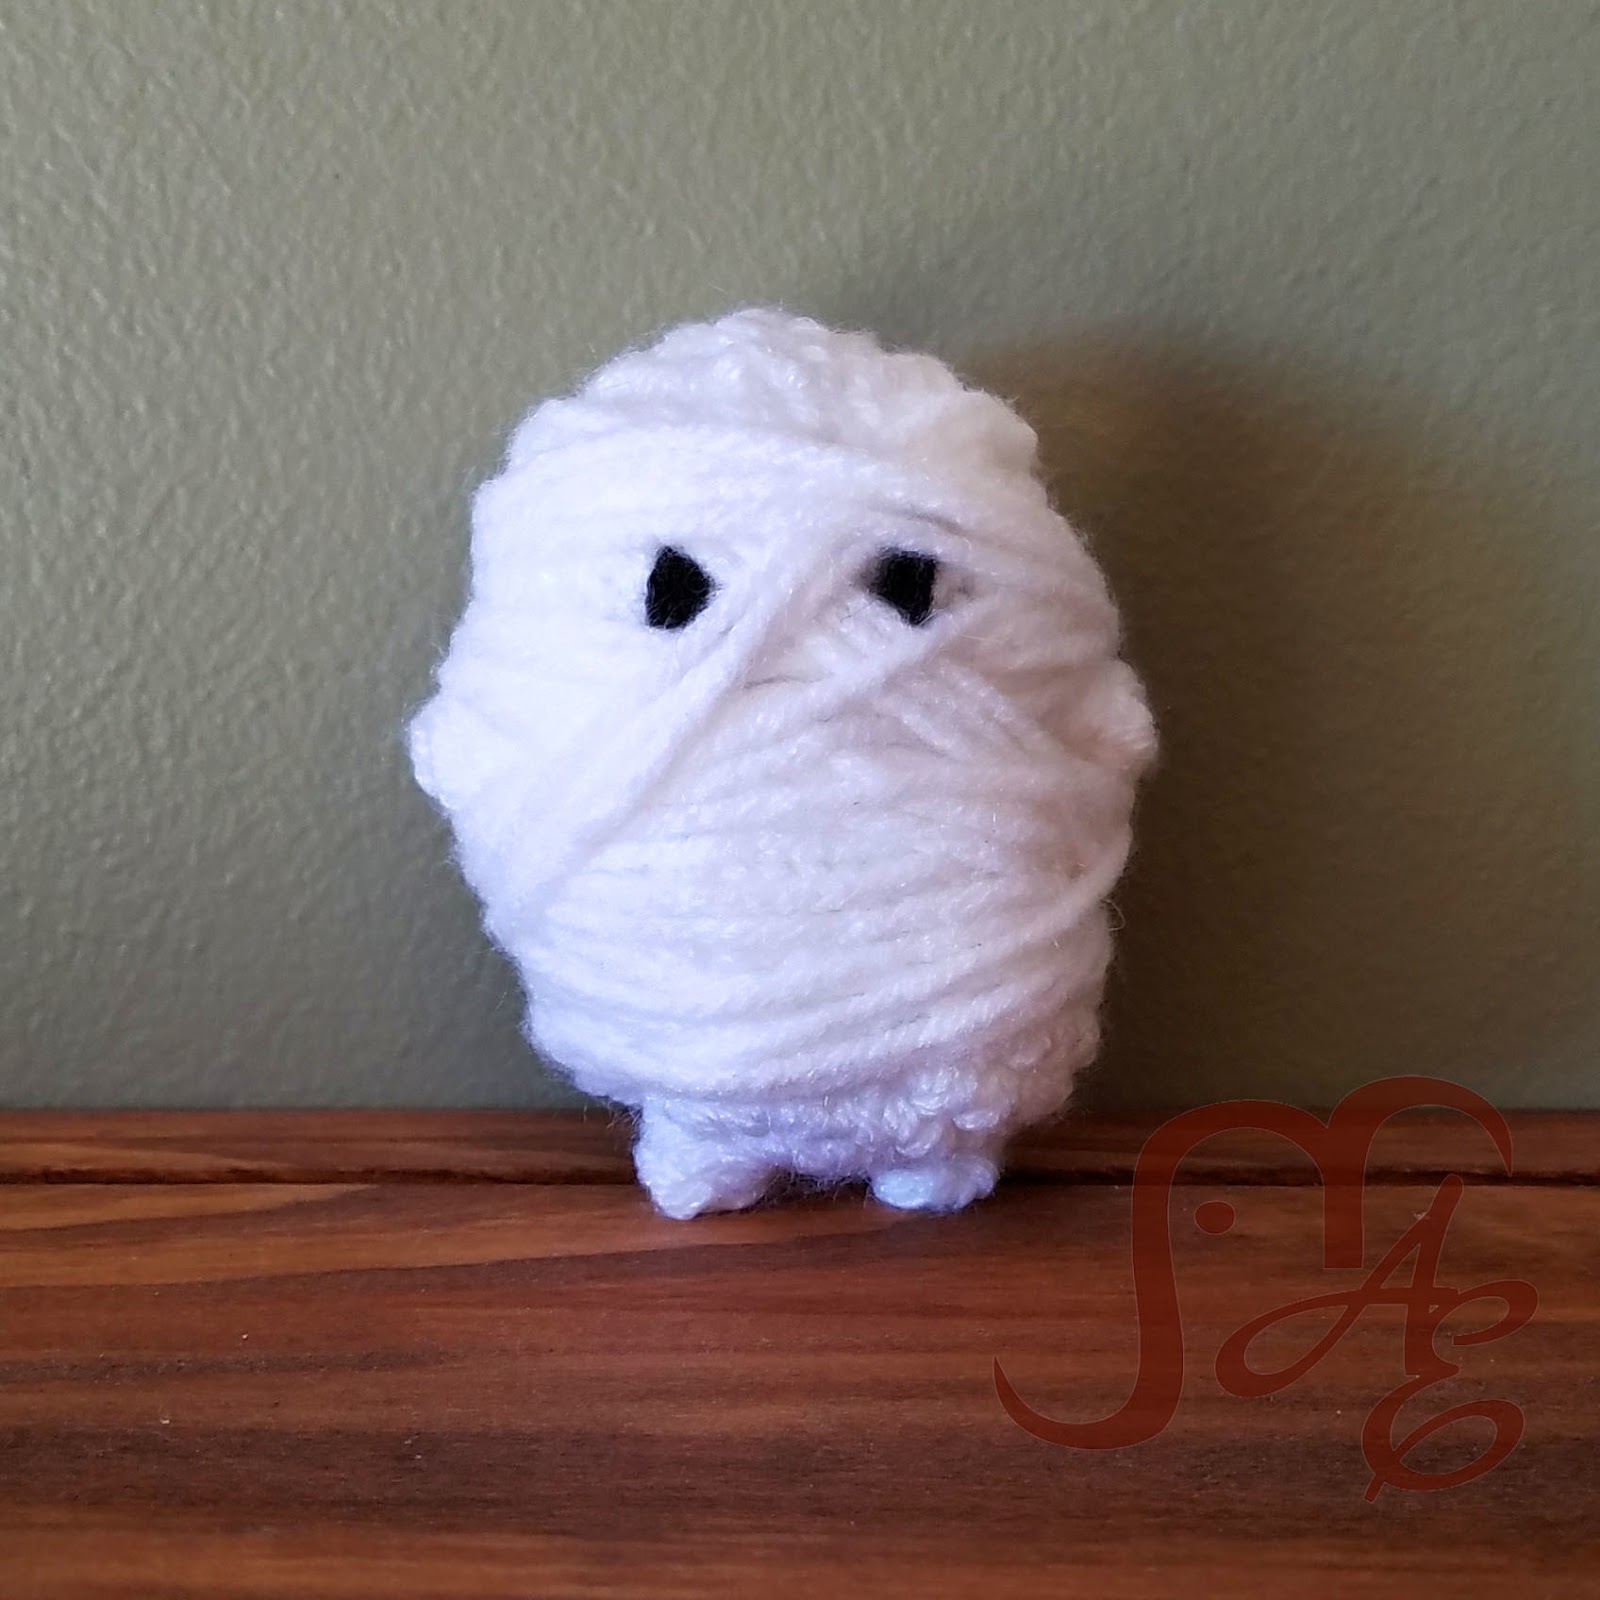
Mini Mummy
Supplies Needed:
G Hook
Worsted yarn, I used Red Heart Super Saver in White
Small amount of black yarn for the eyes
Yarn needle
Stitches Used: (in US terms)
MR- Magic Ring
SC- Single Crochet
Bobble- *Yarn Over, Insert hook into stitch, Yarn Over, Pull through, Yarn Over, Pull through 2 loops* Repeat from * to * 3 more times, until you have 5 loops on your hook, Yarn Over, Pull through 5 remaining loops.
TBobble- Triple Bobble (I’m sure I didn’t make up this stitch but I hadn’t come across it before and calling it a ‘TBobble’ makes me chuckle.) *Yarn Over twice (like you are about to do a triple crochet), Insert hook into stitch, Yarn Over, Pull Through, Yarn Over, Pull through 2 loops, Yarn over, pull through 2 loops* Repeat from * to * 3 more times until you have 5 loops on your hook, Yarn Over, Pull through 5 remaining loops.
Dec- SC dec
Worked in a continuous round, use a stitch marker to keep track of your place.
1) MR 8 SC (8)
2) 2SC in next stitch, Bobble, 2SC in next 3, Bobble, 2SC in last 2 (2 Bobbles, 12 SC)
3) *SC, 2SC* Repeat from * to * around (21)
4) *SC 2, 2SC* Repeat from * to * around (28)
5-6) SC around (28)
7) SC 5, DEC, DEC, SC 10, DEC, DEC, SC 5 (24)
8) SC 5, DEC, SC 10, DEC, SC 5 (22)
9) SC 5, TBobble, SC 10, TBobble, SC 5 (You could use a regular Bobble here if you wanted, the TBobble just make the arms stand out more.) (2 TBobbles, 20 SC)
10) SC 5, 2SC, SC 10, 2SC, SC 5 (24)
11-12) SC around (24)
13) *SC 6, DEC* Repeat from * to * around (21)
14) SC around (21)
15) *SC, DEC* Repeat from * to * around (14)
Stuff
16) DEC around (7)
Finish off, leave a tail to sew shut the hole.
With your black yarn, stitch on some eyes wherever you would like them. They don’t have to be perfectly even since you’ll be partially covering them with your “wrap” anyway.
With your white yarn, begin wrapping up your mummy pretty tightly but not so tight that it distorts the shape. Leave your starting tail sticking out a little, enough that you’ll be able to tie it off and stitch back in. Try to cover as much of the body as you can without making it too bulky. Or do less, you are in charge of your mummy. 🙂 I like to go in between and around the eyes so that it looks a little spookier. When you are happy with your mummy wrap, cut your yarn leaving a longish tail. Tie it together with the beginning tail. Then take each end and tack down the wrap in several places. This will keep it from coming off or moving around too much. Weave in the ends when you are done with that and there you go!
Note: These patterns are available for free. You are welcome to use the patterns to make and sell products. I would appreciate receiving credit and a link back to the site. Please do not republish or distribute the patterns in any way, or use my photos in your listings.
Also, these patterns are untested by anyone other than myself at this point. If you find any errors or places that need clarification, please let me know so that I can fix my mistakes.