This post may contain affiliate links. If you use these links to buy something I may earn a small commission at no cost to you. Thanks.
…
My boys only casually watched this Umizoomi show so I wasn’t terribly familiar. I had a friend ask if I would make a Bot plush for her daughter’s birthday so I had to figure one out. I love the way he came out! Even if you aren’t familiar with the show he’s still and adorable little robot guy!!!

A couple of disclaimers: This pattern is intended for personal use only. You are welcome to use the pattern to make and sell products, to keep for yourself, or to give away as gifts. I would appreciate receiving credit and a link back to the site, however. Please do not republish or distribute the pattern in any way, or use my photos in your listings.
I am not a robot, so if you find any typos, errors, or places that need clarification, please let me know so that I can fix my mistakes or explain things differently. 🙂

I hope you enjoy this crochet pattern. If you have any questions or comments you can leave them below OR email me at auburnelephant@gmail.com OR through the contact page on this site. I’d also love to see your finished creations! 🙂
BOT Plush from Team Umizoomi
Supplies Needed:
Red Heart Super Saver, Medium Worsted Weight 4 (100% Acrylic, 364 yds, 7 oz) Spring Green, 1 skein, Royal, 1 skein, Black, 1 skein, White, 1 skein, Pumpkin, 1 skein
G/6 4.25mm Hook
Tapestry Needle
PolyFil
6mm safety eyes (2)
Stitches Used:
US terminology
Ch- Chain
Sl st- Slip Stich
SC- Single Crochet
HDC- Half Double Crochet
Special Stitches:
2SC- SC Increase, 2 SC in the same stitch
HDC DEC- Half Double Decrease, HDC 2 stitches together
FPSC- Front Post Single Crochet
BPSC- Back Post Single Crochet
SC DEC- Single Crochet Decrease, SC 2 stitches together
BPSC DEC- Back Post Single Crochet Decrease around the posts of the next 2 stitches. Insert hook from back to front and then from front to back going around 2 posts at once.
HDC DEC- Half Double Crochet Decrease
NOTES:
- I would consider this an intermediate pattern, or advanced beginner, due to the use of Front and Back Post Stitches. If you aren’t familiar with the technique it could seem a little tricky.
- Unless noted, this project is worked in joined rounds. Each round starts with a Ch 1 and ends with a sl st to the first stitch of the round. I did this so that the color changes would be crisper.

Body
In Green
1) Using the Magic Ring technique (OR Ch 3 and join with a sl st to the first chain to form a ring) SC 8 (8)
2) 2SC in each around (16)
3) *SC in next, 2SC* Repeat from * to * around. (24)
4) SC in each around. (24)
5) *SC in next 2, 2SC in next* Repeat from * to * around. (32)
6) *SC in next 3, 2SC in next* Repeat from * to * around. (40)
7) SC in each around. (40)
8) *SC in next 4, 2SC in next* Repeat from * to * around. (48)
9-10) SC in each around. (48)
Switch to Blue
11) *FPSC around next 7, 2FPSC around next stitch (increase)* Repeat from * to * around. (54 FPSC)
12) BPSC around each FPSC of the last round. (54 BPSC)
Switch to Black but leave working Blue, you’ll pick it back up for the next round.
13) Sl st loosely around (54 Sl st)
This round serves as the mouth. You could skip the sl st round if you’d like and stitch a line with black when you are done.
Switch to Blue
14) In the tops of the BPSC of Round 12 (skipping the black sl st round) *HDC in next 7 stitches, HDC DEC* Repeat from * to * around (48 HDC)
15) BPSC in each around (48)
Place eyes before you get too far into the next Green section. I placed mine between Rounds 9 and 10, approximately 5 stitches apart. You’ll probably want to place the eyes so that the seam where you joined your rounds is on the backside.
Switch to Green
16) FPSC in each BPSC around (48)
17) SC in next 11, SC DEC, SC in next 22, SC DEC, SC in next 11 (46)
18) SC in each around (46)
19) SC in next 21, SC DEC, SC in next 21, SC DEC (44)
20) SC in each around (44)
21) *SC in next 9, SC DEC* Repeat from * to * around (40)
22-23) SC in each around (40)
24) SC in next 4, SC DEC, *SC in next 8, SC DEC* Repeat from * to * 2 more times, SC in last 4 (36)
25-27) SC in each around (36)
28) *SC in next 7, SC DEC* Repeat from * to * around (32)
29) SC in each around (32)
30) BPSC in each around (32)
Switch to Blue
31) *SC in next 2, SC DEC* Repeat from * to * around (24)
Start Stuffing
32) *SC in next, SC DEC* Repeat from * to * around (16)
Add more stuffing, if needed to reach the firmness level you’d like.
33) SC DEC around (8)
Finish Off, leave tail to sew opening shut. Weave in ends.
Legs (Make 2)
In Green
1) Ch 11, SC in 2nd from hook, SC 9, Ch 1, turn. (10)
2-4) SC in each across, Ch 1, turn. (10)
Finish off, leaving long tail. Fold piece in half lengthwise and sew together the beginning chain and Row 4 making a long tube. See Photo below.

In Blue
1) Attach yarn to the end of the green tube, 2SC in the end of each row around, sl st to first SC. (8)
2) Ch 1, *SC in next, 2SC in next* Repeat from * to * around. (12)
3) SC in each around. (12)
4) *BPSC around next stitch, BPSC DEC* Repeat from * to * around. (8)
Use a little bit of stuffing to fill in the foot. Finish Off, leave tail to sew hole shut. Weave in ends.
Arms (make 2)
In Green
1) Ch 13, SC in 2nd from hook, SC 11, Ch 1, turn. (12)
2-4) SC in each across, Ch 1, turn. (12)
Finish off, leaving long tail. Fold piece in half lengthwise and sew together the beginning chain and Row 4 making a long tube. Use the same technique as with the legs.
In Blue
1) Attach yarn to the end of the green tube, *SC, then 2SC in next* Repeat from * to * around. (6)
Switch to Orange
2) 2SC in each around. (12)
3-4) SC in each around. (12)
5) SC DEC around. (6)
Stuff a little, Finish off, leave tail to sew shut. Weave in ends.
Tummy Screen

In White
1) Ch 9, Starting in 2nd Ch from hook, SC 8, Ch 1, turn. (8)
2) SC across, Ch 1, turn. (8)
3) 2SC in next stitch, SC in next 6, 2SC in last stitch, Ch 1, turn. (10)
4-7) SC in each across, Ch 1, turn. (10)
Change to Orange
SC around outside of white piece, adding 3 SC in each corner. Finish Off. Leave long tail to sew to body.
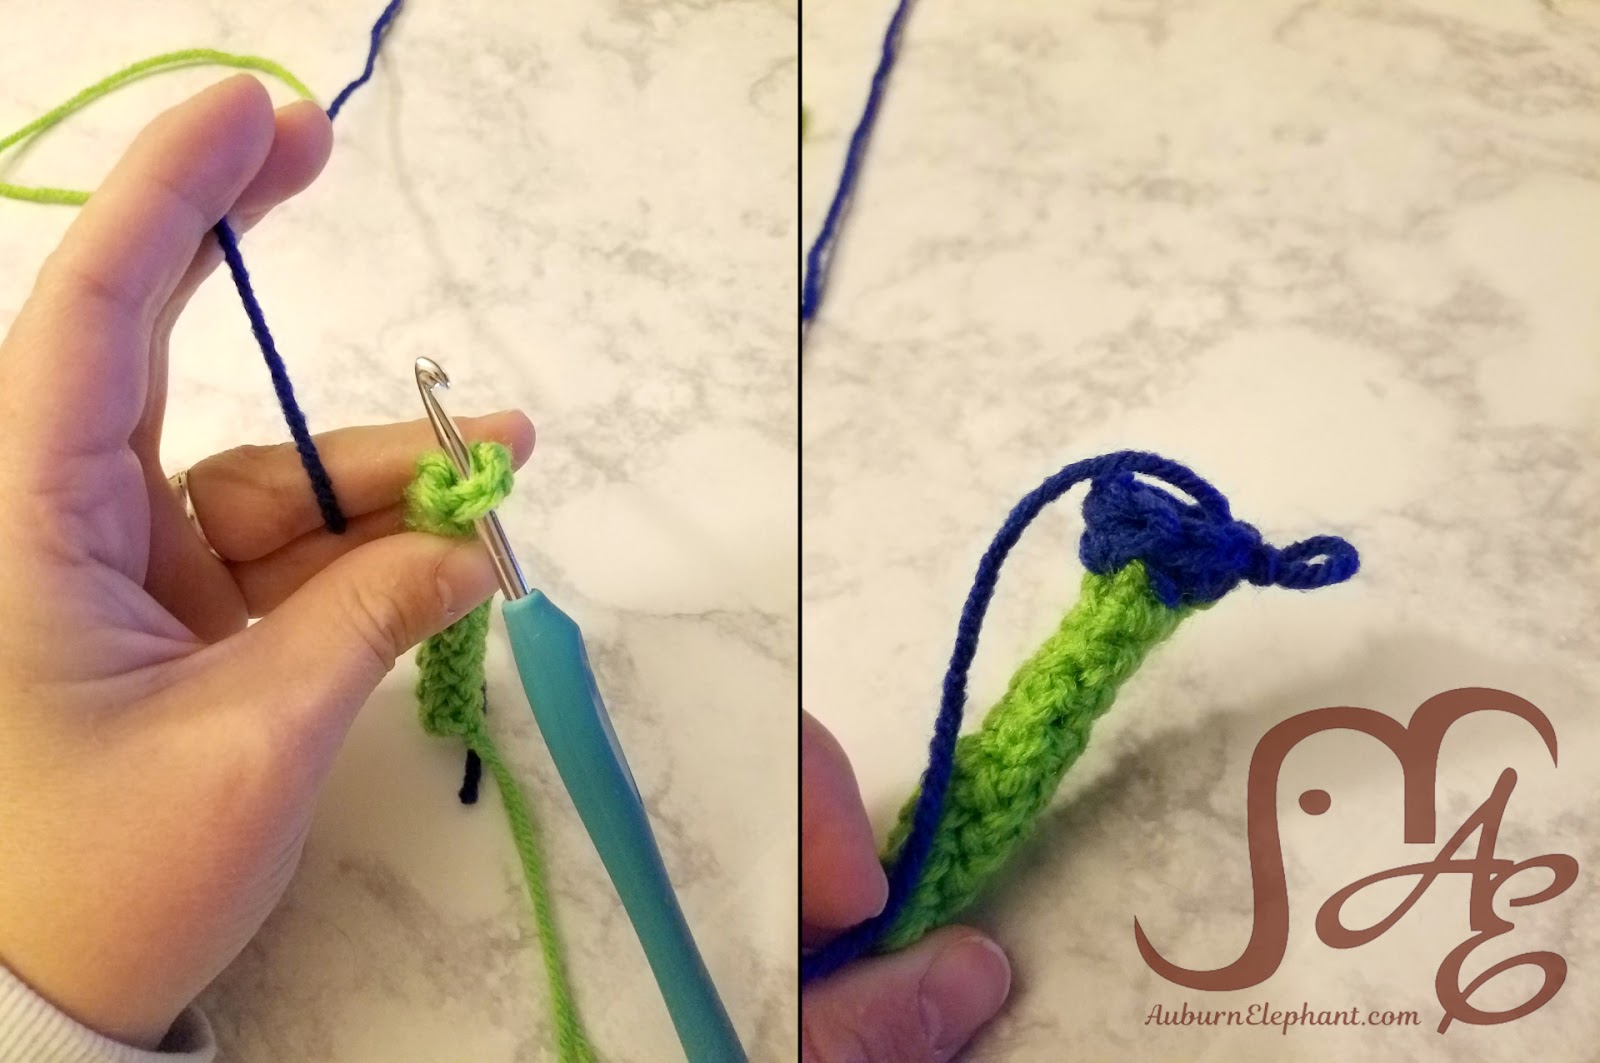
Antenna
The antenna part will be 3 separate pieces put together. Photos are at the end of the written pattern.
In Green (leave a long starting tail)
1) Ch 3, starting in 2nd Ch from hook, SC 2 (2)
2-4) Ch 1, turn. SC across (2) (Do NOT finish off)
Use starting tail to sew shut the tube.
Picking back up the working end-
1) 2SC in each end space around, Sl st to join to top of first SC. (8)
2) Ch 1, *SC in next, 2SC in next* Repeat from * to * around. Sl st to join to top of first SC. (12)
3) Ch 1, SC in each around. Sl st to join to top of first SC. (12)
Finish Off. Weave in ends.
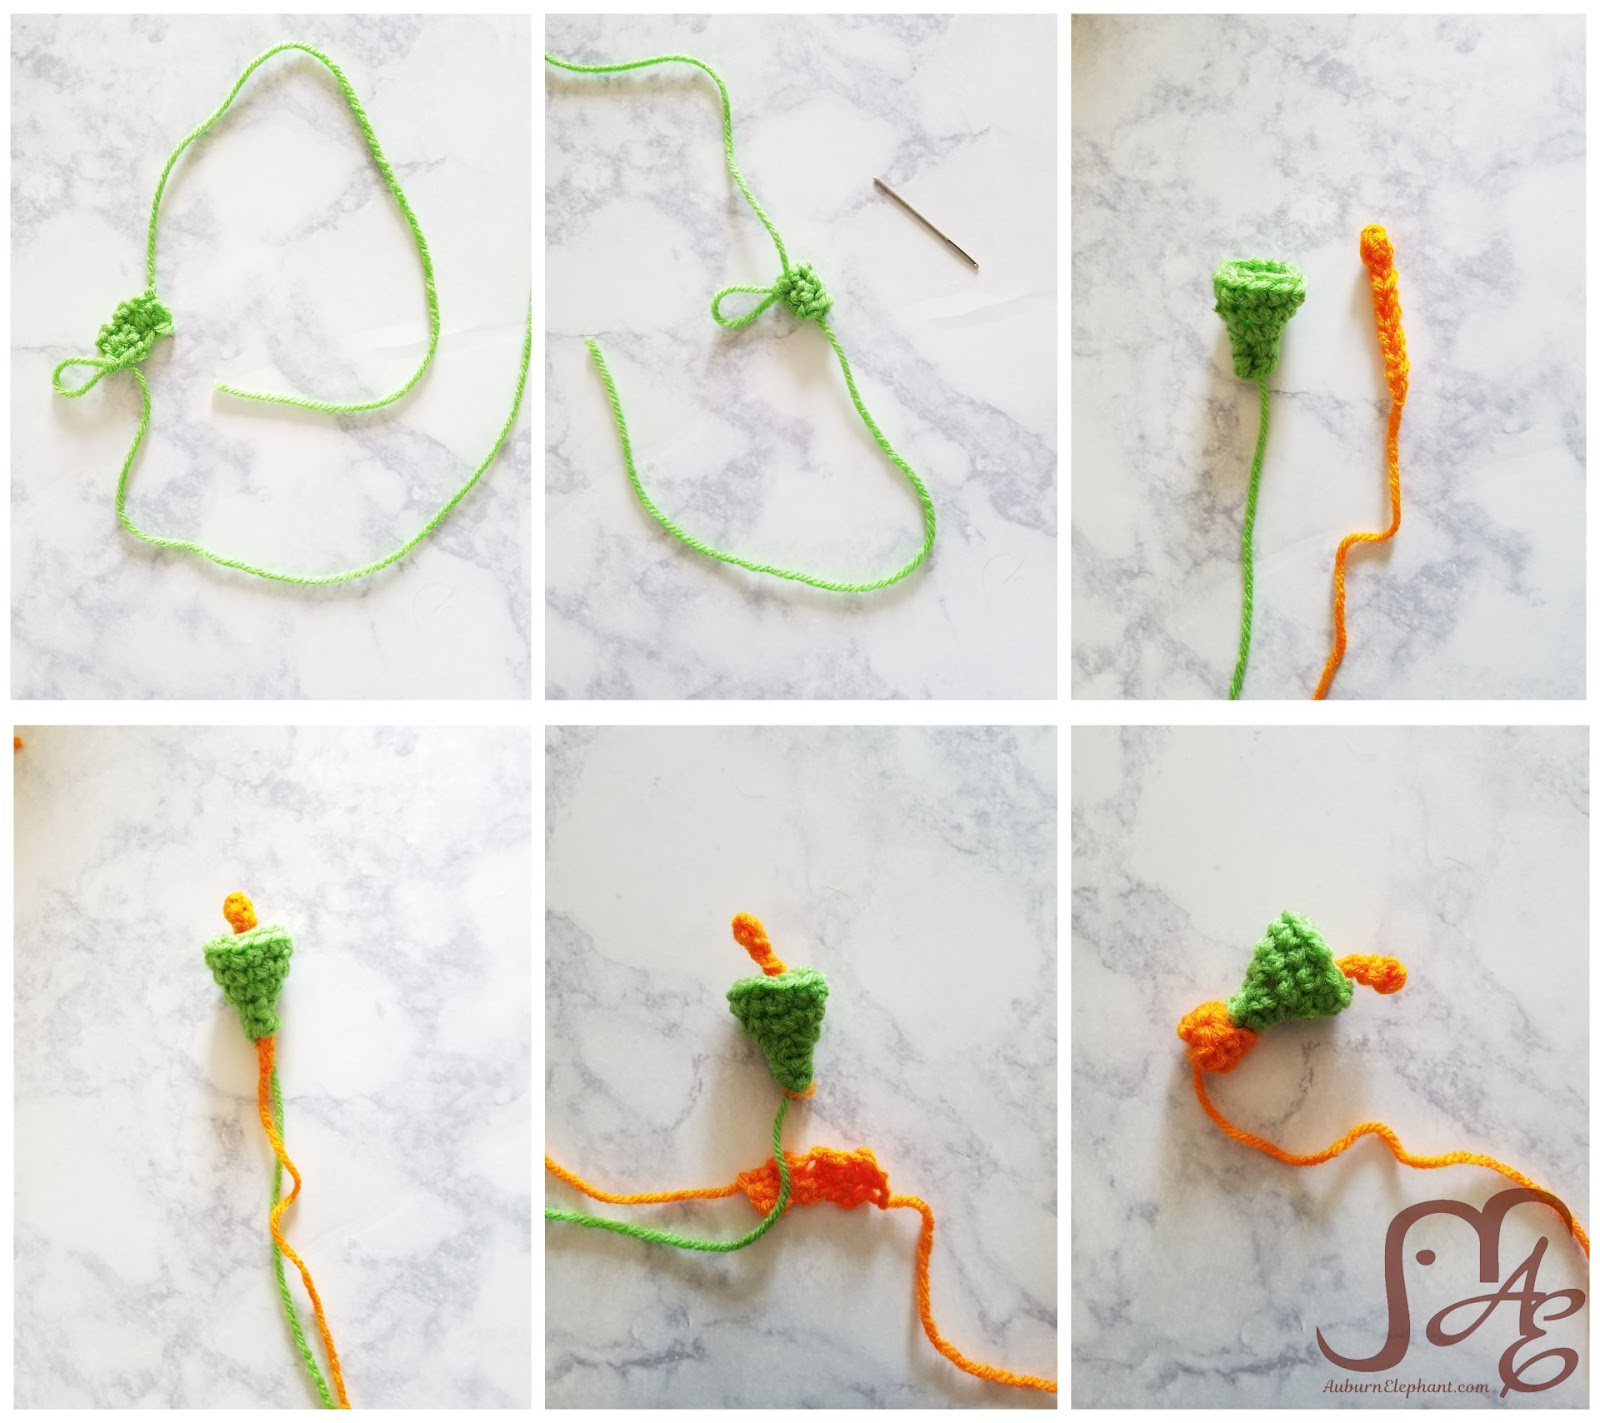
In Orange
Ch 10, in 2nd from hook, Sl st in next 2. Finish off. Use tail to sew together top “bulb”. Pull chain end through the center of main antenna piece.
In Orange
1) Ch 3, starting in 2nd from hook, SC 2 (2)
2-6) Ch 1, turn. SC 2 (2)
Wrap this piece around the bottom of the green shell part and sew shut. Go through the Green as you are weaving in the ends to secure the two pieces together.
Assembly
I start putting BOT together by sewing on the antenna. BOT’s antenna is over his left eye and slightly forward from the center of his head.
Next sew on the Tummy Screen. Center this piece on the front of his body. Using the eyes as a guide.
Sew the arms on either side of the body. Since the Tummy Screen is on, use that to help make them even as well. So if you put the left arm on 5 stitches away from the edge of the screen, you’ll put the right arm on 5 stitches away on the other side.
For the legs, I put them closer together and toward the front rather than completely centered on the bottom. I planned on him to be more of a sitter anyway. As always, use your judgement!
Watch how Bot comes together! 🙂