This post may contain affiliate links. If you use these links to buy something I may earn a small commission at no cost to you. Thanks.
…
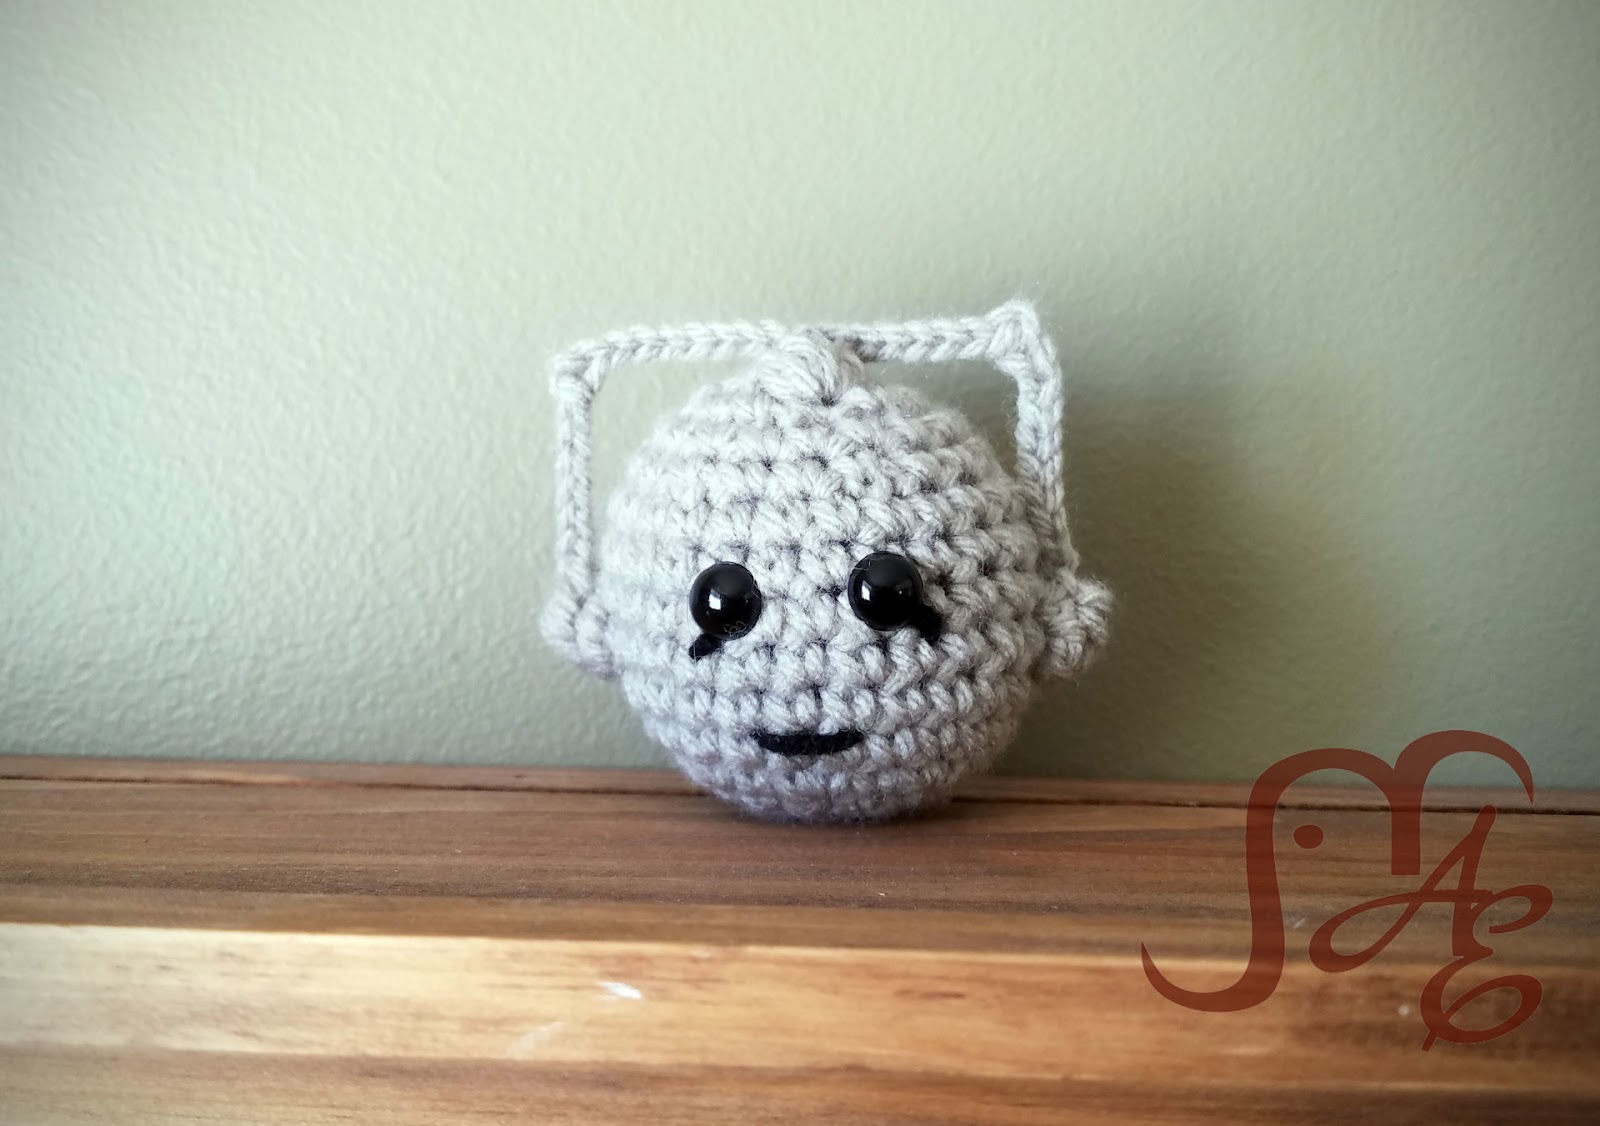
I have been a little obsessed with making these little “mini” guys. I love how quick they are and how cute! I mean, have you ever wanted to just squeeze a Cyberman so badly?! 🙂 These would be awesome to turn into ornaments or decorations as well. Just add a hook or loop to the tops!
I’m planning on coming up with more of these. Suggestions welcome! 😉
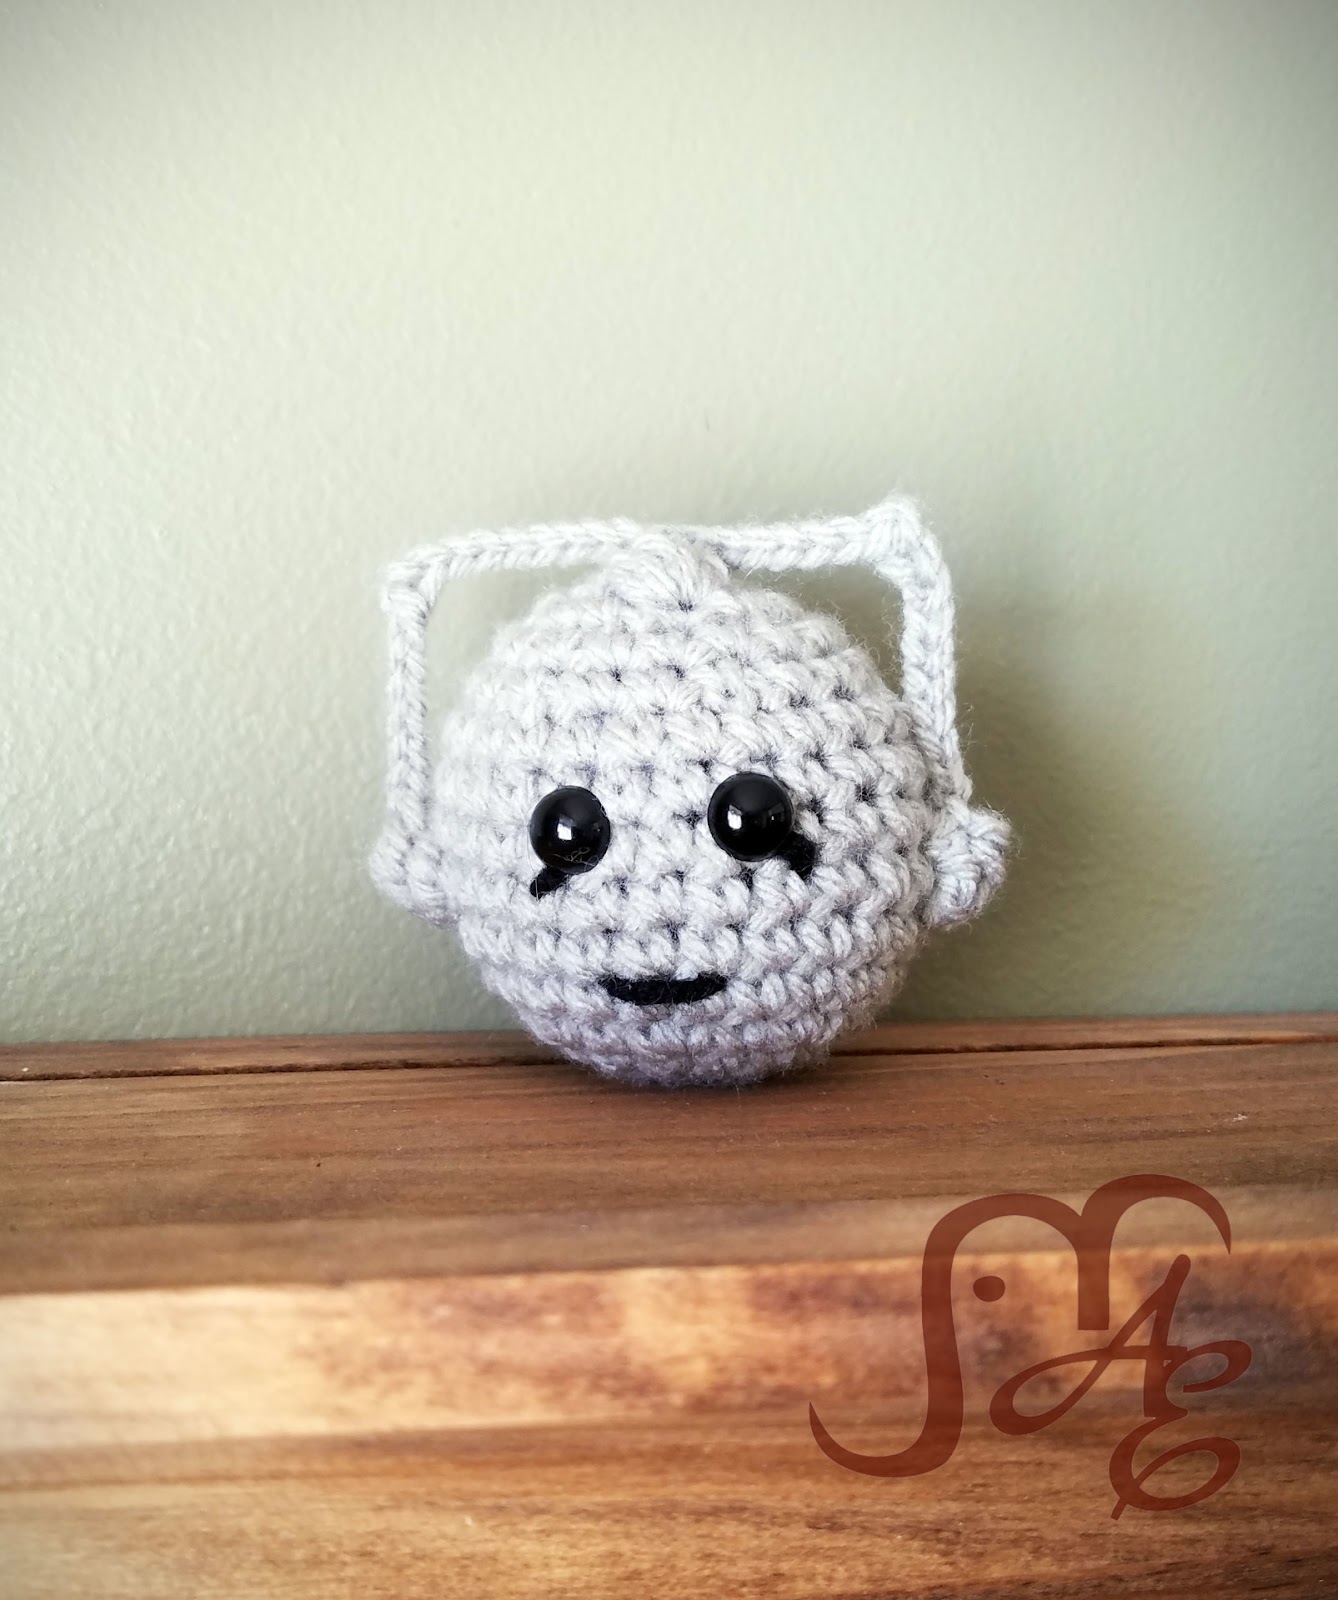
Mini Cyberman
Supplies Needed:

G Hook
Worsted yarn in Grey/silver, small amount of black for embroidery.
Safety eyes, I would suggest between 8 and 12 mm.
Yarn needle
Stitches Used: (in US terms)
MR- Magic Ring
SC- Single Crochet
2SC- Single Crochet Increase-Do 2 SC in the same stitch to increase
Bobble- *Yarn Over, Insert hook into stitch, Yarn Over, Pull through, Yarn Over, Pull through 2 loops* Repeat from * to * 3 more times, until you have 5 loops on your hook, Yarn Over, Pull through 5 remaining loops.
TBobble- Triple Bobble (I’m sure I didn’t make up this stitch but I hadn’t come across it before and calling it a ‘TBobble’ makes me chuckle.) *Yarn Over twice (like you are about to do a triple crochet), Insert hook into stitch, Yarn Over, Pull Through, Yarn Over, Pull through 2 loops, Yarn over, pull through 2 loops* Repeat from * to * 3 more times until you have 5 loops on your hook, Yarn Over, Pull through 5 remaining loops.
DEC- SC dec
This project is worked in continuous rounds. You won’t join. Use a stitch marker or scrap piece of yarn to keep track of the start of each round.
1) MR 8 SC (8)
2) 2SC in each around (16)
3) SC around (16)
4) *SC, 2SC* Repeat from * to * around (24)
5-6) SC around (24)
7) SC 5, TBobble, SC 11, TBobble, SC 6 (22 SC, 2 TBobble)
8-10) SC around (24)
11) *SC 2, DEC* Repeat from * to * around (18)
12) SC around (18)
Place eyes between rounds 8 and 9, but don’t put the backs on yet. Take your black yarn on a needle and stitch on the little eye drops (not sure what else to call them) I went from the place I was going to place the eye, which I found was easier if the safety back wasn’t on yet, and went out to the side and one row down. You can trial and error this part and see what works for you and how you like it best. Make sure to place your eyes again and attach the safety backs. You can also stitch on the mouth slit if you want to.
13) *SC, DEC* Repeat from * to * around (12)
Stuff with polyfil
14) DEC, DEC, DEC, Bobble, DEC, DEC, SC (7)
Leave a tail and sew close the hole. Do not cut yet. Leave the end to tie on the “handles”.
To make the “handles”, leave a long tail to start and tightly chain 10, loosely chain 2, ss into 2nd from hook (first loose chain), tightly chain 15, loosely chain 2, ss into 2nd from hook (first loose chain), tightly chain 10. Leave a long tail to sew on. Sew on each end to the tops of the TBobbles on the sides. Center the top row and sew onto the top bobble.
Note: This pattern is available for free. You are welcome to use the pattern to make and sell products. I would appreciate receiving credit and a link back to the site. Please do not republish or distribute the pattern in any way, or use my photos in your listings.
Also, these patterns are untested by anyone other than myself at this point. If you find any errors or places that need clarification, please let me know so that I can fix my mistakes.