
This post may contain affiliate links. If you use these links to buy something I may earn a small commission at no cost to you. Thanks.
…
Okay, I’ll admit it, I’ve been sucked in to watching April the Giraffe. I don’t know why it is so fascinating. I feel like the live feed might have jumped the gun a bit. It has been a couple of months, right? It’s still cool. One positive thing about our overly-connected society is that we can experience things like this that we would never get to normally. I mean, I don’t know too many people who have access to giraffes on a regular basis. So it is pretty neat.
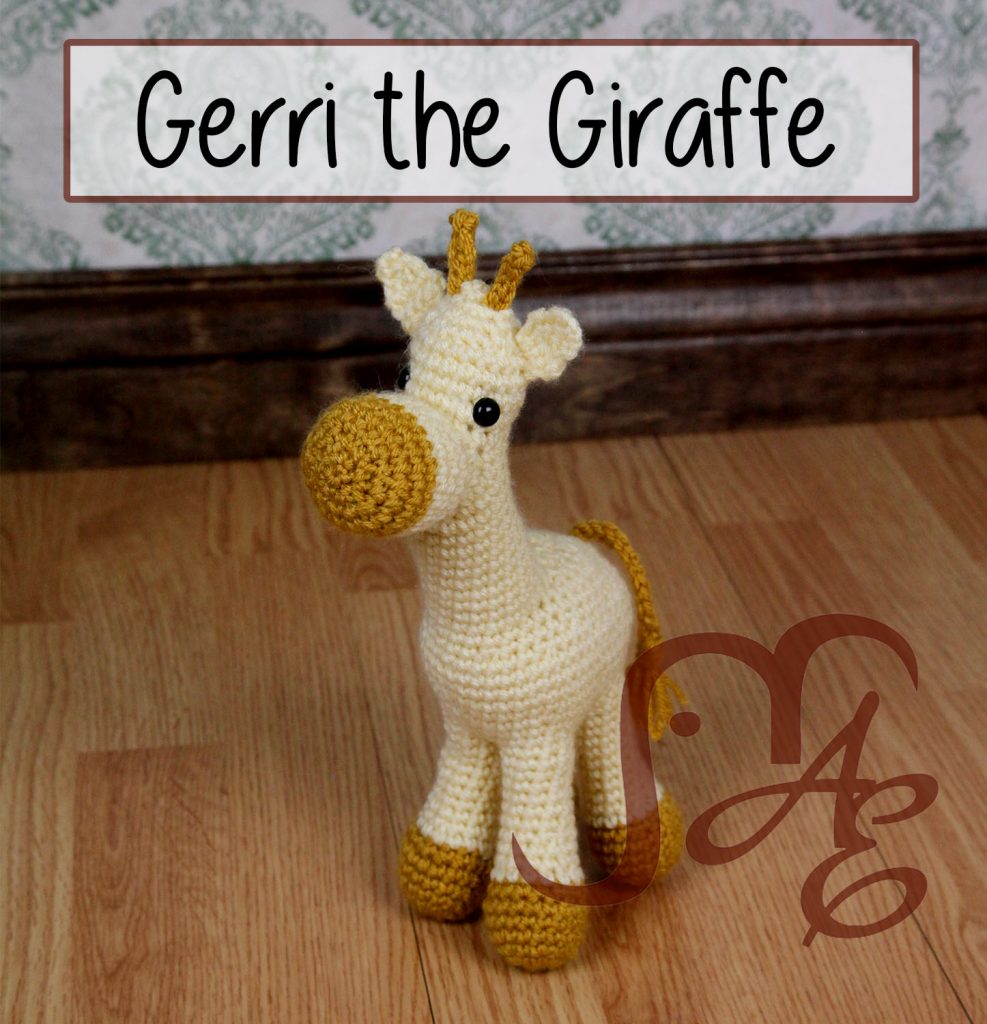
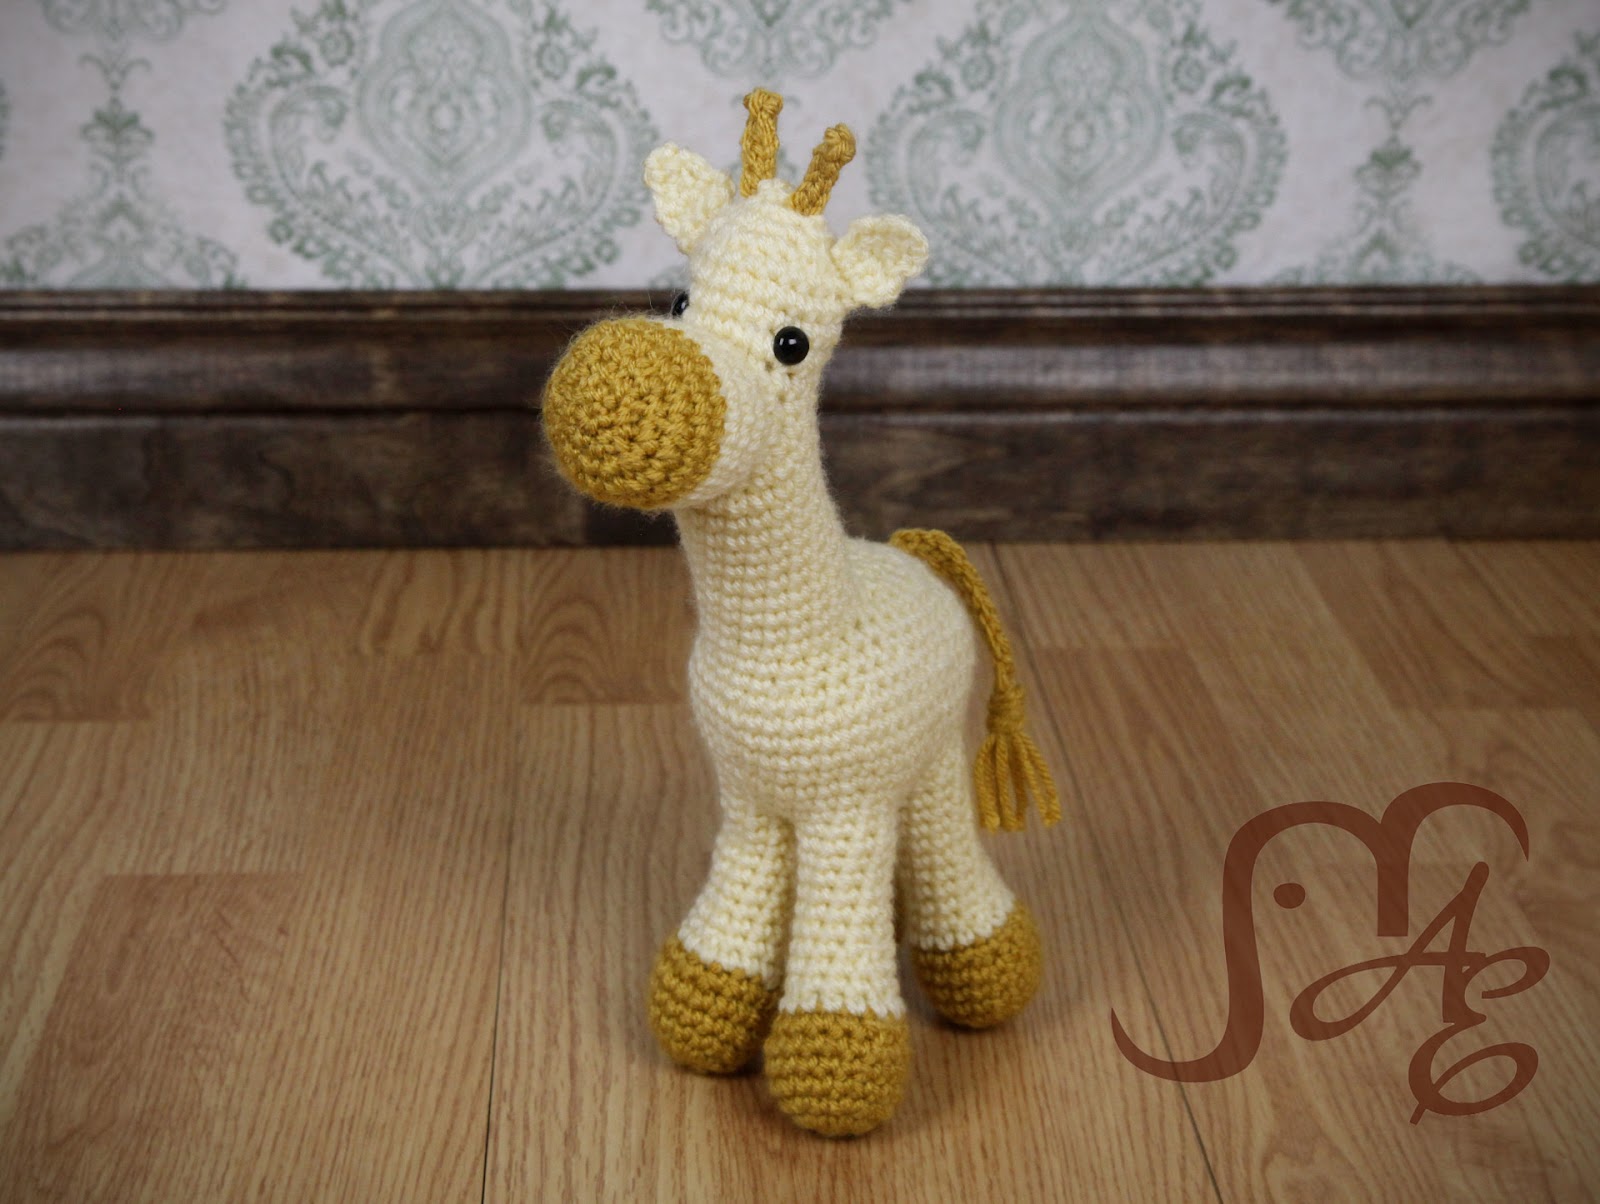
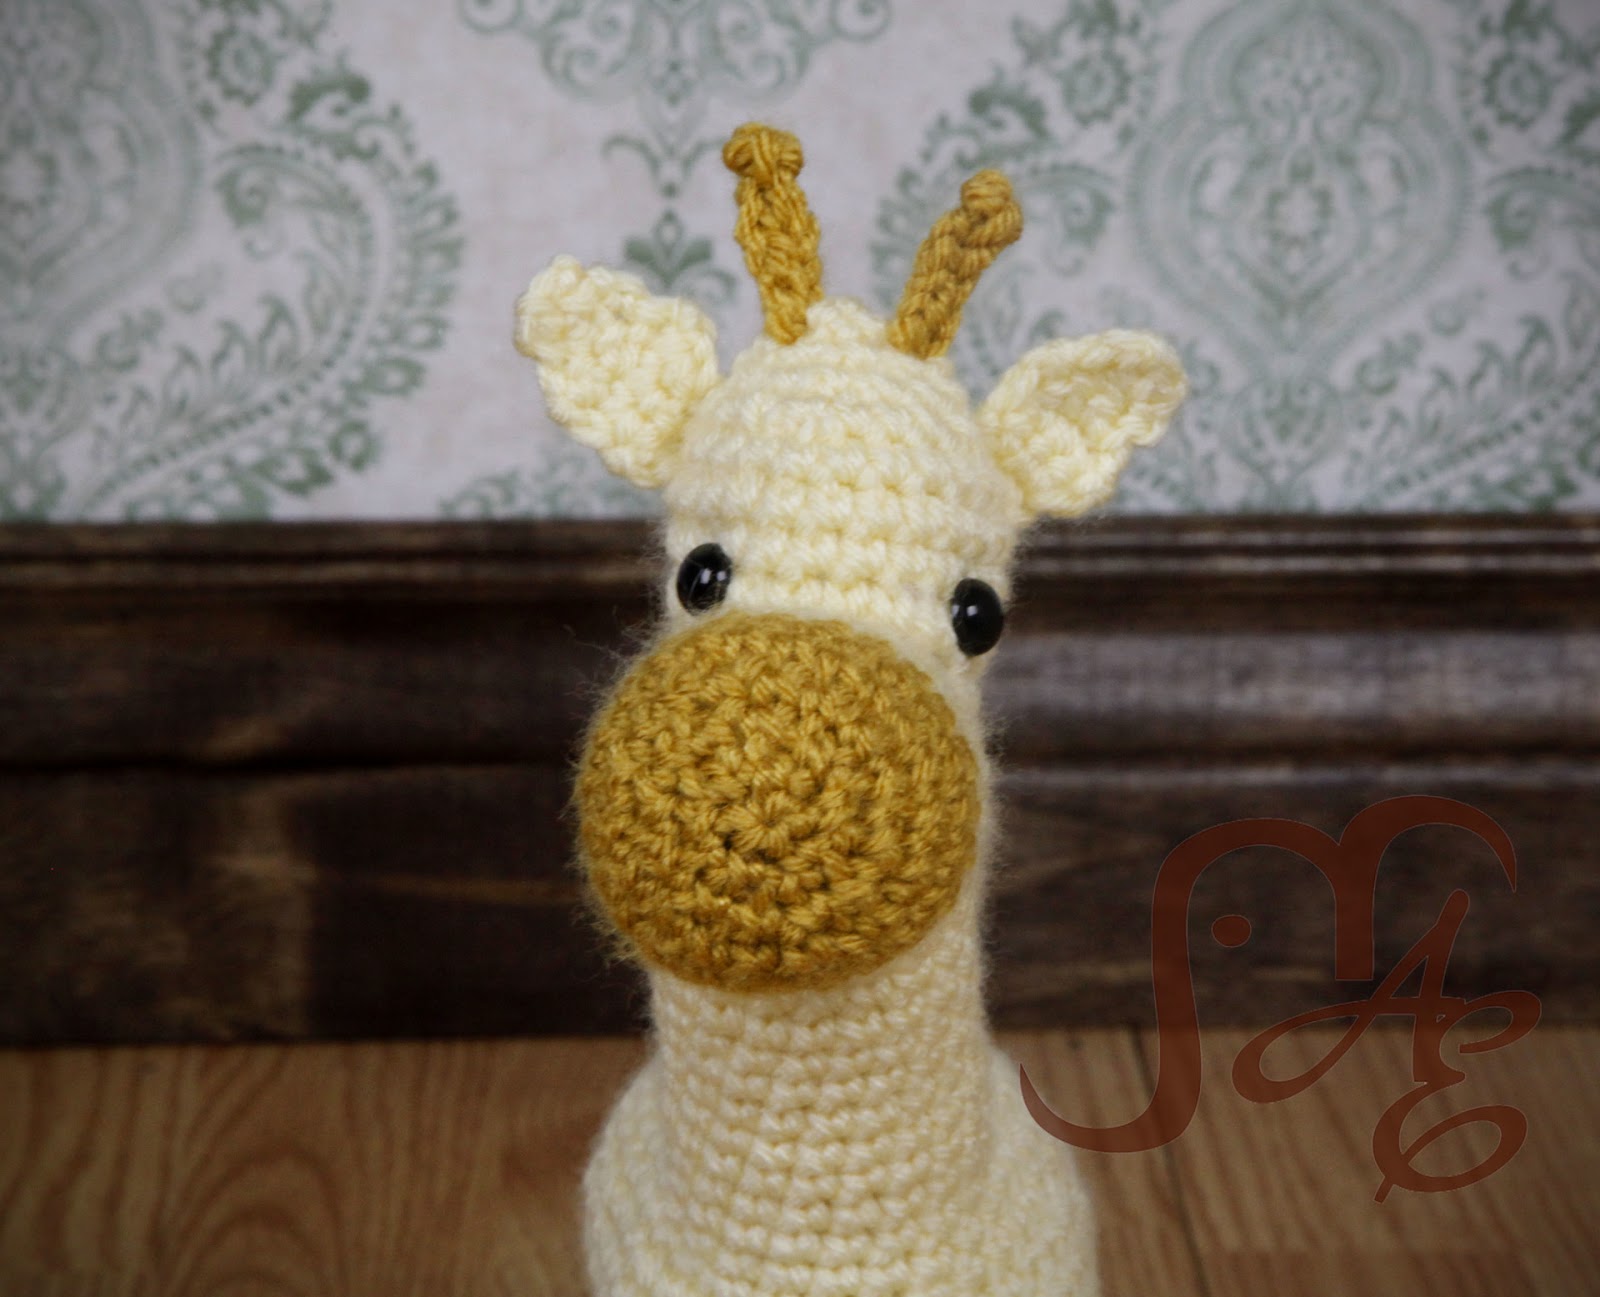
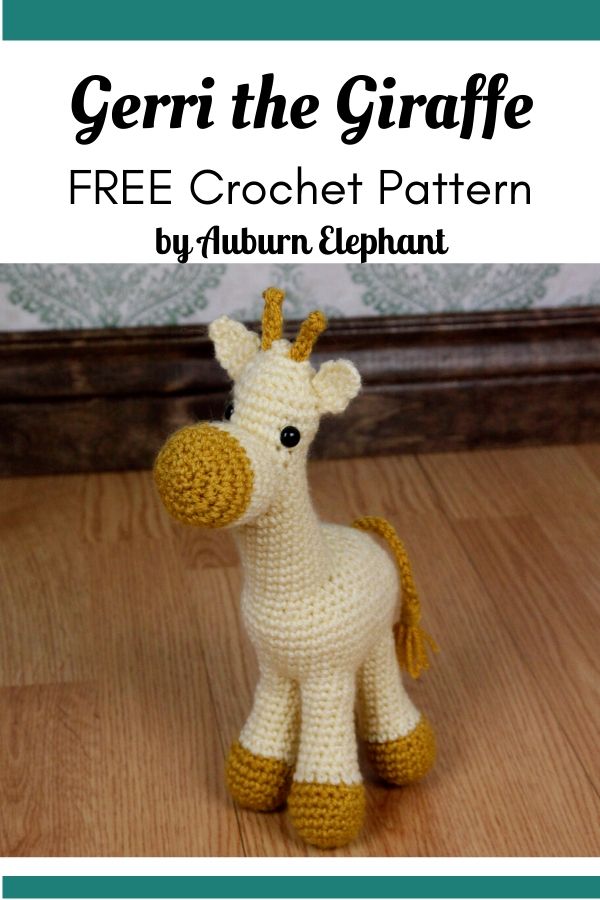
I did get a little impatient waiting and created my own little giraffe. Isn’t Gerri cute?! (I guess I’m hoping for a girl!)
UPDATE (4/20/18): I have updated this pattern to be a little more clear and accurate. Along with some extra step photos there are some additional optional add-ons. ENJOY! 🙂


A couple of disclaimers: This pattern is intended for personal use only. You are welcome to use the pattern to make and sell products, to keep for yourself, or to give away as gifts. I would appreciate receiving credit and a link back to the site, however. Please do not republish or distribute the pattern in any way, or use my photos in your listings.
I am not a robot, so if you find any typos, errors, or places that need clarification, please let me know so that I can fix my mistakes or explain things differently. 🙂
I hope you enjoy this crochet pattern. If you have any questions or comments you can leave them below OR email me at auburnelephant@gmail.com OR through the contact page on this site. I’d also love to see your finished creations! 🙂
Gerri the Giraffe Amigurumi
Supplies Needed:
Worsted Weight (4) Yarn in 2 coordinating colors
G/6 4.25mm Hook
Tapestry Needle
10mm Safety Eyes
Polyfil Stuffing
Stitches Used:
Ch- Chain
SC- Single Crochet
MR- Magic Ring
2SC- SC increase. Do 2 SC in the same stitch to increase.
DEC- Single Crochet 2 stitches together. I like to use an invisible decrease. Insert hook up through the front loop of the next 2 stitches, Yarn Over, Pull through both front loops, Yarn over, pull through to finish the single crochet.

SC3TOG- SC Decrease over 3 stitches
HDC- Half Double Crochet
DC- Double Crochet
Loop Stitch (optional)
Note: Each section is worked a little differently. Be sure to read the notes for each.
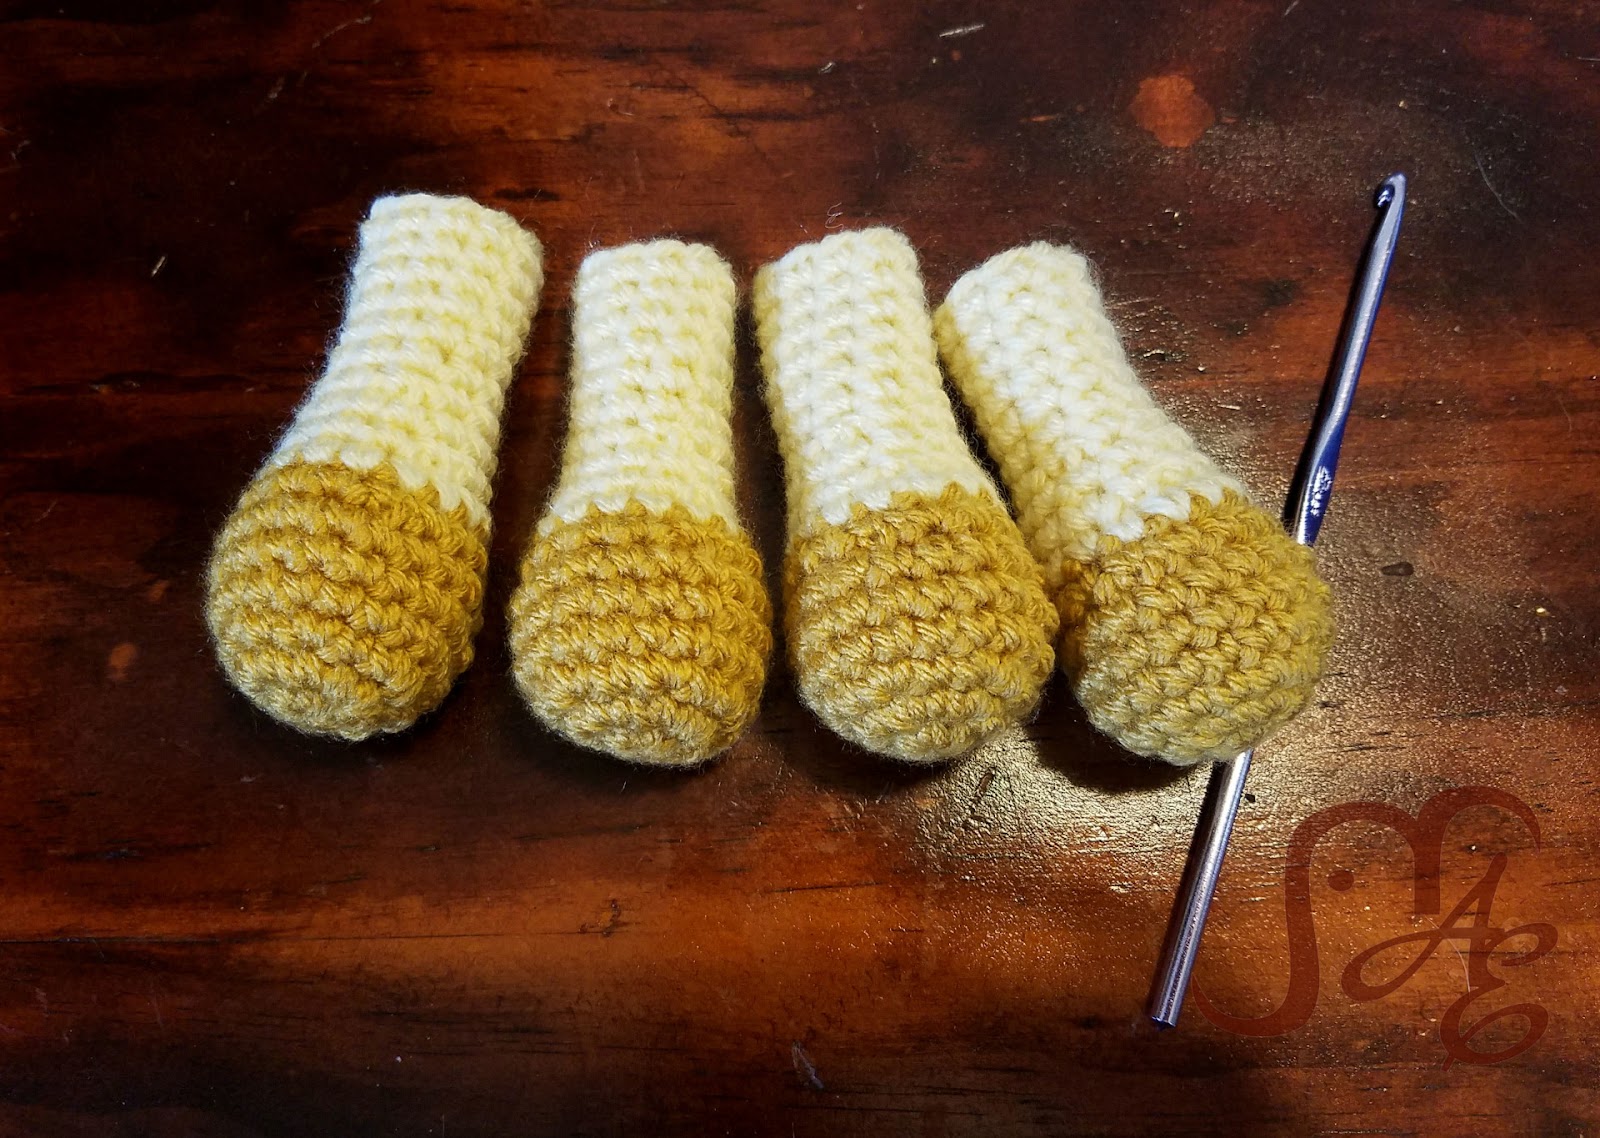
Legs
Make 4
These are worked in joined rounds. Each round begins with a Ch 1 and ends with a SS to the top of the first single crochet. Chains do not count as stitches.
Starting with the Hoof color
1) MR 6 SC (6)
2) 2SC in each around (12)
3) *SC, 2SC* Repeat from * to * around (18)
4-6) SC in each around (18)
7) *SC 4, DEC* Repeat from * to * around (15)
Change to Body color
8) SC in each around (15)
9) *SC, DEC* Repeat from * to * around (12)
10) SC in each around (12)
11) *SC 4, DEC* Repeat from * to * around (10)
12-17) SC in each around (10)
Finish Off. Stuff each leg.
Body
Except where noted, you’ll be working in continuous rounds, do not join. You will need a stitch marker (or scrap piece of yarn) to keep track of your rounds. And I suggest leaving a long tail so that you can stitch close any gaps you might notice.
1) Ch 4, In 2nd chain from hook, 2SC, SC in next chain, 3SC in last chain, (continue onto other side of the starting chain), SC, SC in same as starting (8)

Beginning Body oval made after Round 1. Some of these example photos are from an update to the Unicorn Plush pattern. The techniques and instruction are the same for Gerri.
2) 2SC, 2SC, SC, 2SC, 2SC, 2SC, SC, 2SC, SS to top of first SC of round. (14)
Here you’ll connect the legs. To do this, insert the hook from the inside to the outside of the leg (it doesn’t make a huge difference which stitch you start in, I usually try to put the seam toward the inside though), then through the next stitch on the body, yarn over and pull through all the way to complete a SS. Follow instructions in Round 3.
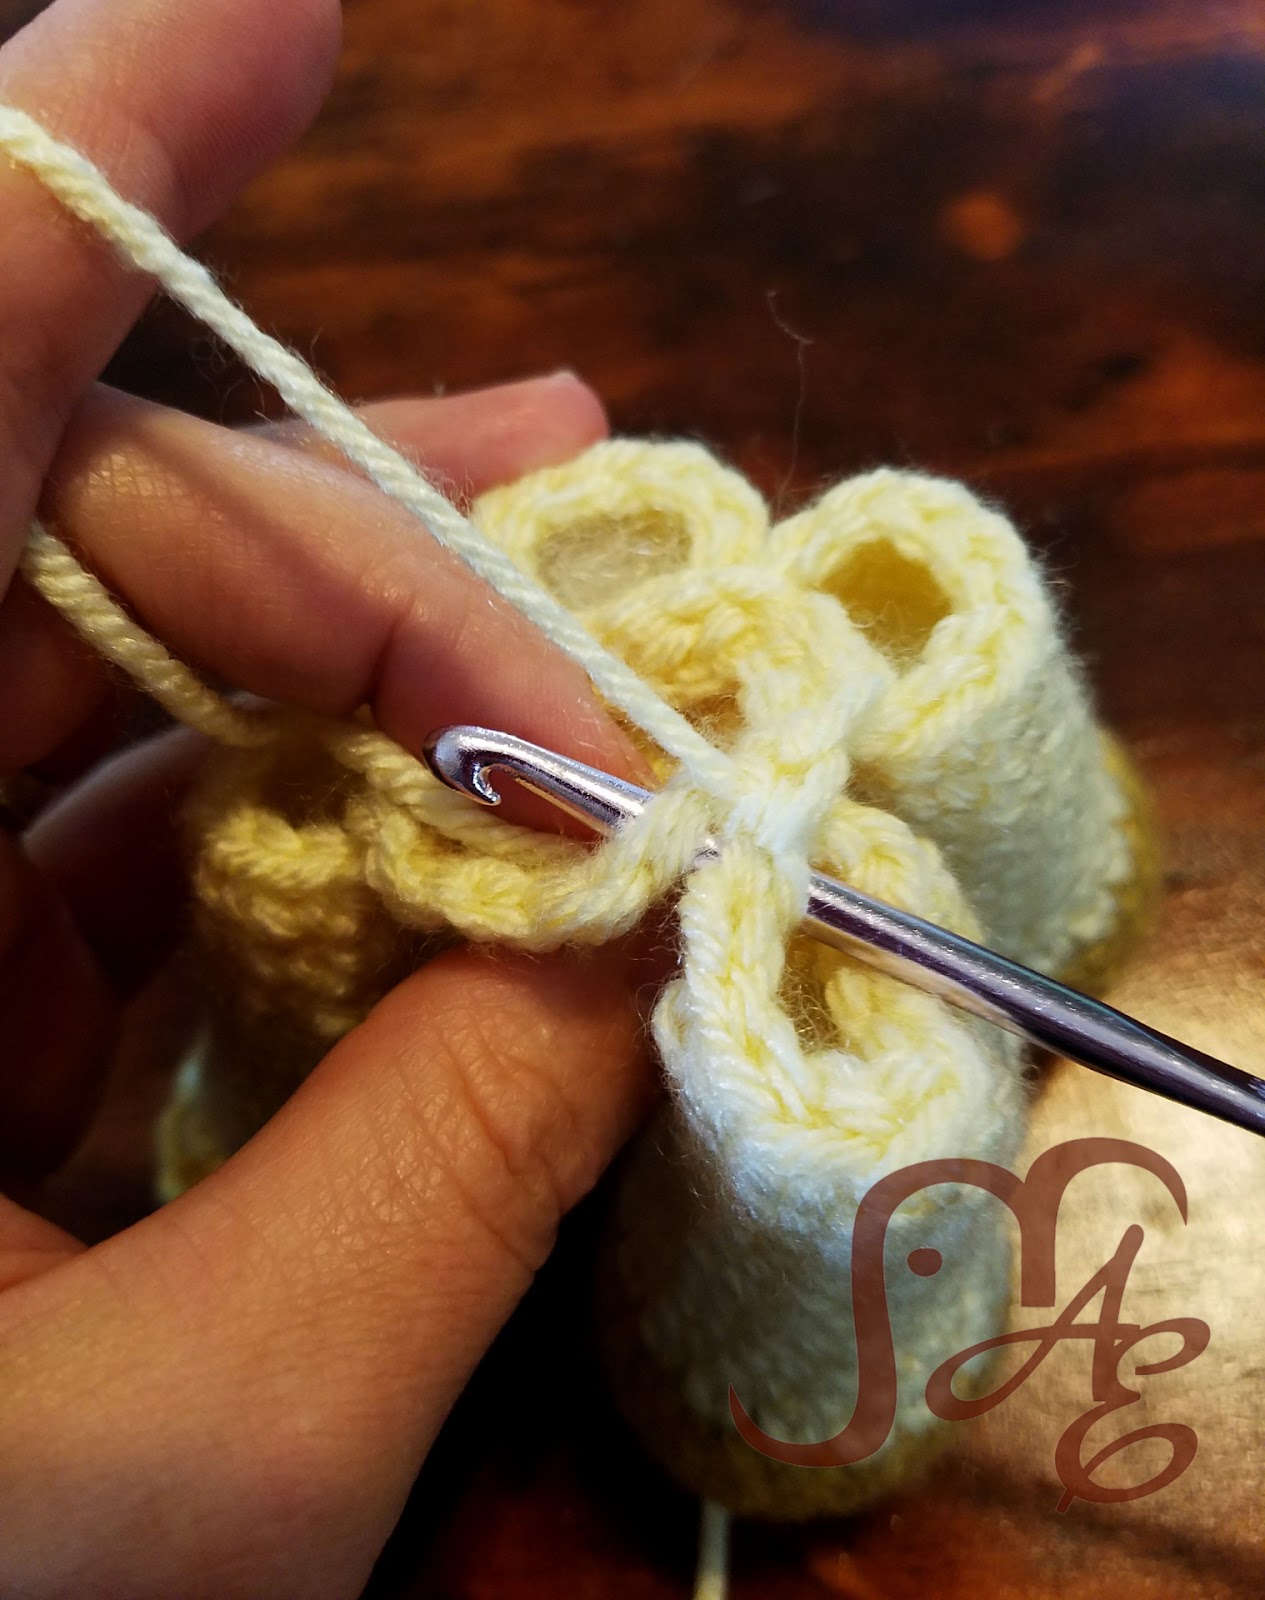
To attach legs, insert hook from inside to outside of a leg, then insert hook through next stitch on body. Yarn Over and pull through.
3) SS 3 through leg, 2SC in next stitch on the belly, SS 3 through next leg, SS 3 through next leg, 2SC in next stitch on the belly, SS 3 through leg. (4 SC, 12 SS).
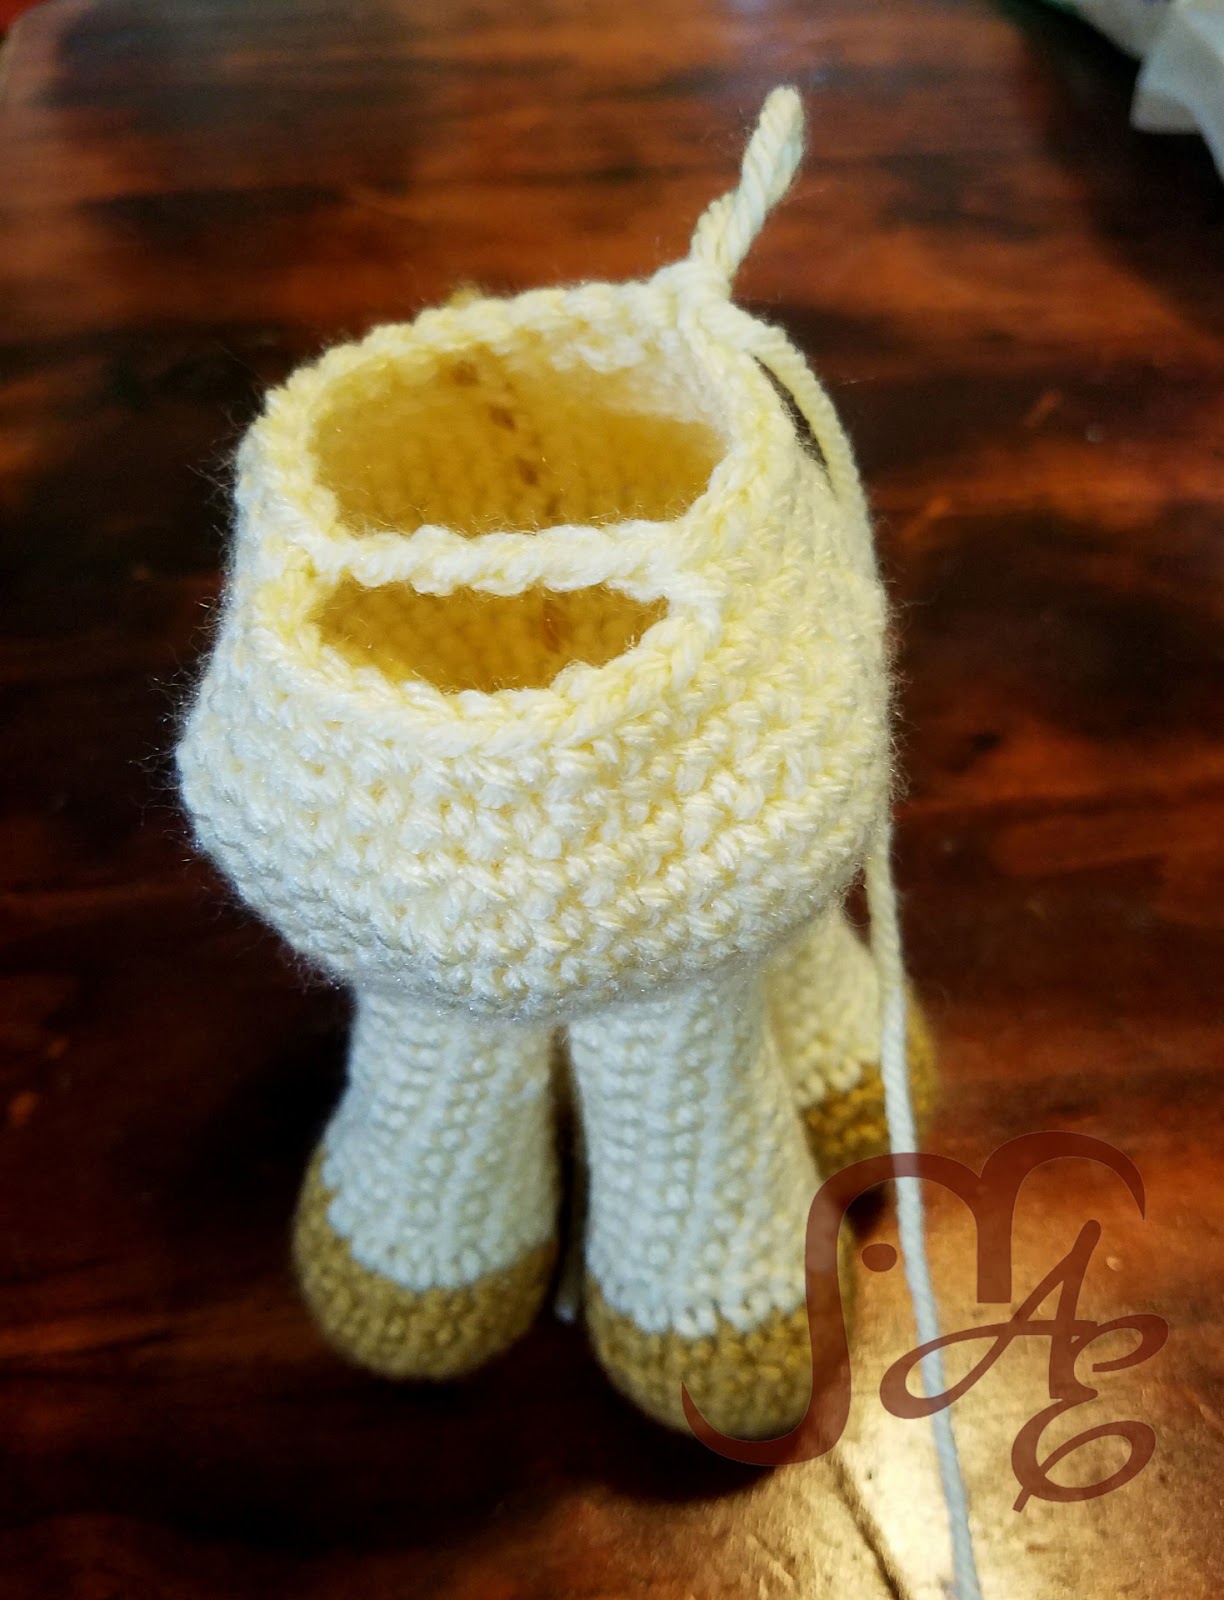
After Round 3, all legs are attached on the inside. Round 4 will go around the outside of the legs.

After Round 3, all legs are attached on the inside. Round 4 will go around the outside of the legs.
4) The first stitch of this round will be on the first leg you attached. Each leg has 10 stitches around the top. We used 3 to SS to the belly piece leaving 7 unworked. SC around the leg in each of the unworked stitches, then SC into the 2 that you put directly on the belly piece. Continue SC around in the unworked stitches on the legs and onto the 2 SC on the belly. (32 total- 7 SC around Leg 1, 2 SC on belly, 7 SC around Leg 2, 7 SC around Leg 3, 2 SC on belly, 7 SC around Leg 4)
5-6) SC in each around (32)
7) *SC 4, 2SC* Repeat from * to * around. SC in last 2 (38)
8) SC in each around (38)
9) *SC 5, 2SC* Repeat from * to * around. SC in last 2 (44)
10-11) SC in each around (44)
12) *SC 5, DEC* Repeat from * to * around. SC in last 2 (38)
13) SC 3, DEC, *SC 4, DEC* Repeat from * to * around. SC in last 3. (32)
14) SC 2, DEC, DEC, SC in next 22, DEC, DEC (28)
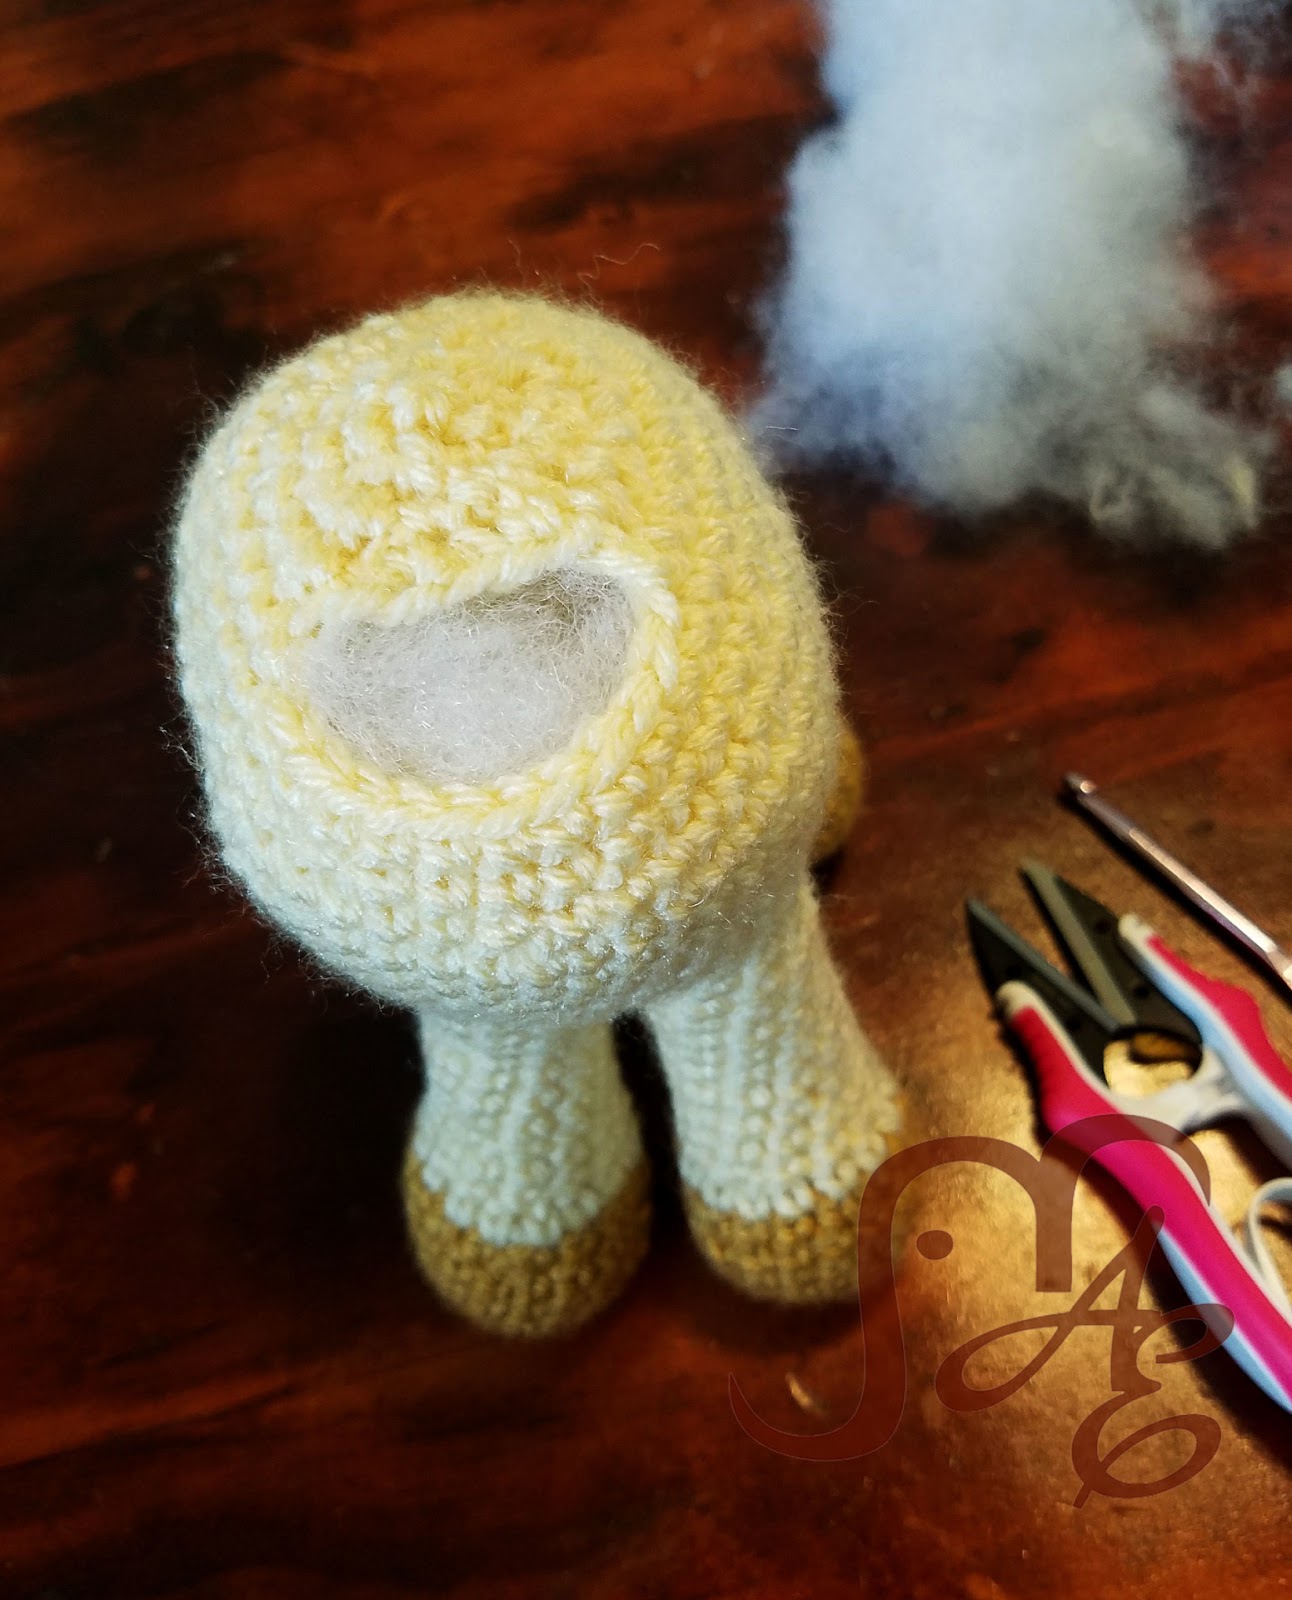
15) SC 11, Ch 5, Skip 10, SC in remaining 7 (18 SC, 5 Chains, 10 unworked)
16) *SC 2, DEC* Repeat from * to * around. SC in last 3 (18) (Be sure to work into the Chains instead of the chain space-you’ll need the other side of the chain for the neck. You’ll have a decrease on the chain section, you may find it easiest to just skip instead of trying to do the invisible decrease on that part.)
17) *SC, DEC* Repeat from * to * around. (12)
18) SC3TOG, DEC, SC, SC3TOG, SC, DEC (6)
Finish Off. Leave tail to close hole. Sew hole shut
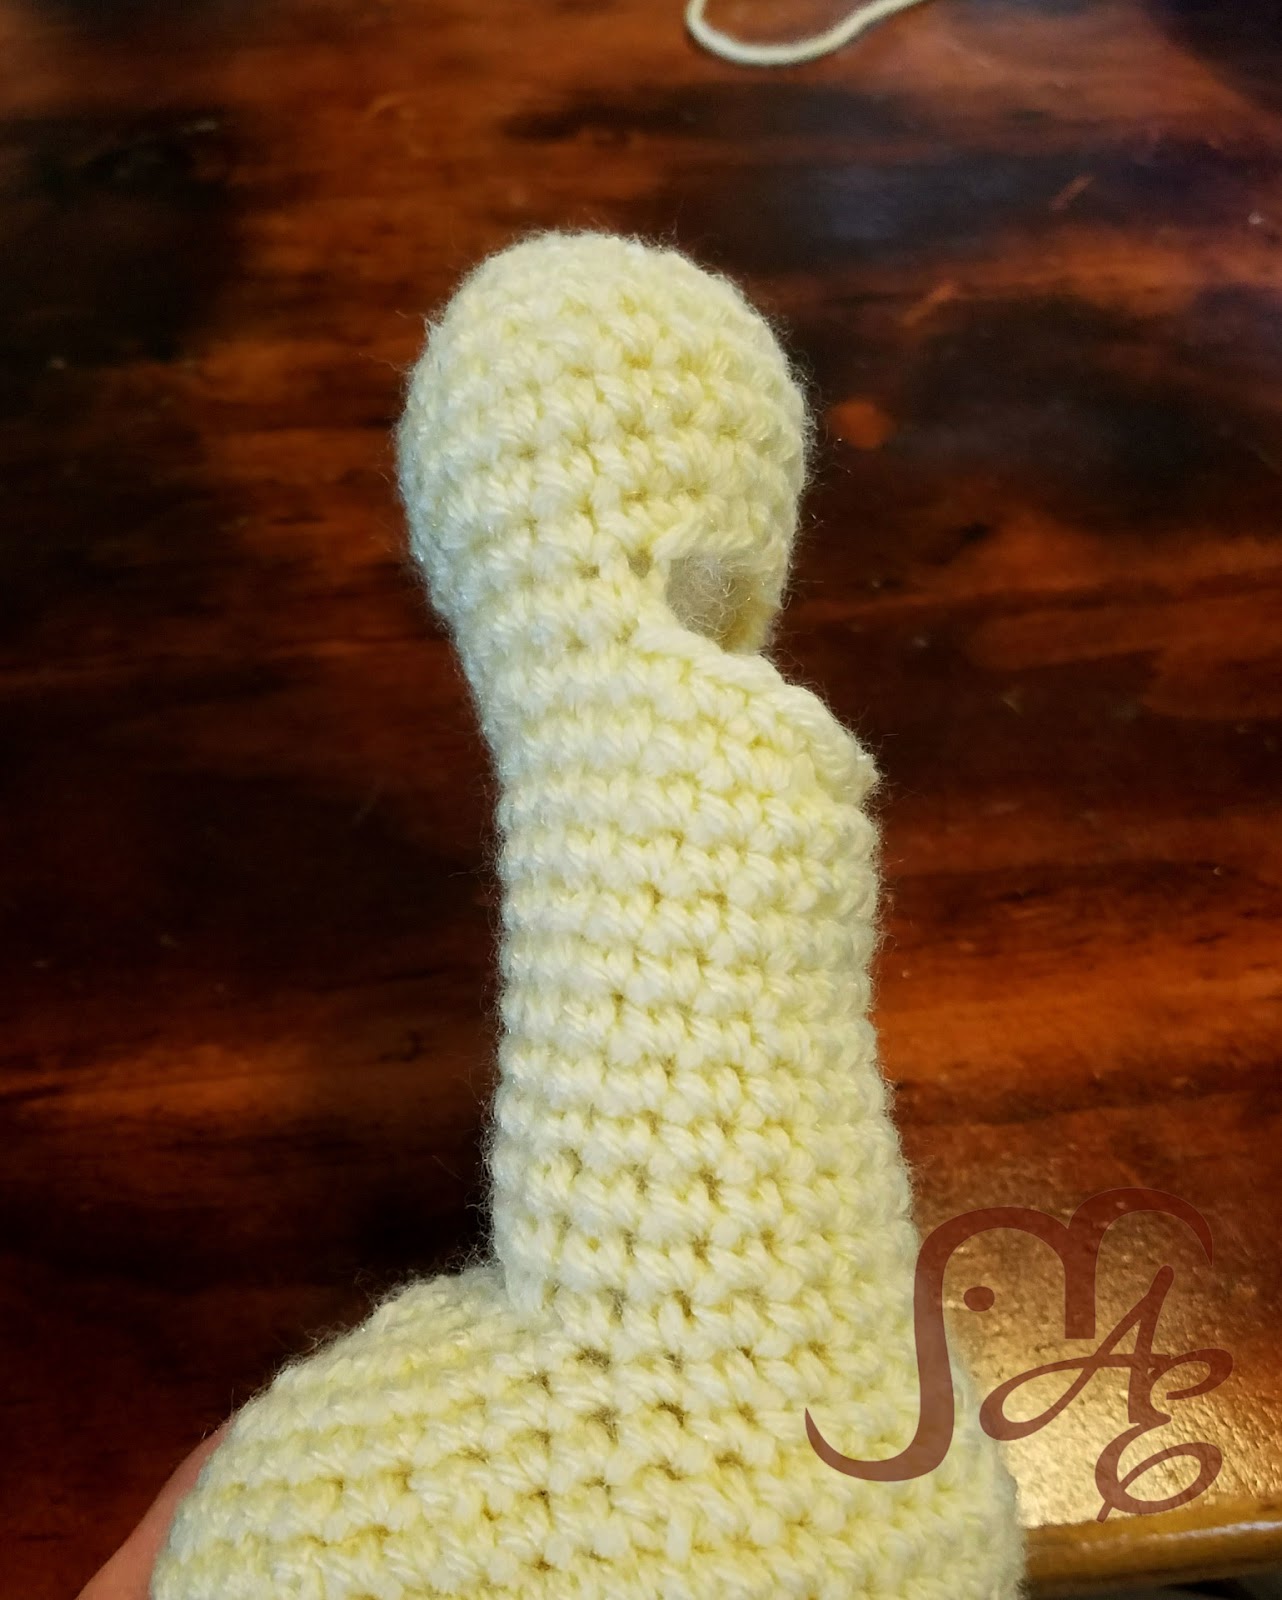
Neck and Head
Still working in the round, do not join. Mark the beginning of each round.
Attach Yarn at the left-hand corner of the opening- the 1st unworked SC on Round 15.
1) SC in each around (There were 10 unworked SC from Round 15 of the body plus the 5 Chains. You’ll work one SC in each of those PLUS 2 SC in each corner. See Photo. Should end up with 19 SC)
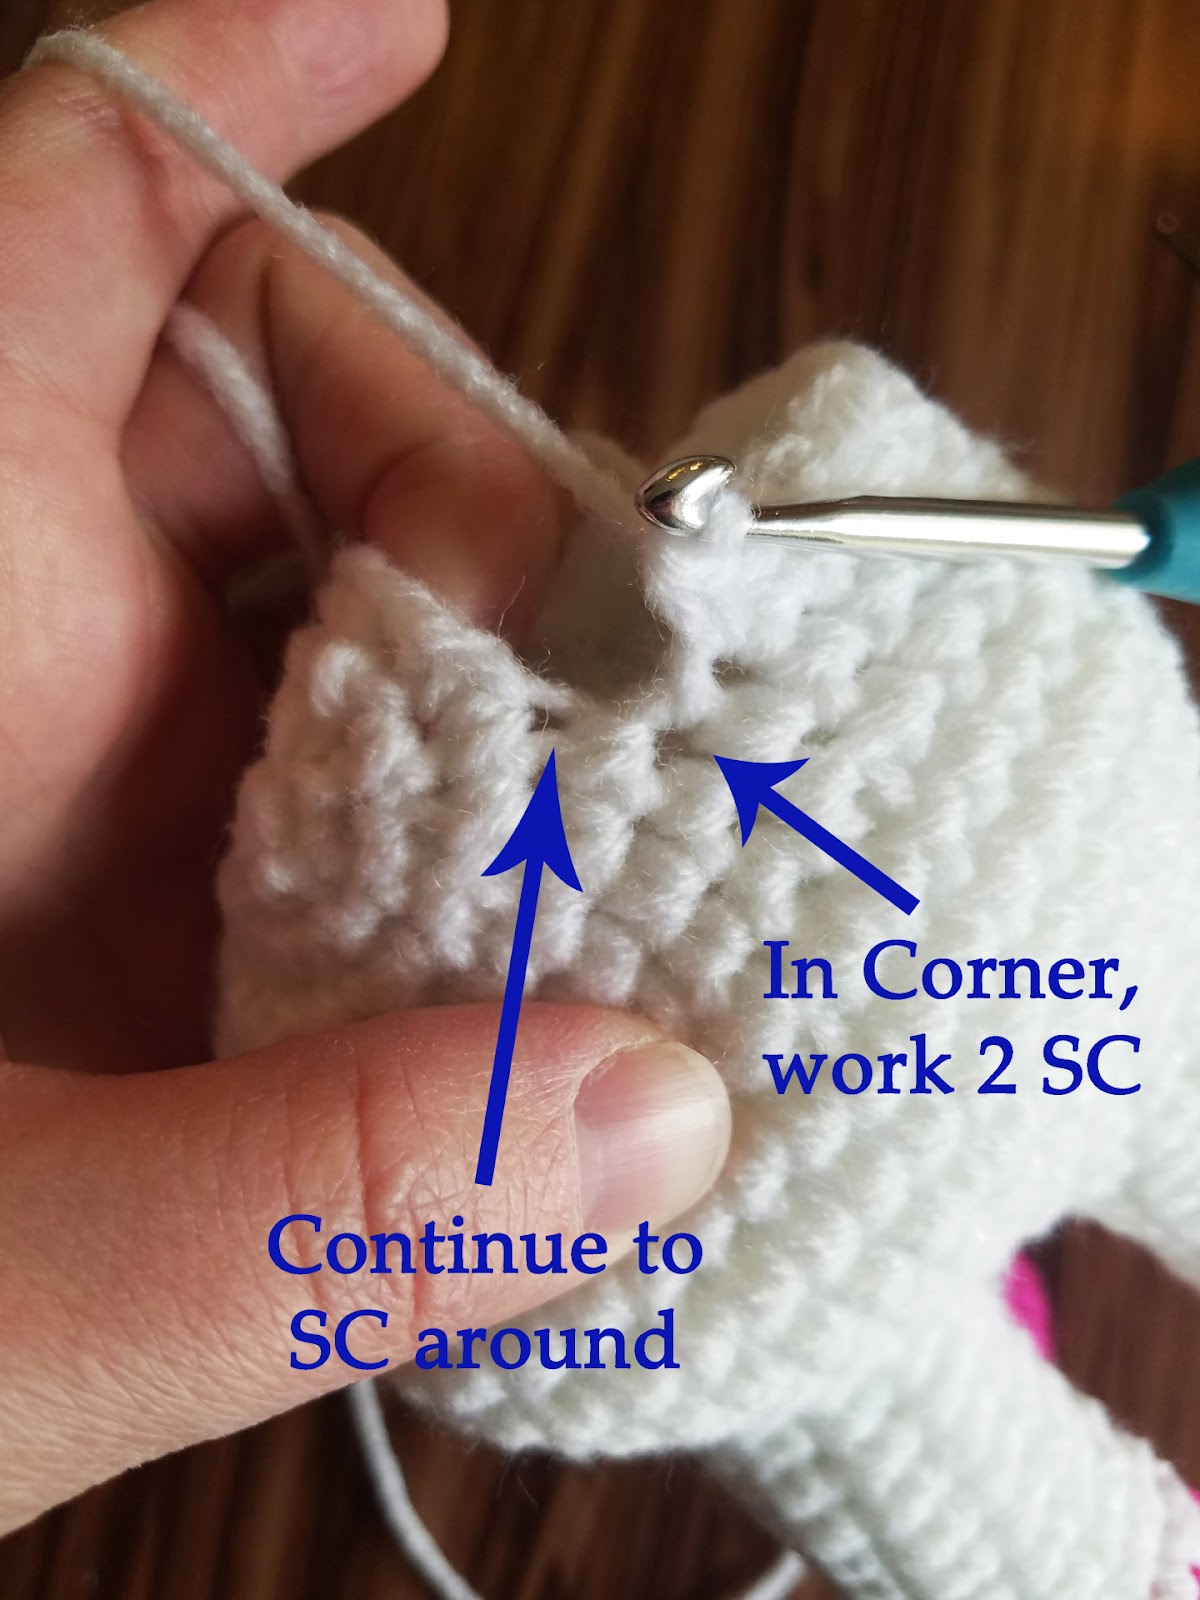
2-10) SC in each around (19)
11) SC 4, loosely SS in next 6 stitches (SS loosely so that you can go through the SS in the next round too), SC in remaining 10 (14 SC, 6 SS)
12) SC 4, SS 6 in the SS of last round, SC in next 4, 2SC, SC in next 3, 2SC (15 SC, 6 SS)
13) SC 3, Ch 5, Skip 8 stitches (skipping 1 SC, 6 SS, 1 SC), SC in remaining 10 (Your skipped stitches should be centered on the front of the chest, make adjustments if needed.) (13 SC, 5 Chains)
14) SC in each chain and around (Just like on the body to start the neck, be sure to crochet into the chain and not the space, you’ll need the other side of the chain when you start the nose.) (18)
15) *SC 3, 2SC* Repeat from * to * around. SC in last 2 (22)
16-18) SC in each around (22)
13) *SC 3, DEC* Repeat from * to * around. SC in last 2 (18)
14) *SC 2, DEC* Repeat from * to * around. SC in last 2 (14)
15) *SC, DEC* Repeat from * to * around. SC in last 2 (10)
16) DEC around (5)
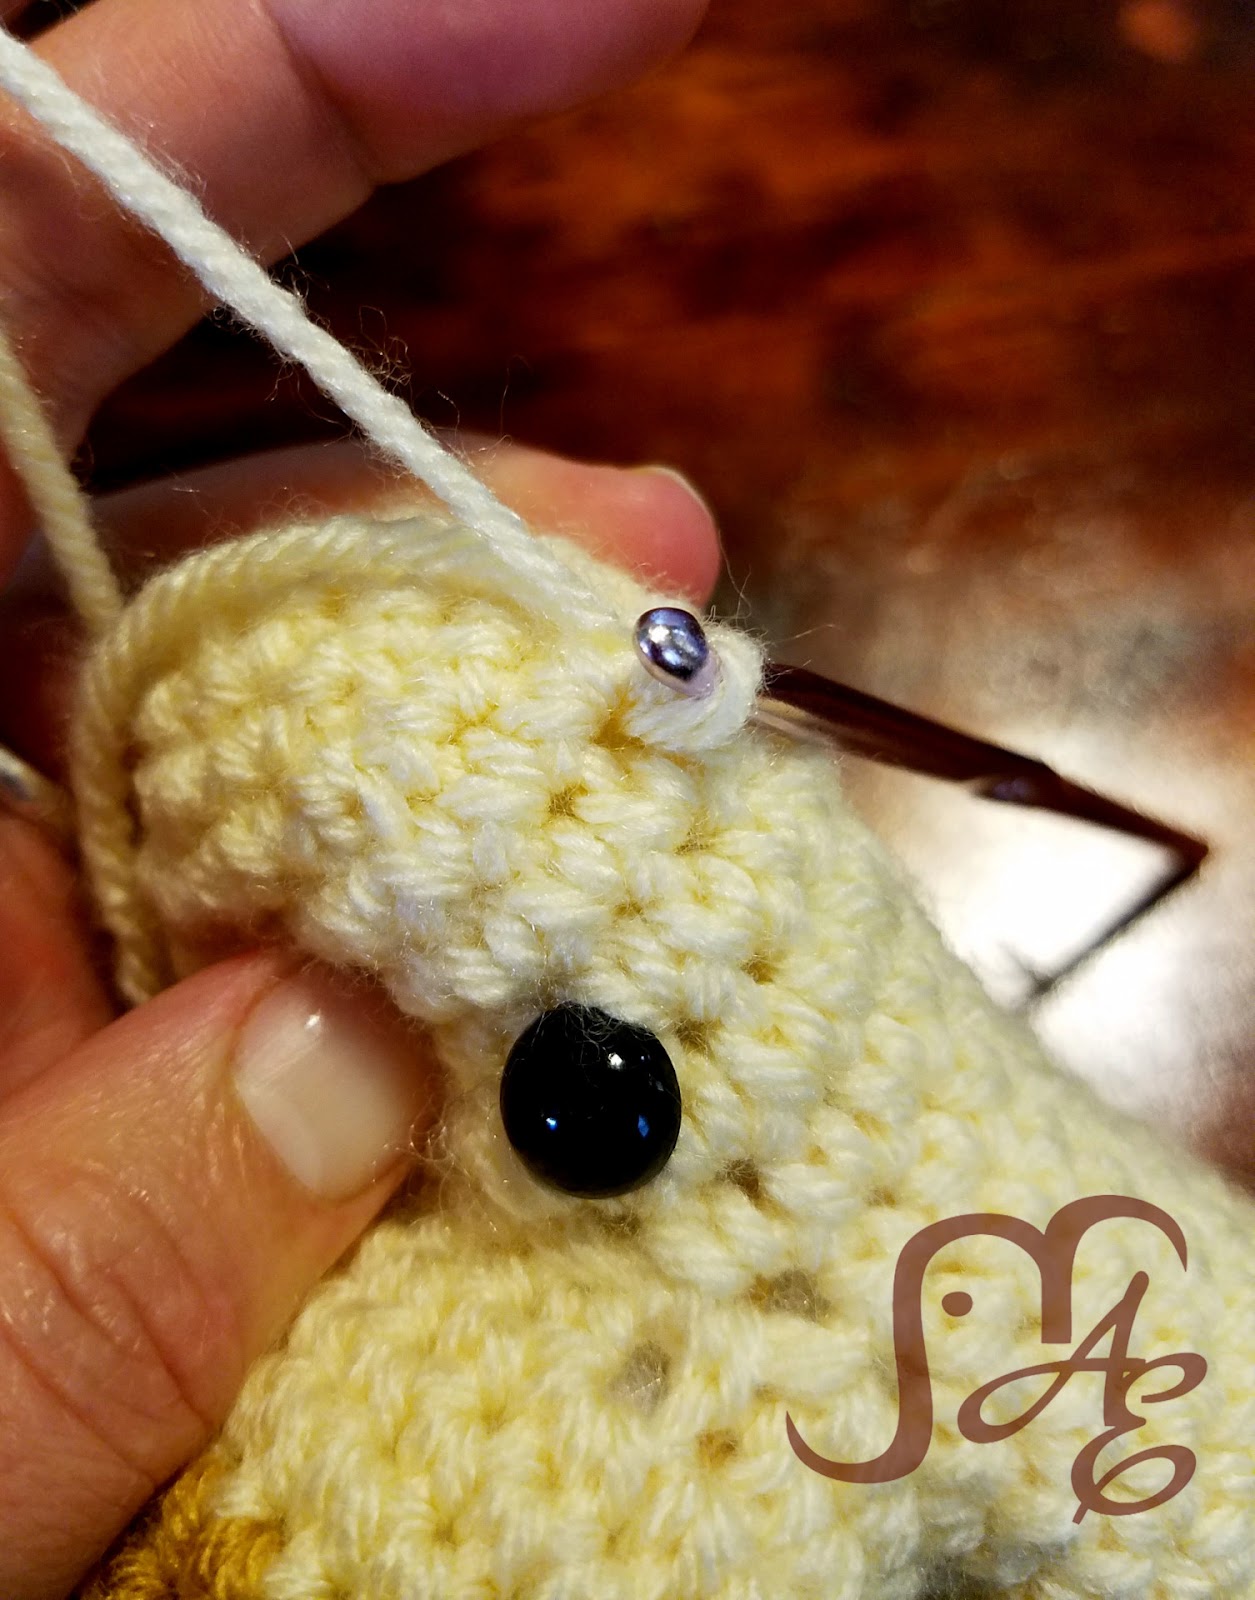
Finish Off and close top hole. Stuff Neck and top of head. You can place eyes at this point or wait until you have part of the nose made. (your choice, just try to make them even.)
Muzzle/Nose
This section is also worked in a continuous round. Use a marker to track the start of the rounds.
Attach Yarn at the corner of the opening- the 1st unworked SC on Round 7
1) SC in each around (There were 8 unworked stitches from Round 7 of the neck [1 SC, 6 SS, 1 SC] plus 5 Chains. You’ll work one SC in each of those PLUS 2 SC in each corner. (The same as you did to start the neck.) (Should end up with 17 SC)
2-4) SC in each around (17)
5) SC 5, change colors, SC in remaining 12 (this puts the color change seam under the muzzle so it isn’t as noticeable) (17)
6-7) SC in each around (17)
8) *SC 2, DEC* Repeat from * to * around. SC in last 1 (13)
If you haven’t placed the eyes yet, be sure to do so before the opening gets too small.
Finish Stuffing muzzle and head/neck.
9) *SC, DEC* Repeat from * to * around. SC in last 1 (9)
10) DEC 4 times, leave last stitch unworked (5)
Finish off, leave tail to sew hole shut. Weave in ends.
Ears
I try my very best in my amigurumi to not have to sew on pieces, especially little ones. I find it tedious and I’m always worried that they’ll come off. I do a lot of details like this- stitching right into the project. If you aren’t a fan (or can’t understand my directions.) You can start with a Ch 3, SC in 2nd from hook and next (2) and start at Row 2 to follow the rest of the steps and then sew it on.
Decide where you want your ears to be. They should be about evenly spaced on the sides of the head.
1) Insert your hook around the post of the single crochet of the round you chose. SC around that stitch. SC around the post of the stitch above that one. Chain 1, turn. (2)
2) 2SC in each across. Ch 1, turn. (4)
3) SC 4 across. Ch 1, turn. (4)
4) SC 2, skip next, SC. Ch 1, turn. (3)
5) SC, skip next, SC, Ch 1, turn. (2)
6) DEC. Finish Off. (1)
Repeat for the other side.
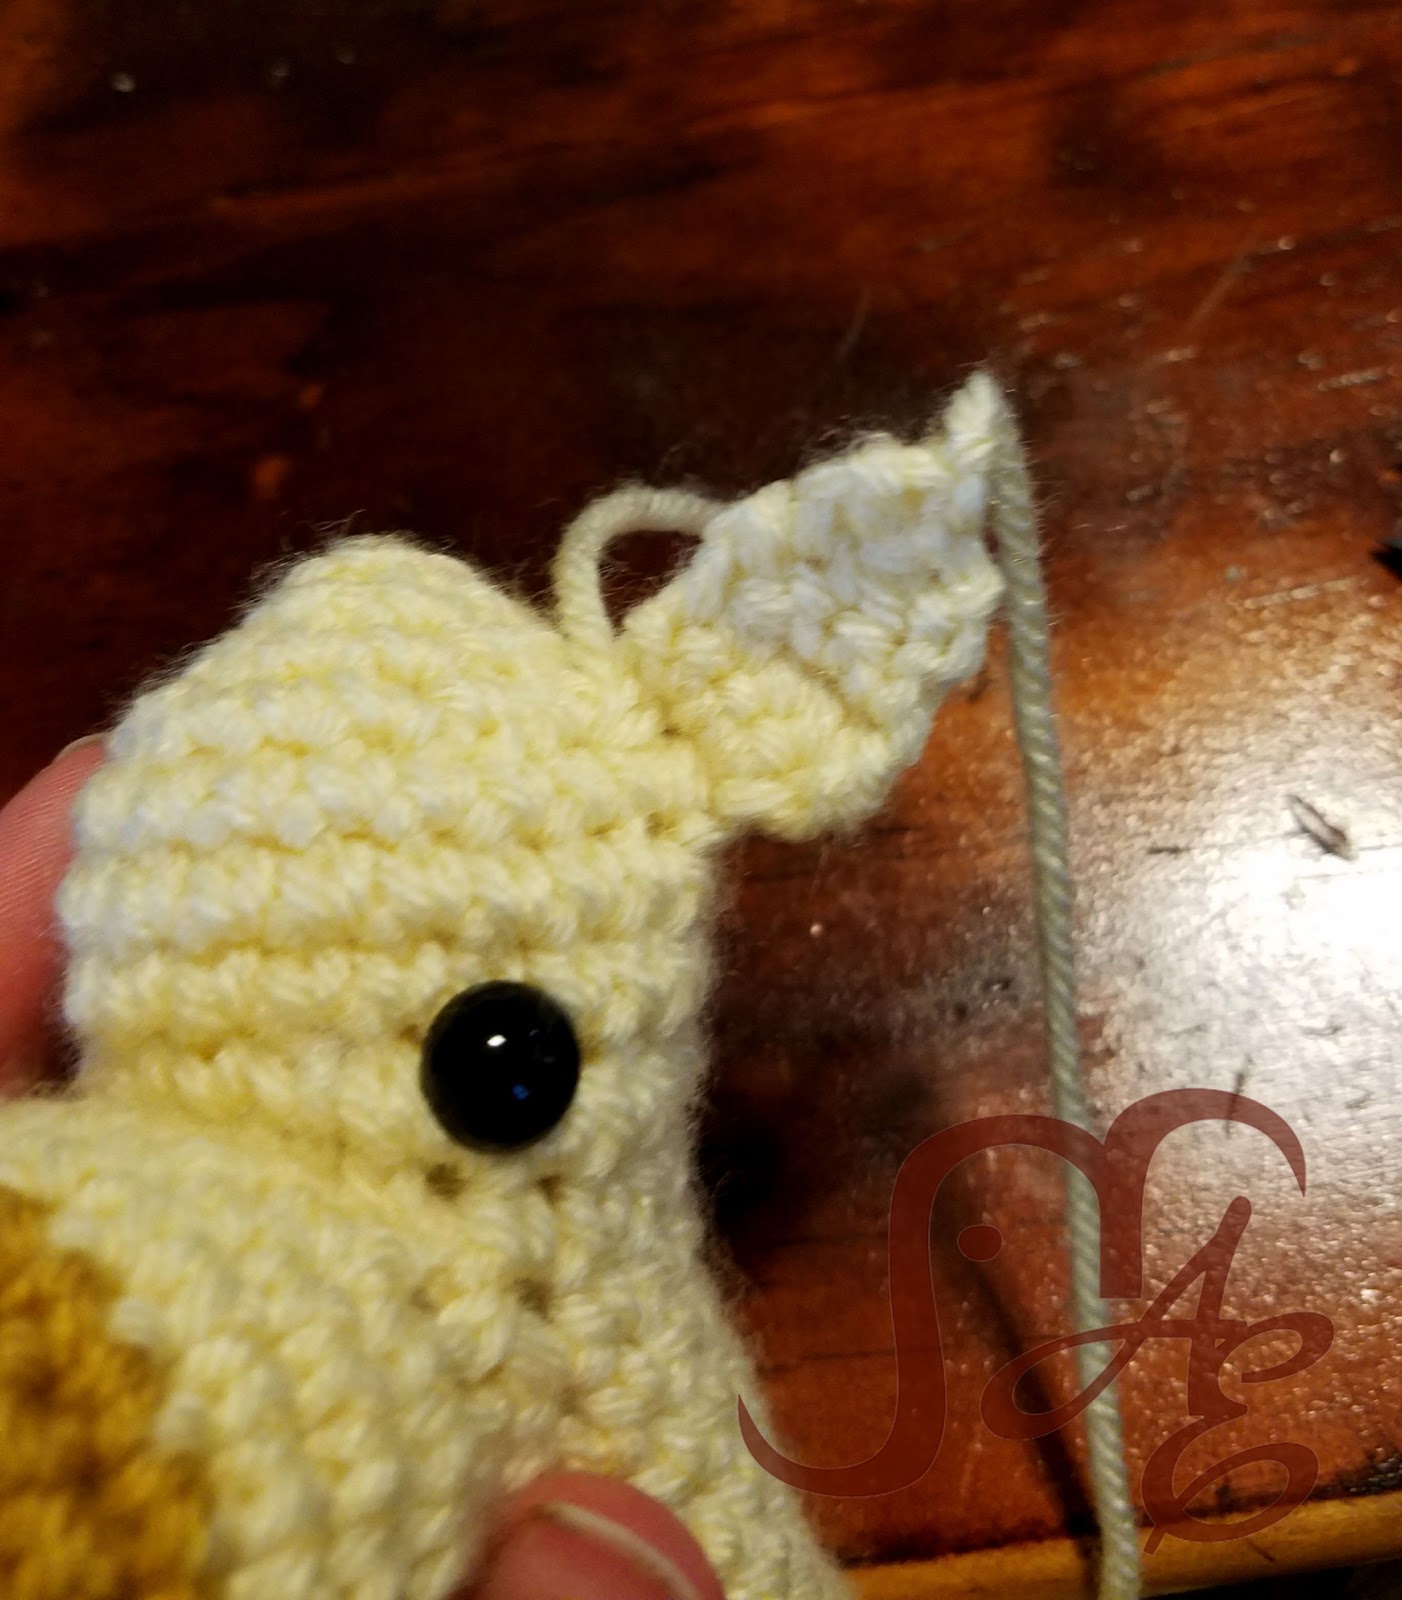
Horns (I think that’s what you call them on a giraffe. lol)
Similar to the way you did the ears.
Around the post of a single crochet near the top of the head, insert your hook around pull up a loop and Ch 5. In second chain from the hook, 2SC. Slip stitch 3 down to the base. Leave a tail to tighten it down. Repeat for the second horn.
Again, these could be made and then sewn on if you prefer.
Tail
Same as before, choose the spot on the rump that you want the tail to start. Insert hook around post of the stitch, pull up a loop and chain 12, In second chain from hook, SS. SS in each stitch down to the base. Finish Off and sew down the connected end as you weave in the ends.
Cut 3 lengths of yarn about 8-10” long. Pull them through the end loop of the tail and tie them together. Then you can trim off to the length you want. I leave about an inch or so. Optional- You can separate the cut ends to fray the tail too.
Optional Extras
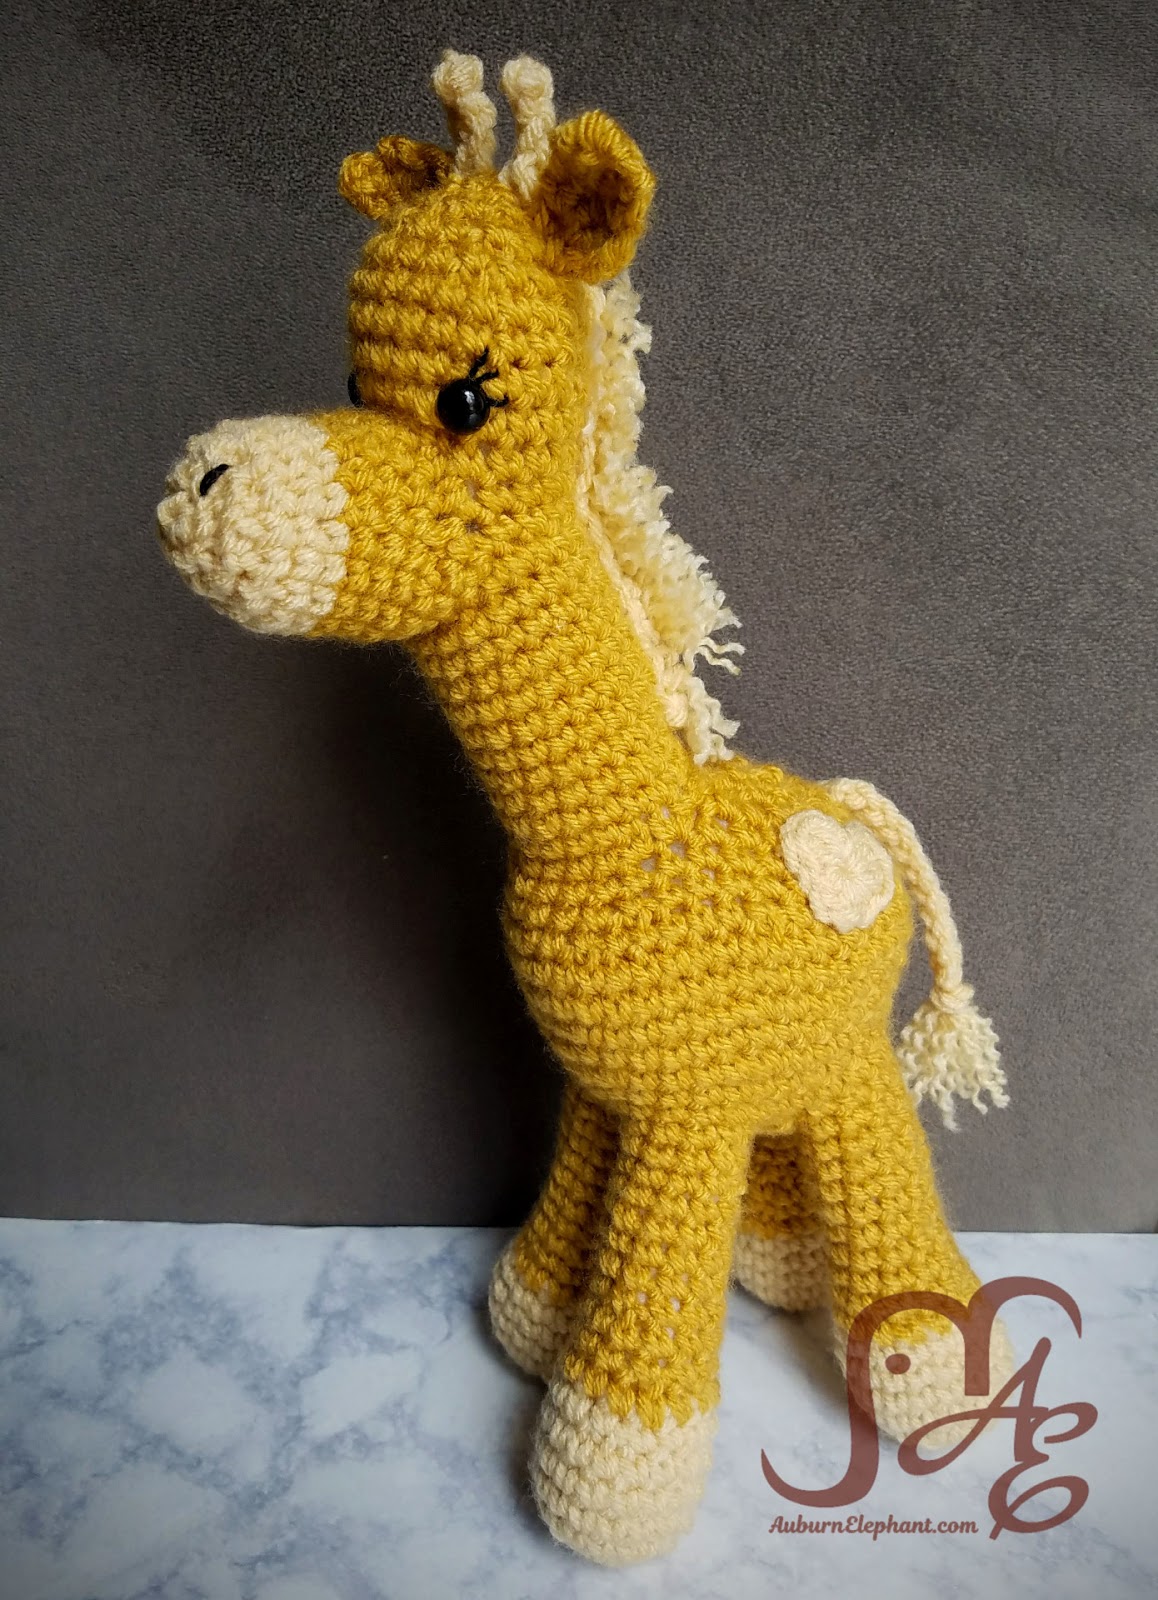
Mane
For a short little giraffe mane I used one row of loop stitch cut and frayed. You could do individual ties if you’d like or leave it off entirely. (I didn’t include this in the first version but I kind of like how it looks!)
Start with a Chain of 19 (long enough to go down the neck), starting in the 2nd chain from the hook, Loop stitch in each remaining. Your loop doesn’t need to be very long. I used my finger. (18 Loop stitches). Finish off the strip. Then you can cut each loop and separate the strands on the yarn. I trimmed these a bit and then sewed the strip onto the back of my giraffe’s neck. After it was attached, I trimmed the hair a little more.
If you are well-versed in the loop stitch and are able to get consistent and small loops, it would look super cute just left as loops too. I am not great at keeping my loops tiny or the same size so I like to cut and fray.

Heart “spots”
In a MR, Ch 1, HDC, DC, HDC, SC 4, HDC, DC, HDC, SS into MR. Pull ring tight. Weave in one end, helping to shape the heart if needed. Leave the other end to sew in place.
You can do just one of these or as many as you’d like to cover the giraffe.
Other details
It’s up to you if you want to add eyelashes or nostrils.
Change the color combos and you’ll have tons of cute little giraffes to hang out with!
3 thoughts on “Gerri the Giraffe”